
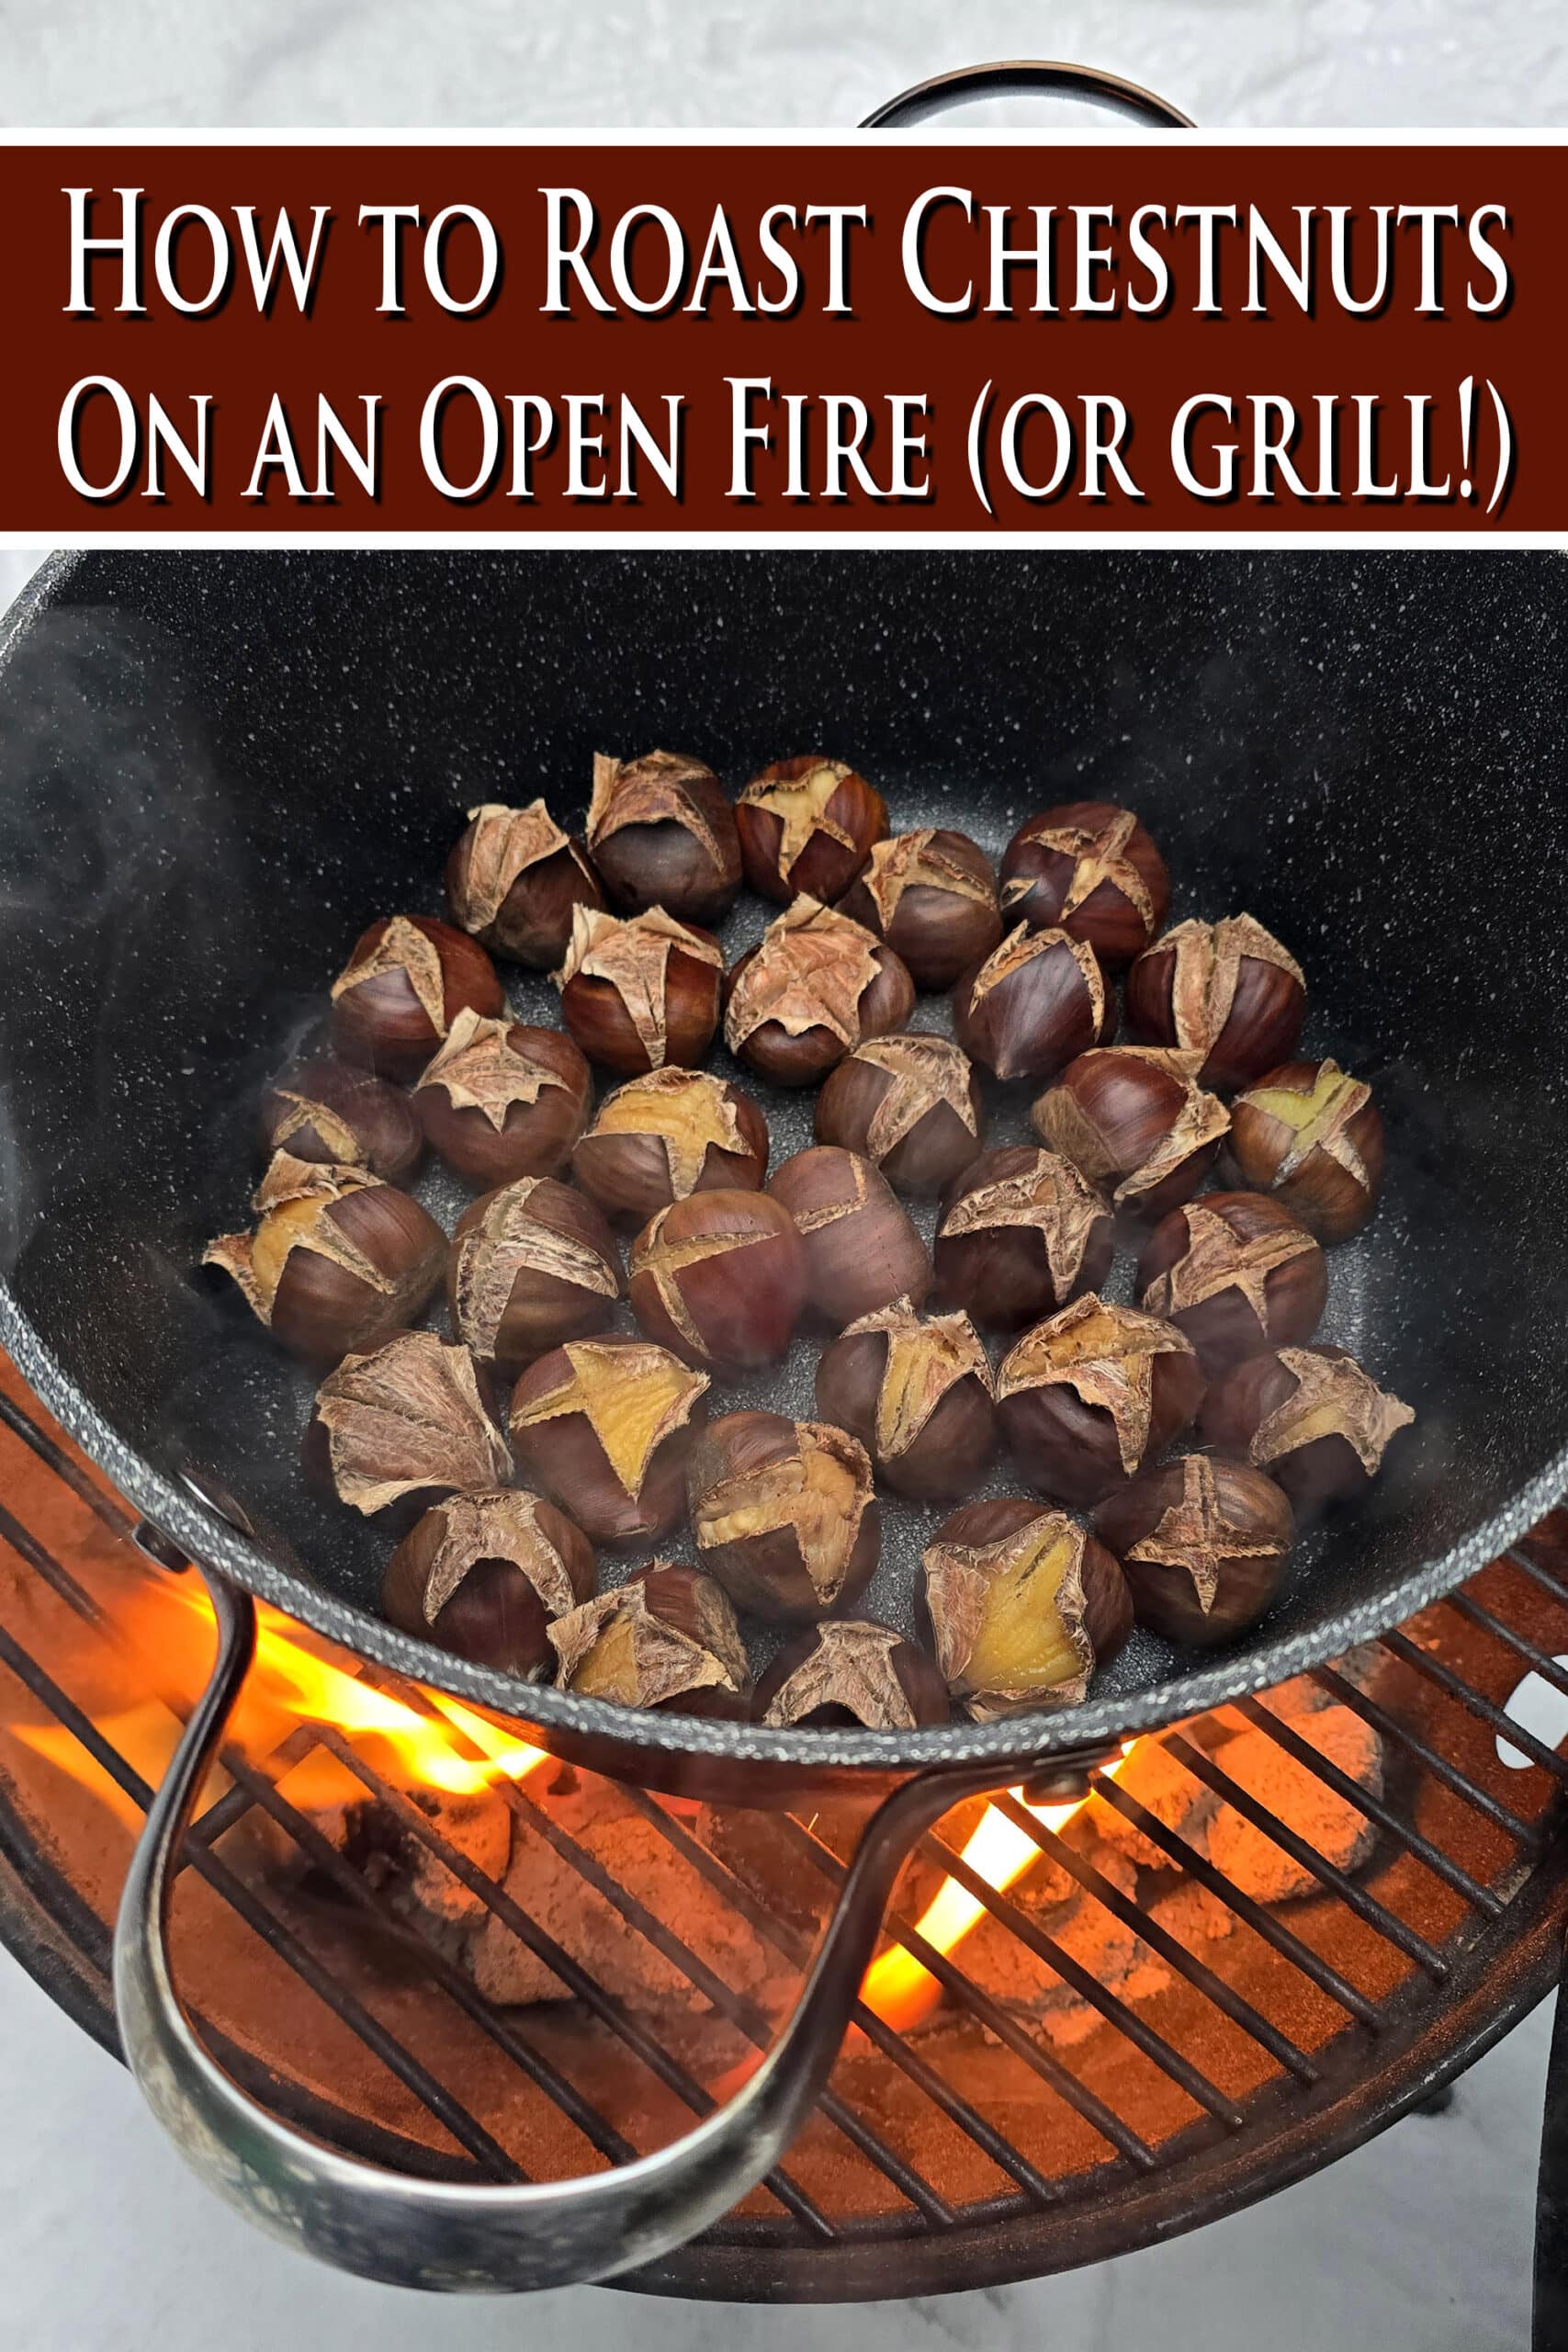
"Chestnuts Roasting on an Open Fire" is an iconic lyric, but have you ever wondered how to roast chestnuts on an open fire? I'll show you!
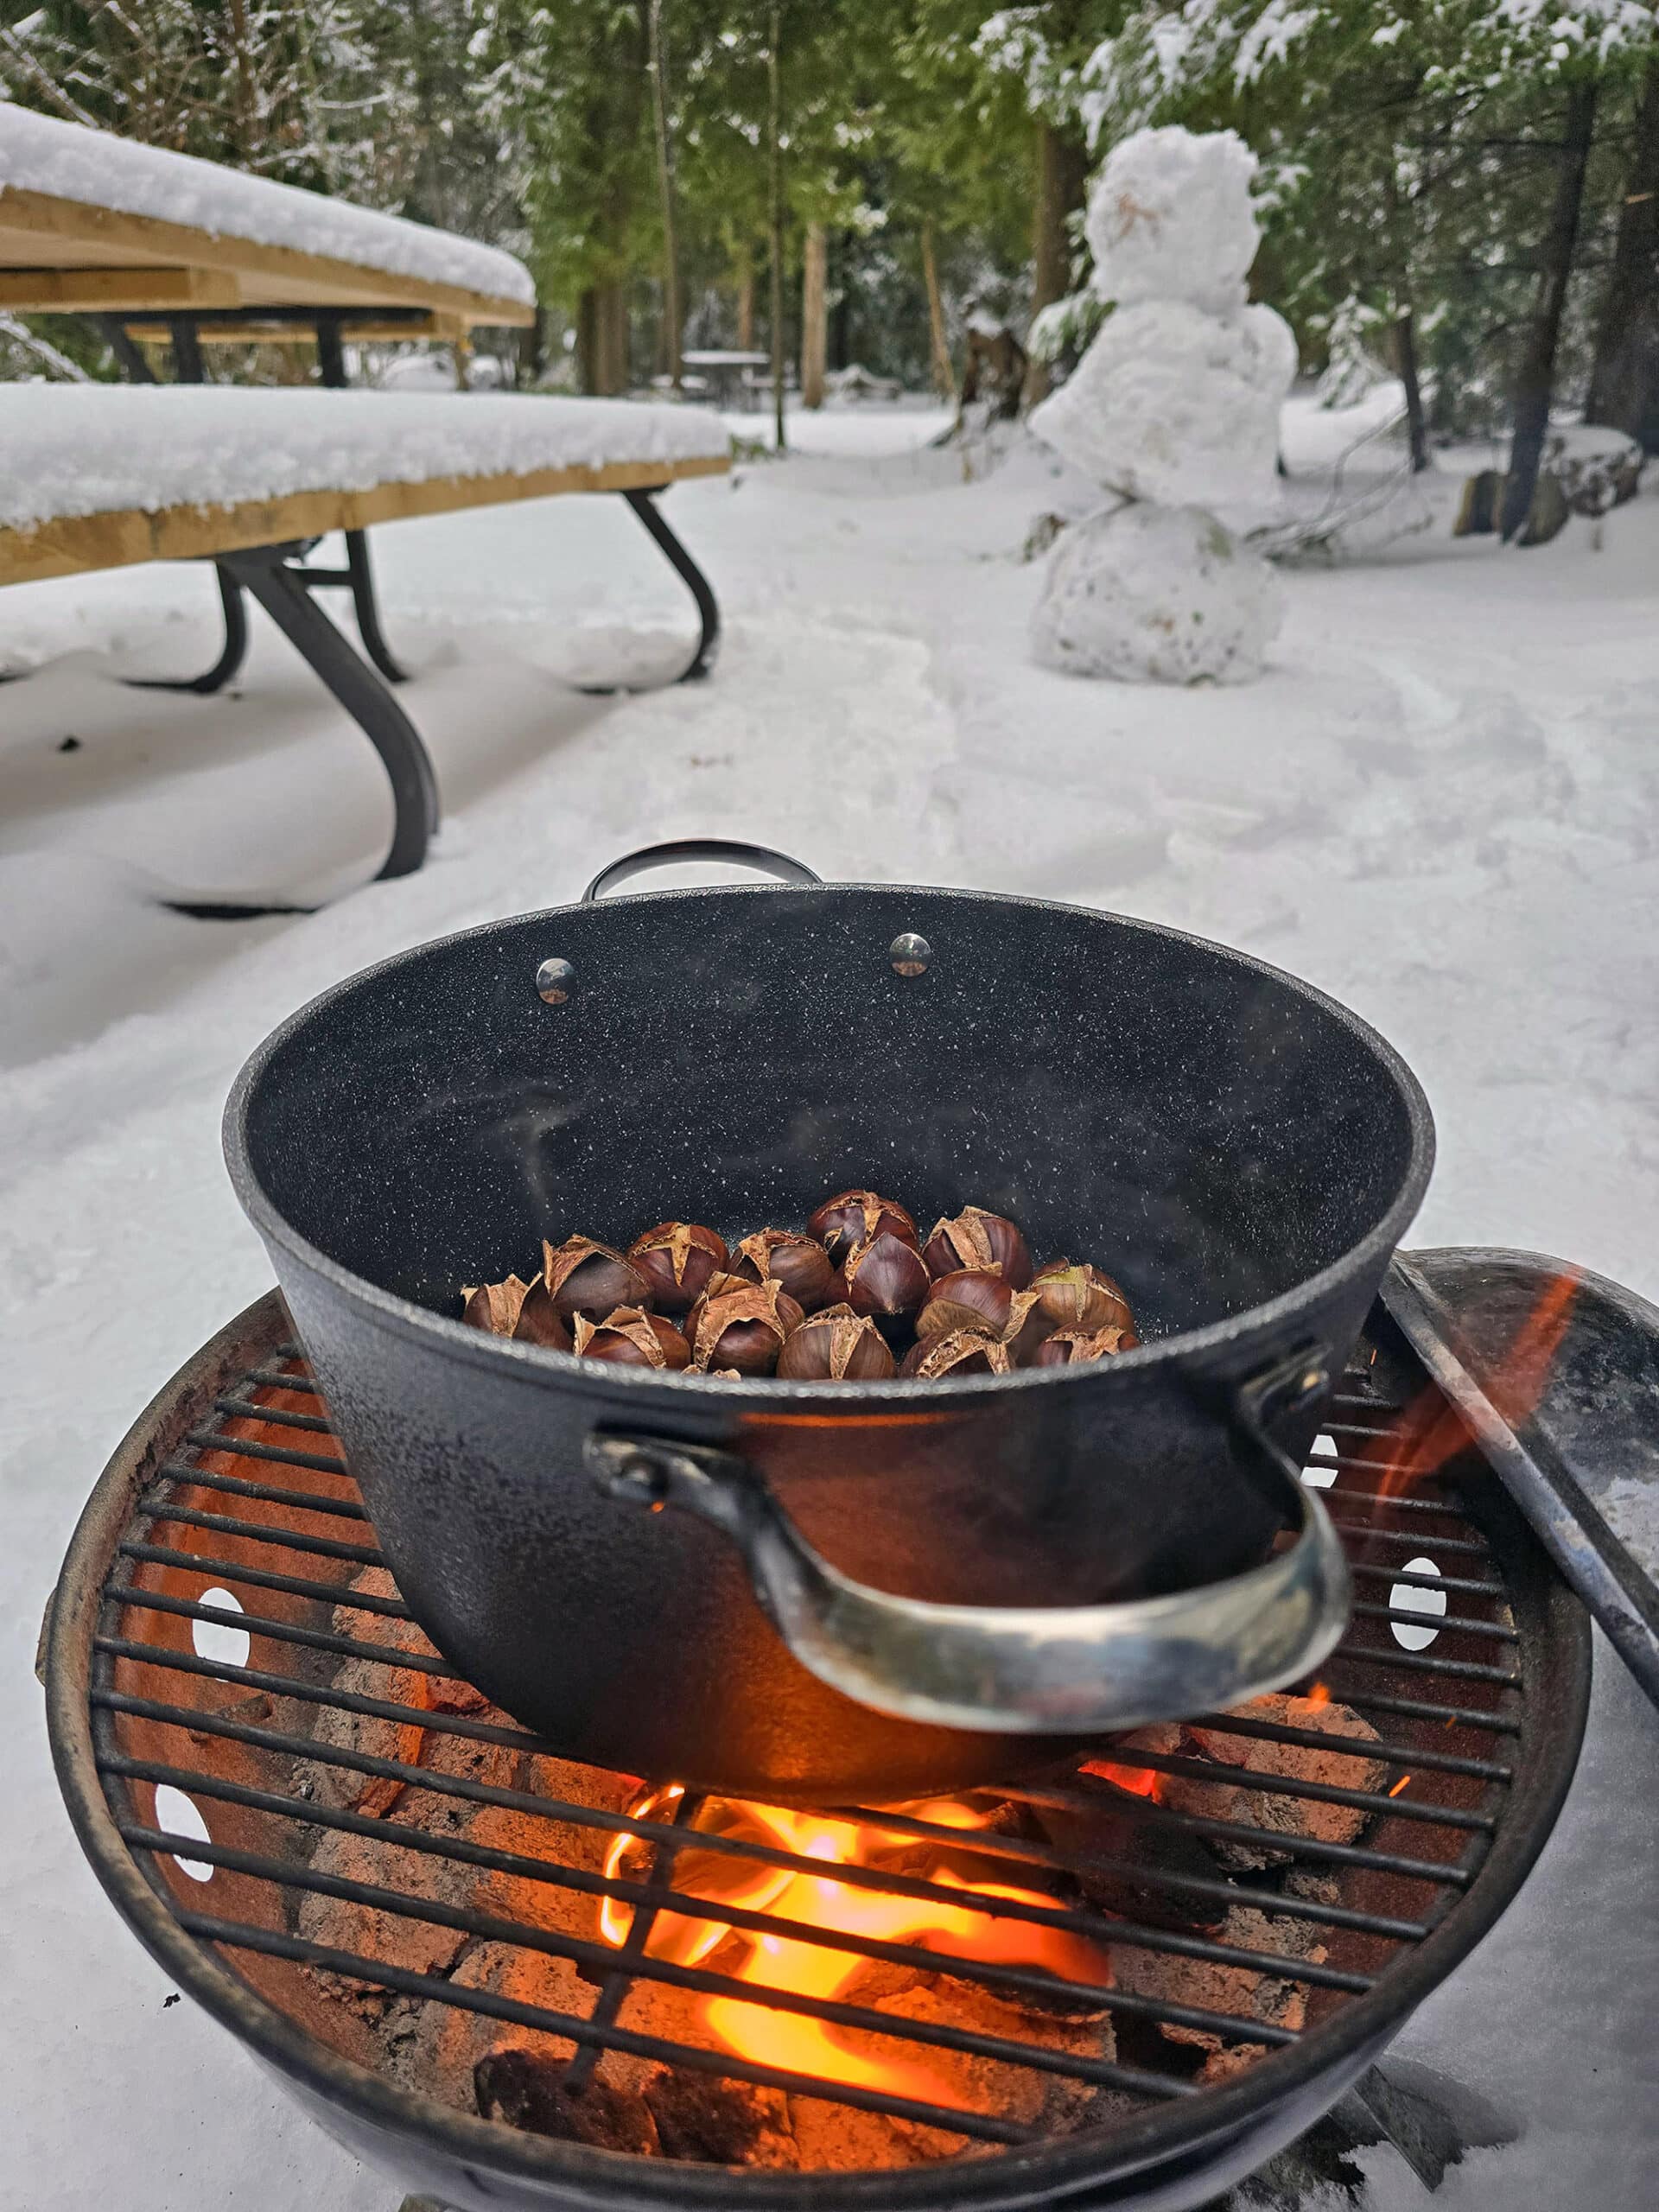
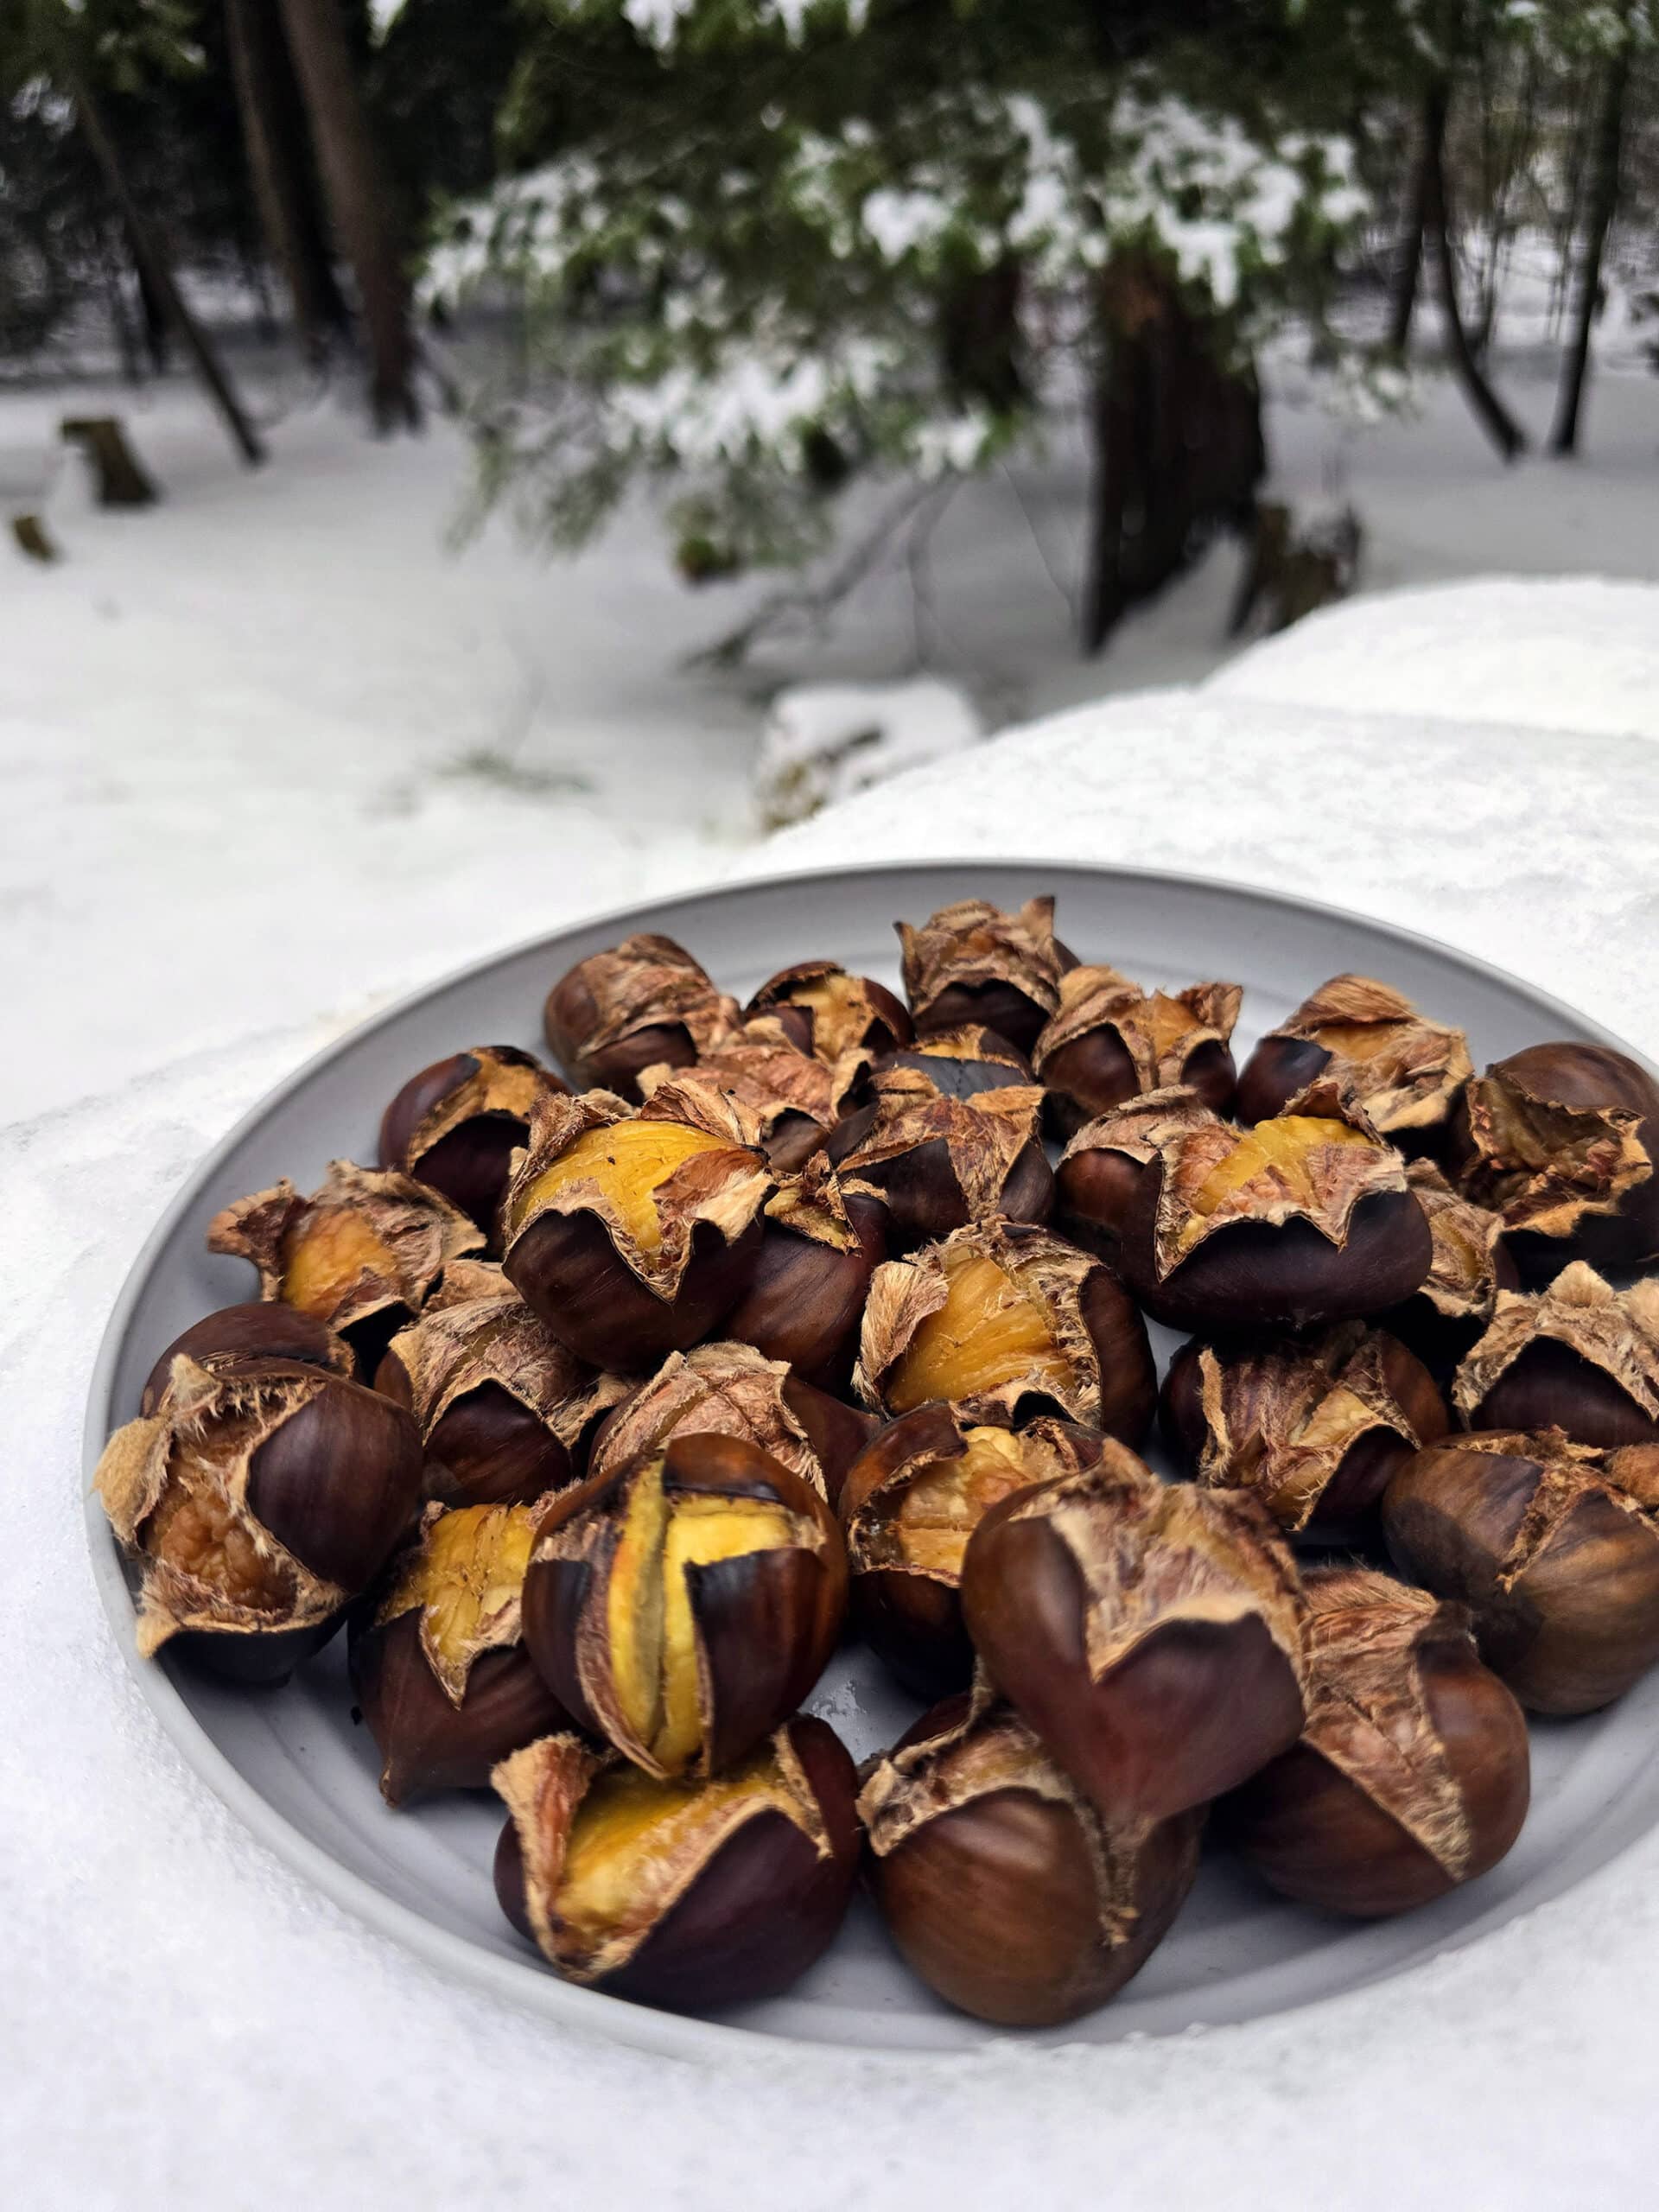
We packed a holiday meal, listened to our favorite Christmas songs on the drive up, and planned to take advantage of the festive weather to do some chestnut roasting over our charcoal grill.
After all, we haven’t had much in the way of snow lately, and I feel like it’s an important part of the roasted chestnut experience.
Sure, we might not be doing the whole “brown bag of roast chestnuts from street vendors at a holiday festival” thing, but really?
Every Provincial Park campsite comes with an open fire pit, and that is really all you need.
(And really, you only really need an outdoor fire pit if you’re looking to be festive and live out that opening line of the Nat King Cole song! My usual Roasted Chestnut Recipe roasts these mild flavored nuts in the oven!).
I love using roasted chestnuts to bring a delightful nutty flavour - and interesting texture- to savory dishes, like my Mushroom Chestnut Stuffing.
Anyway, before you actually get to roasting them, there are some things you need to know about buying, storing, and preparing chestnuts for roasting.
So, let’s talk fire roasted chestnuts...
Ingredients & Equipment
There are a few things you’ll need, in order to roast chestnuts over a campfire - you’ll probably have most of it. A quick trip to a local grocer will get you set right up!
Here’s what you need to know:
Fresh Chestnuts
The only ingredient you actually need, you’ll find these in the produce section of many grocery stores - when in season, anyway.
Sure, you can add butter or seasonings, but I prefer just letting the flavors of the chestnut stand on their own.
Anyway, there are a few things you’ll need to know about buying - and using - chestnuts, as they’re kind of a fussy ingredient.
Selecting Chestnuts
Unless you have your own chestnut tree, it’s a good idea to purchase your chestnuts from a store or farm.
The ones in stores are usually Italian chestnuts, though sometimes you’ll see American Chestnuts.
Out in the wild, you may come across horse chestnuts - these aren’t actual chestnuts - at least not in the edible sense - and are poisonous.
Personally, I wouldn’t know a horse chestnut if one hit me on the head, so I just trust the grocery store to supply me with good quality chestnuts.
In terms of volume, I tend to figure on a lb of chestnuts for every 4 people... but I buy extra if I don’t have the time to sift through and look for good ones. You’ll lose some to mold, and you want to have enough chestnuts left over after culling the bad ones!
What you want to look for are large chestnuts that feel heavy for their size, are firm to the touch, and have a smooth, glossy shell. If you can hear rattling inside when you shake one, it’s not great.
Buying them loose - or in net bags - are a much better idea than getting any that have been stored in a sealed bag.
Picking chestnuts that look good are the first step to getting “good” ones, but even quality chestnuts have a high likelihood of being moldy. The have a fair amount of moisture in an enclosed space, after all.
Avoiding Moldy Chestnuts
Sometimes, you won’t know a chestnut is moldy until after the roasting process ... but there are things you can do to prevent that outcome:
After selecting your chestnuts for purchase, don’t store them in plastic bags - and use them as soon as possible. I like to store chestnuts in a paper bag, and use them within a week or so.
When getting ready to roast your chestnuts, there are a series of “checks” you can do, to weed out potentially bad ones:
1. Throw away any are blemished, cracked, soft, or feel like there’s an air bubble between the shell and the nut.
2. Give each of the remaining chestnuts a little shake, throw away any that rattle.
3. Place the chestnuts in a pot of water. Throw away the ones that float.
4. While cutting into the chestnuts - more on that in the next step - throw away any that have visible mold, are obviously dried out, and/or smell bad.
You might not catch every moldy one before roasting, but if you follow those 4 steps, you’ll definitely get the bulk of them!
Equipment
You’re very likely to have SOME form of everything you need on hand, but here are some notes for you:
Pot and/or Pan
At home, I’ll usually use a pot for the float test and boiling, then a cookie sheet for roasting them in the oven.
When it comes to cooking them over the fire, you’ve got a few options.
For me - because I’m lazy about dishes - I just use a campfire appropriate pot for everything. I do the float test, boil them, and cook them all in the same pot.
As long as the bottom of the pot is big enough to lay them out in a single layer, it’s all good.
That said, if you do your float test in a bowl or the sink, you’ve got other options for the actual roasting.
A cast iron skillet is always a good option to have on hand when camping - and works well for roasting chestnuts. If you want, can use a Chestnut Roasted Pan - a roasting pan with small holes in the bottom.
Basically, just something fire safe and big enough for the amount of chestnuts you want to roast.
A Knife
Before roasting your chestnuts, you’ll need to make a couple of cuts through the outer shell of the chestnut. This is an important safety issue - if you don’t cut them, they can explode.
Anyway, I used to be very much “I hate single-use kitchen tools, so a paring knife is good enough!”. I didn’t see the point of having a specialized tool for doing so.
Then my tendons got screwed up by an evil antibiotic. I caved in and bought myself a Chestnut Knife.
... Honestly, I’m kicking myself for not having done so MUCH sooner. It’s by FAR the easiest way for scoring your chestnuts - and the safest, too!
I still don’t like the idea of single-use tools, but this really ended up being a key tool for this seasonal treat. SO much faster, and makes getting through the hard shell is much easier on my hands!
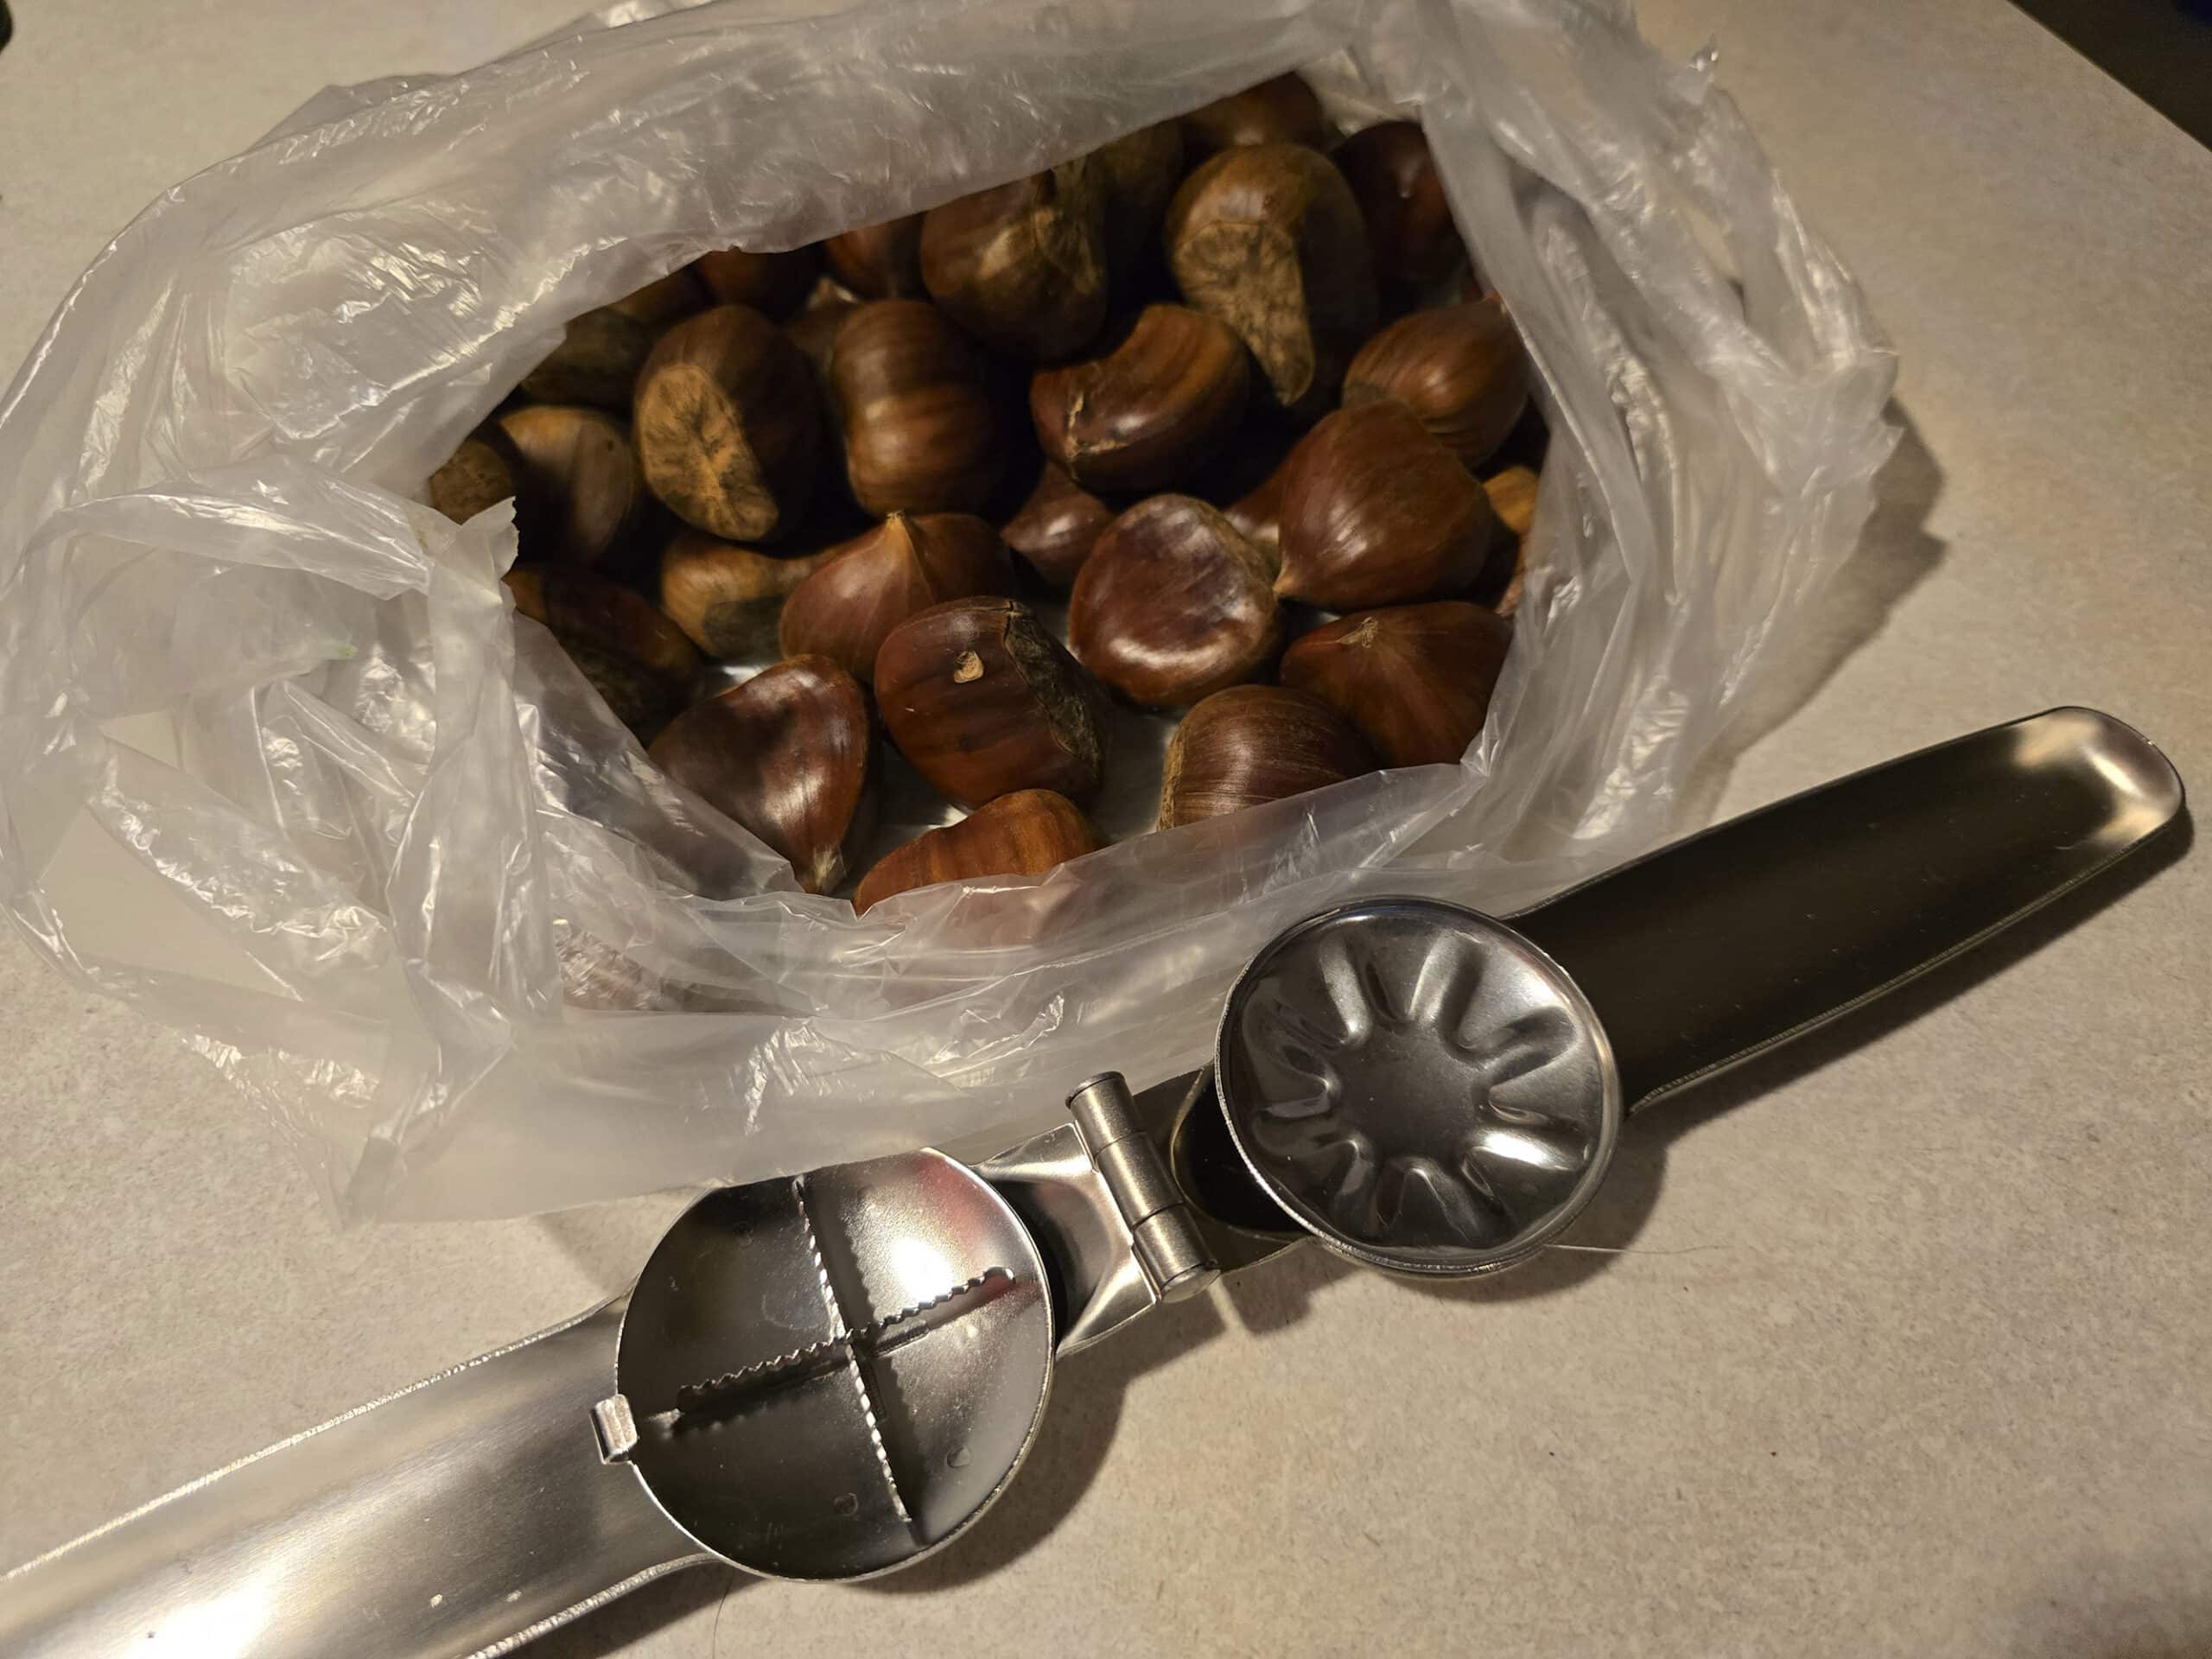
Either way, just know that sharp is KEY. Dull knives are dangerous knives in general, and that goes double when cutting into the rounded side of a chestnut!
Share the Love!If you’ve made one of our recipes, be sure to take some pics of your handiwork! If you post it to Bluesky, be sure to tag us - @2NerdsInATruck, or you can tag us on TikTok, if you’re posting video. We're also on Pinterest, so you can save all your favourite recipes and park reviews to your own boards! Also, be sure to subscribe to our free email newsletter, so you never miss out on any of our nonsense. Well, the published nonsense, anyway! |
How to Roast Chestnuts Over an Open Fire
There’s a printable recipe card at the end of this post, but here’s a pictorial walk through, with some extra details that are good to know:
Prepare the Raw Chestnuts
Before getting your fire started, get your chestnuts sorted and prepared:
Following the tips in the ingredient section - above - get rid of any potentially rotten chestnuts.
After doing the float test, blot your chestnuts dry if you’re using a regular knife to score them. (Wet = more slippery. A little water is not something you really need to worry about with a chestnut knife, though!)
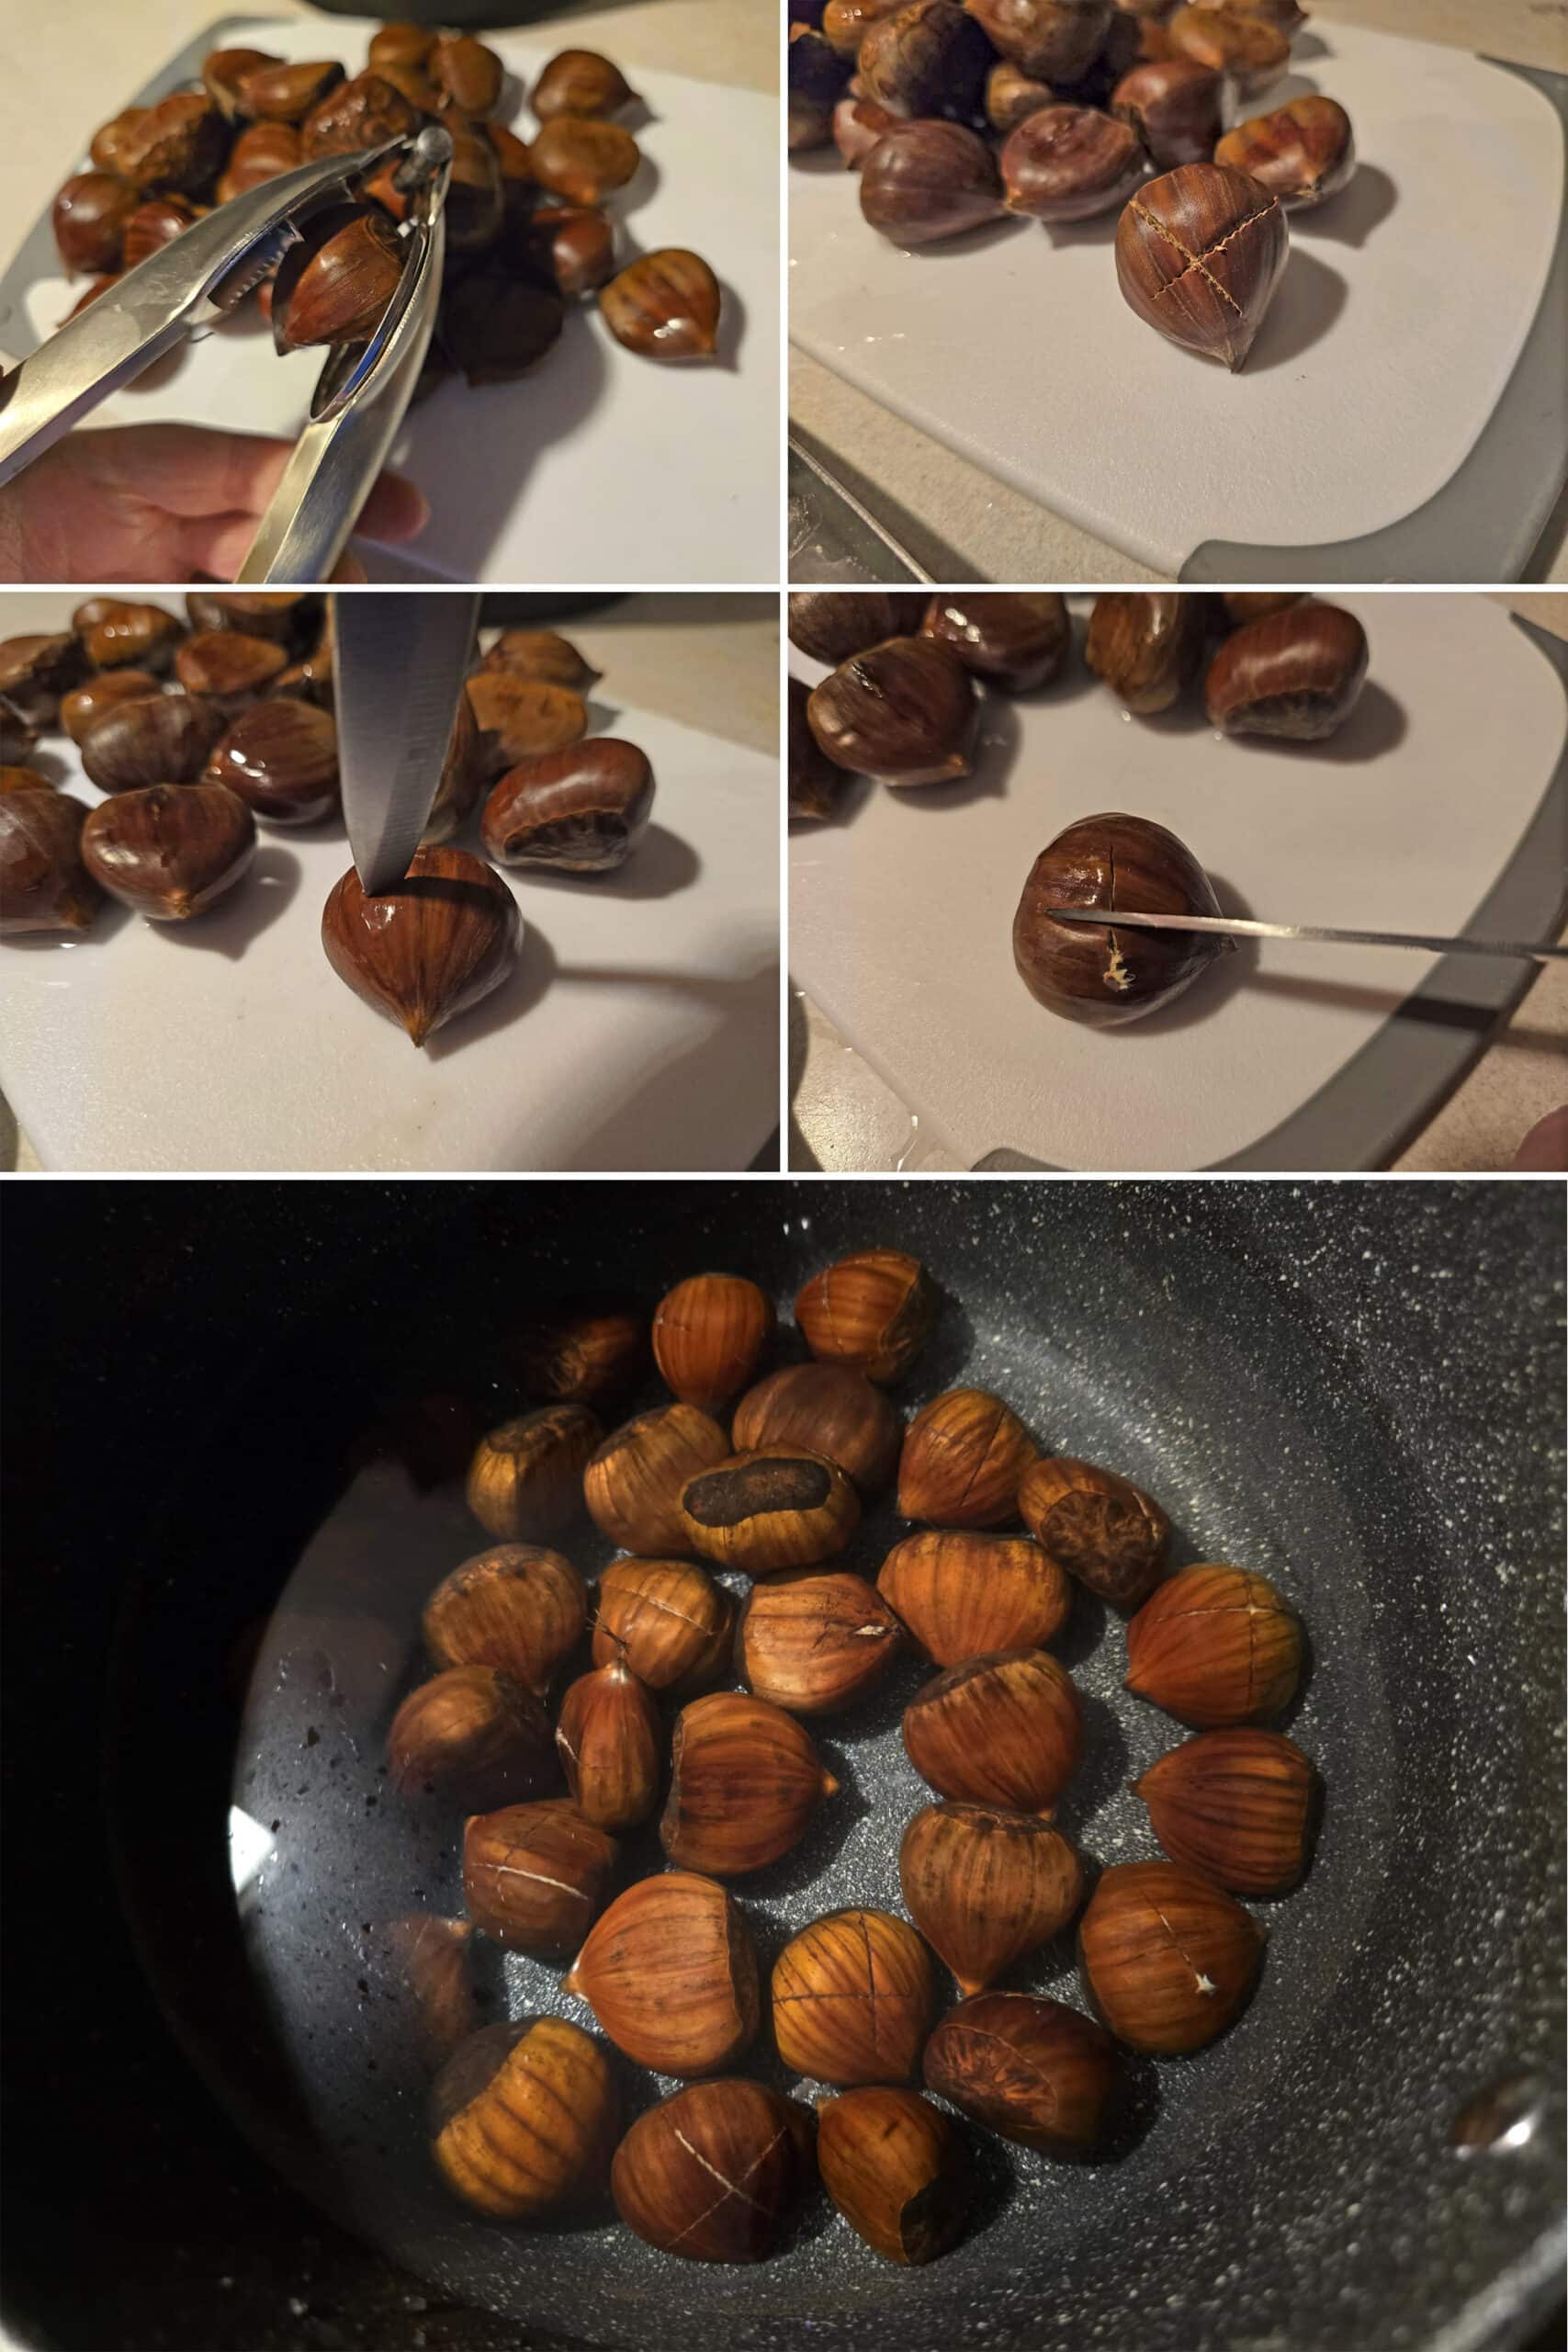
Place chestnuts on a large cutting board, flat side of the chestnut facing down.
One chestnut at a time, use a sharp paring knife (or other small sharp knife) or - as I used here - a chestnut knife, to cut an X into the round side of the chestnut.
Note: This is probably the most important step of roasting chestnuts - the cuts allow steam to escape as the chestnuts roast. If the steam escapes, your chestnuts won’t explode from building pressure as they heat.
You want to eat the chestnuts, not get hit by hot chestnut shrapnel!
If using a knife, poke the sharp point of the knife into the rounded side of the shell, bringing down the handle to gently cut a shot line in the shell.
You need to cut all the way through the outer shell, but not necessarily into the meat of the chestnuts. Once you have the first cut, turn the chestnut and repeat with a second cut.
If using a chestnut knife, place a chestnut in it so that the rounded side is facing the “X” of the knife, and squeeze until you feel it puncture.
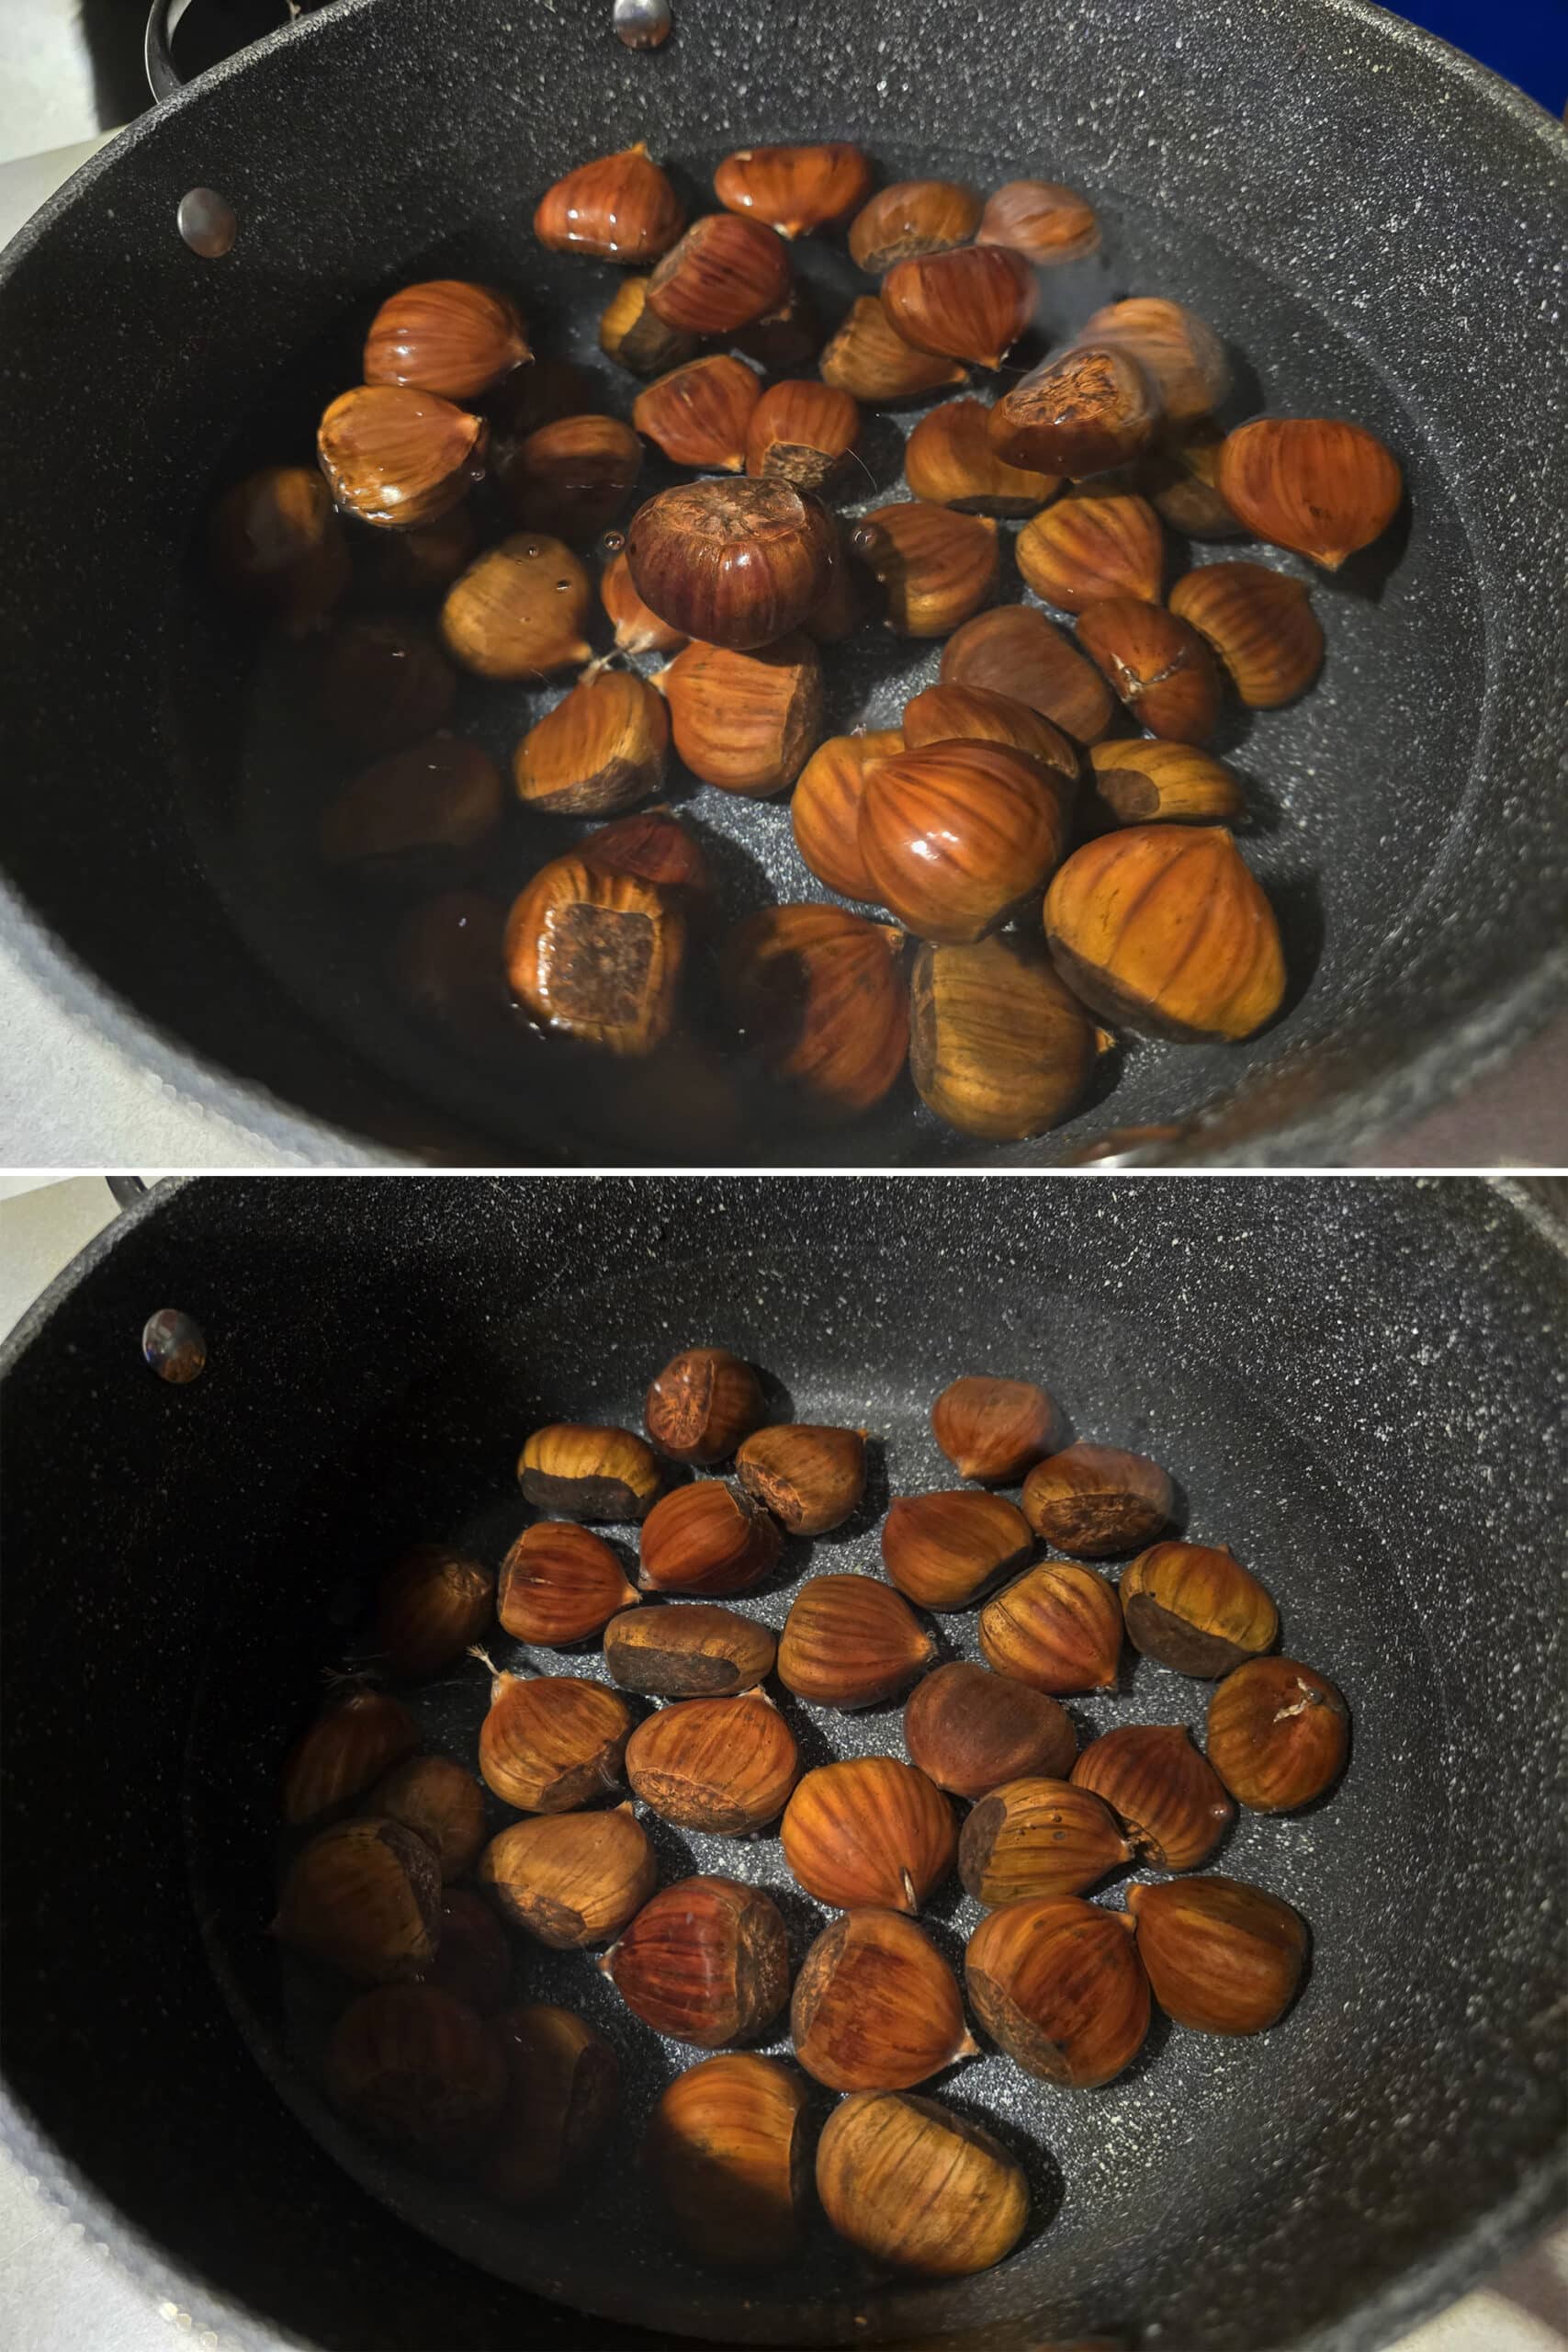
Boil the Chestnuts (Optional)
I like to boil the chestnuts - well, more of a blanching, really - before roasting them. I find it makes them easier to peel after roasting.
To do this, I place the scored chestnuts in a large pot, then cover them with cold water.
Bring the water to a boil over your campfire, then strain the chestnuts out as soon as the water starts actually boiling.
Alternately, you can soak the chestnut in a bowl of hot water for 1 hour or so. Personally, I don’t have the patience for this!
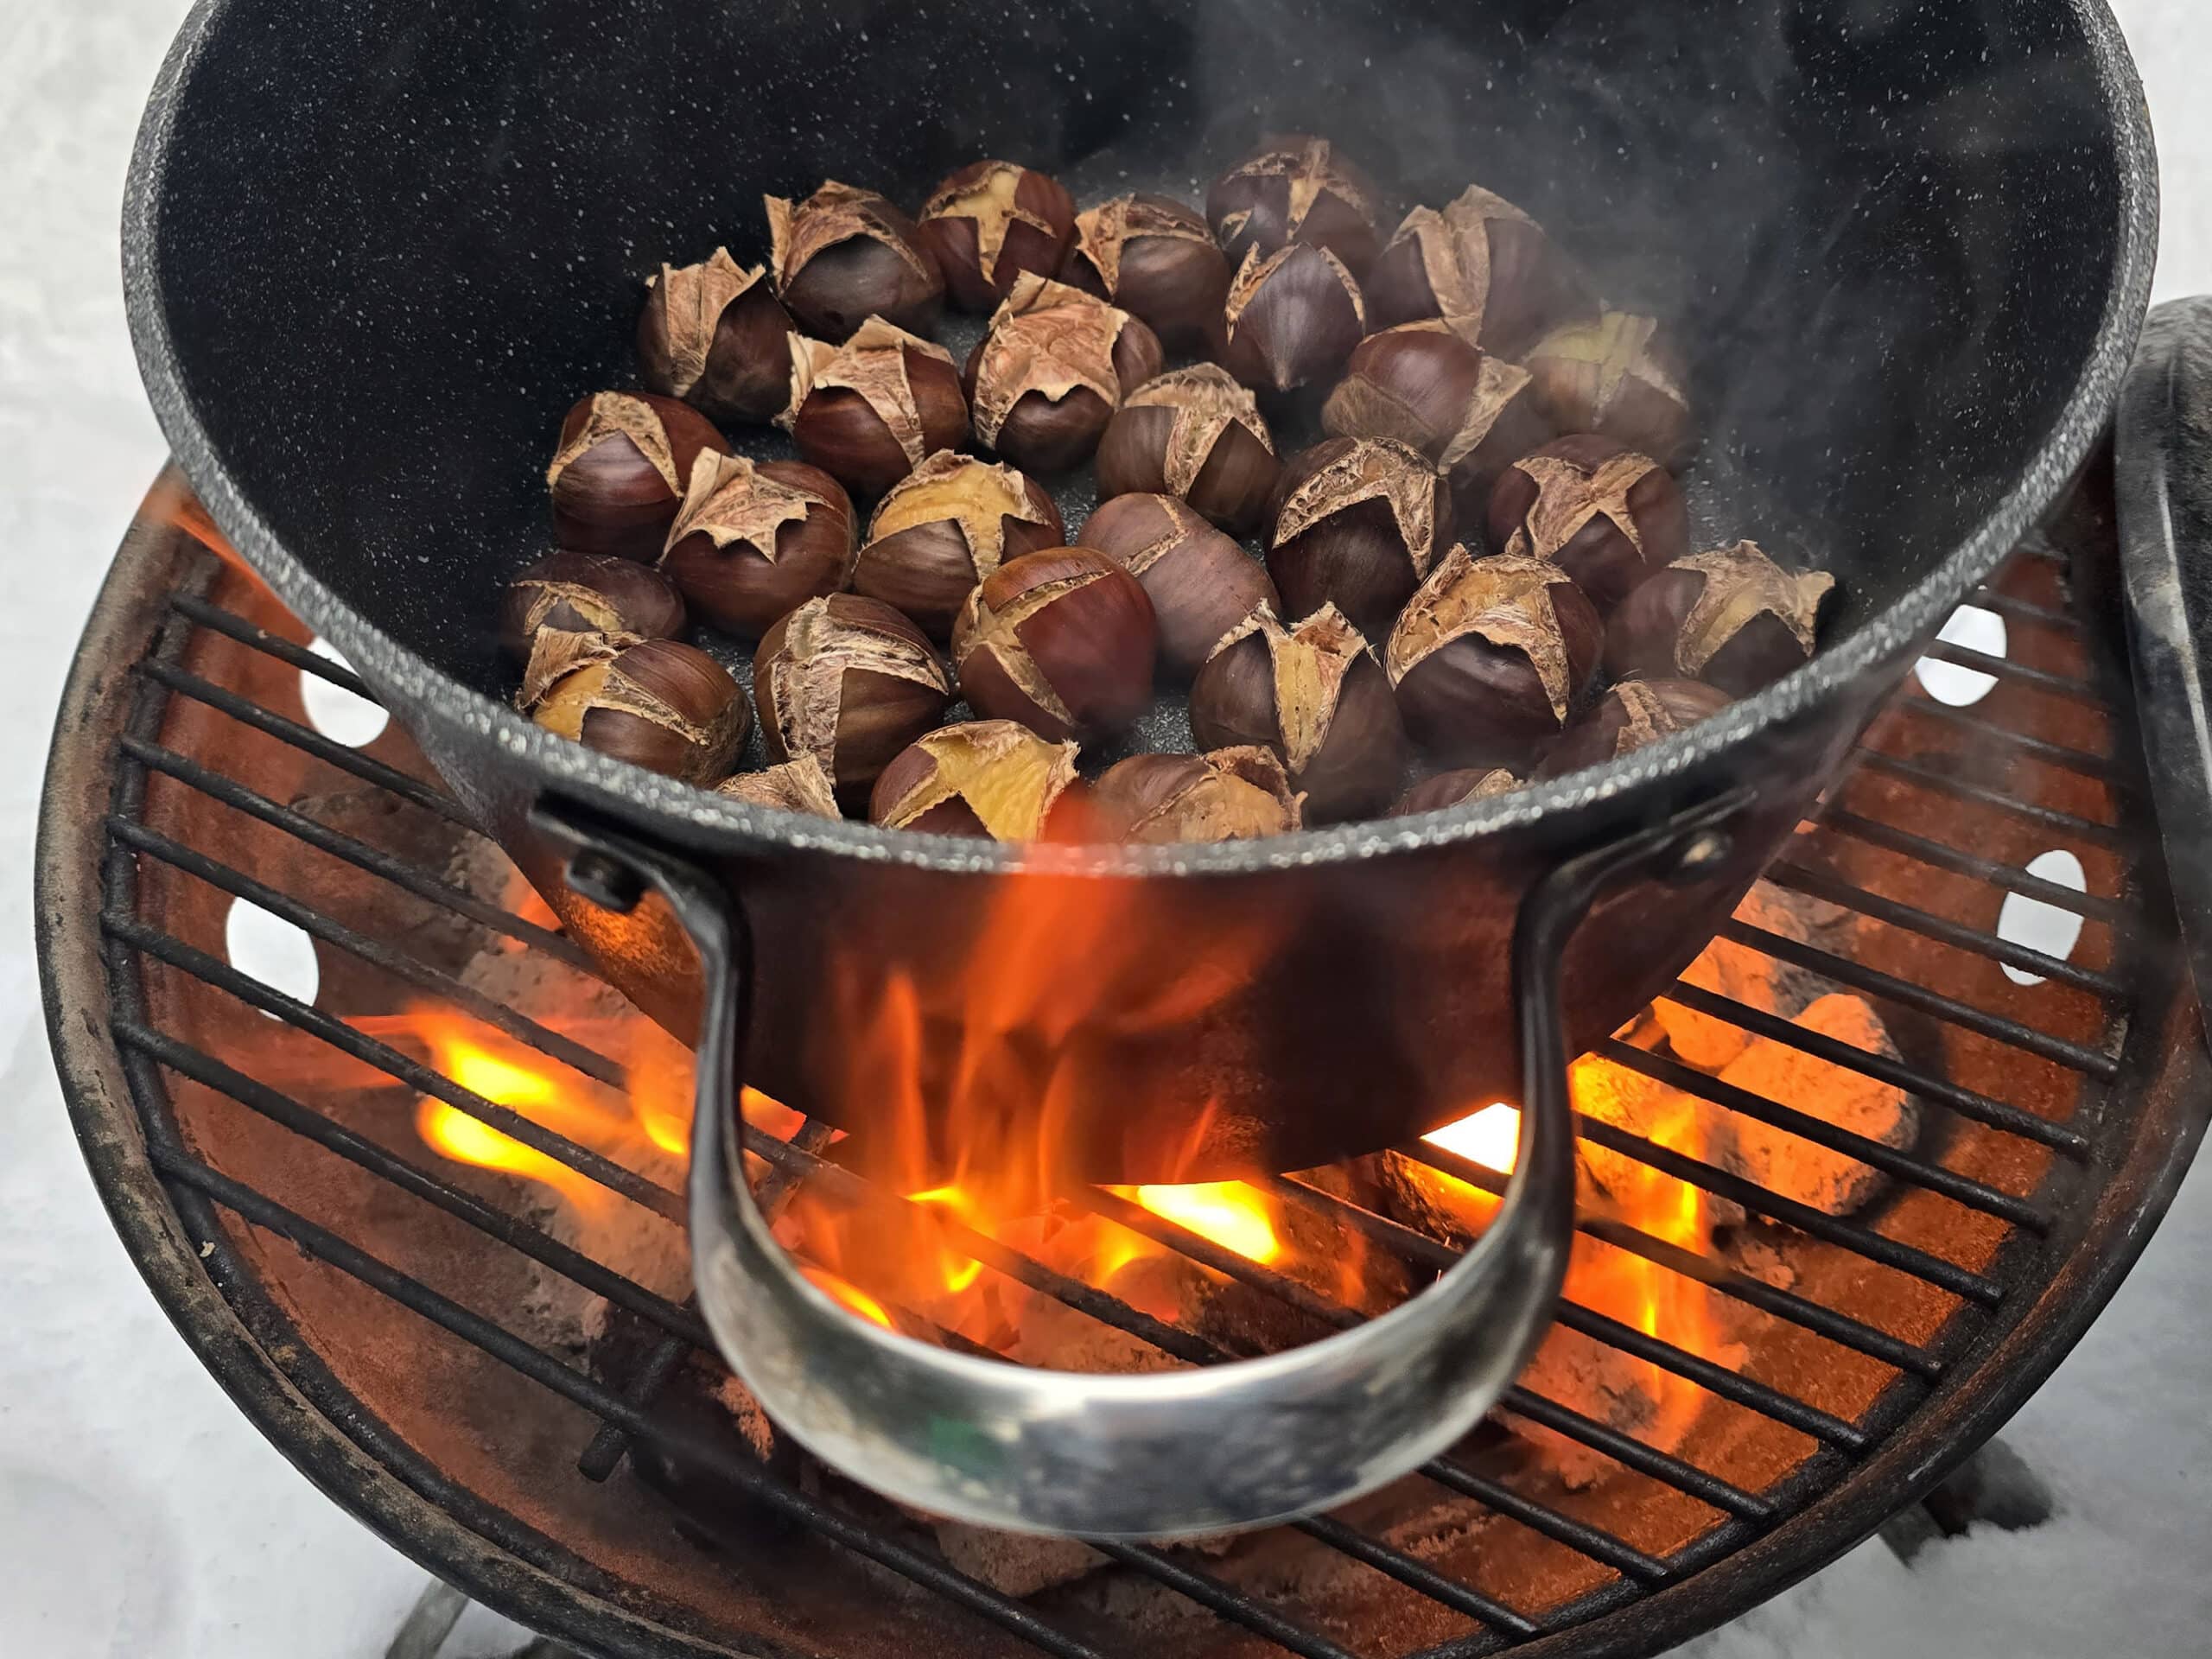
Roast the Chestnuts
Place chestnuts - scored side up - in a single layer in a large pan.
I use a regular large campfire pot (as I boil first and just use the same pot), but a campfire pan or other seasoned cast iron pan would also work. I recommend something with a long handle, or at least have some heat proof gloves or a pan holder on hand!)
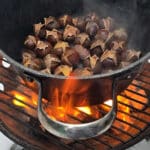
If you don’t already have a fire going for boiling the chestnuts, get a medium fire going now. You can cook on a grill grates over the fire, or with the pan directly on a good bed of hot embers - AFTER the fire subsides.
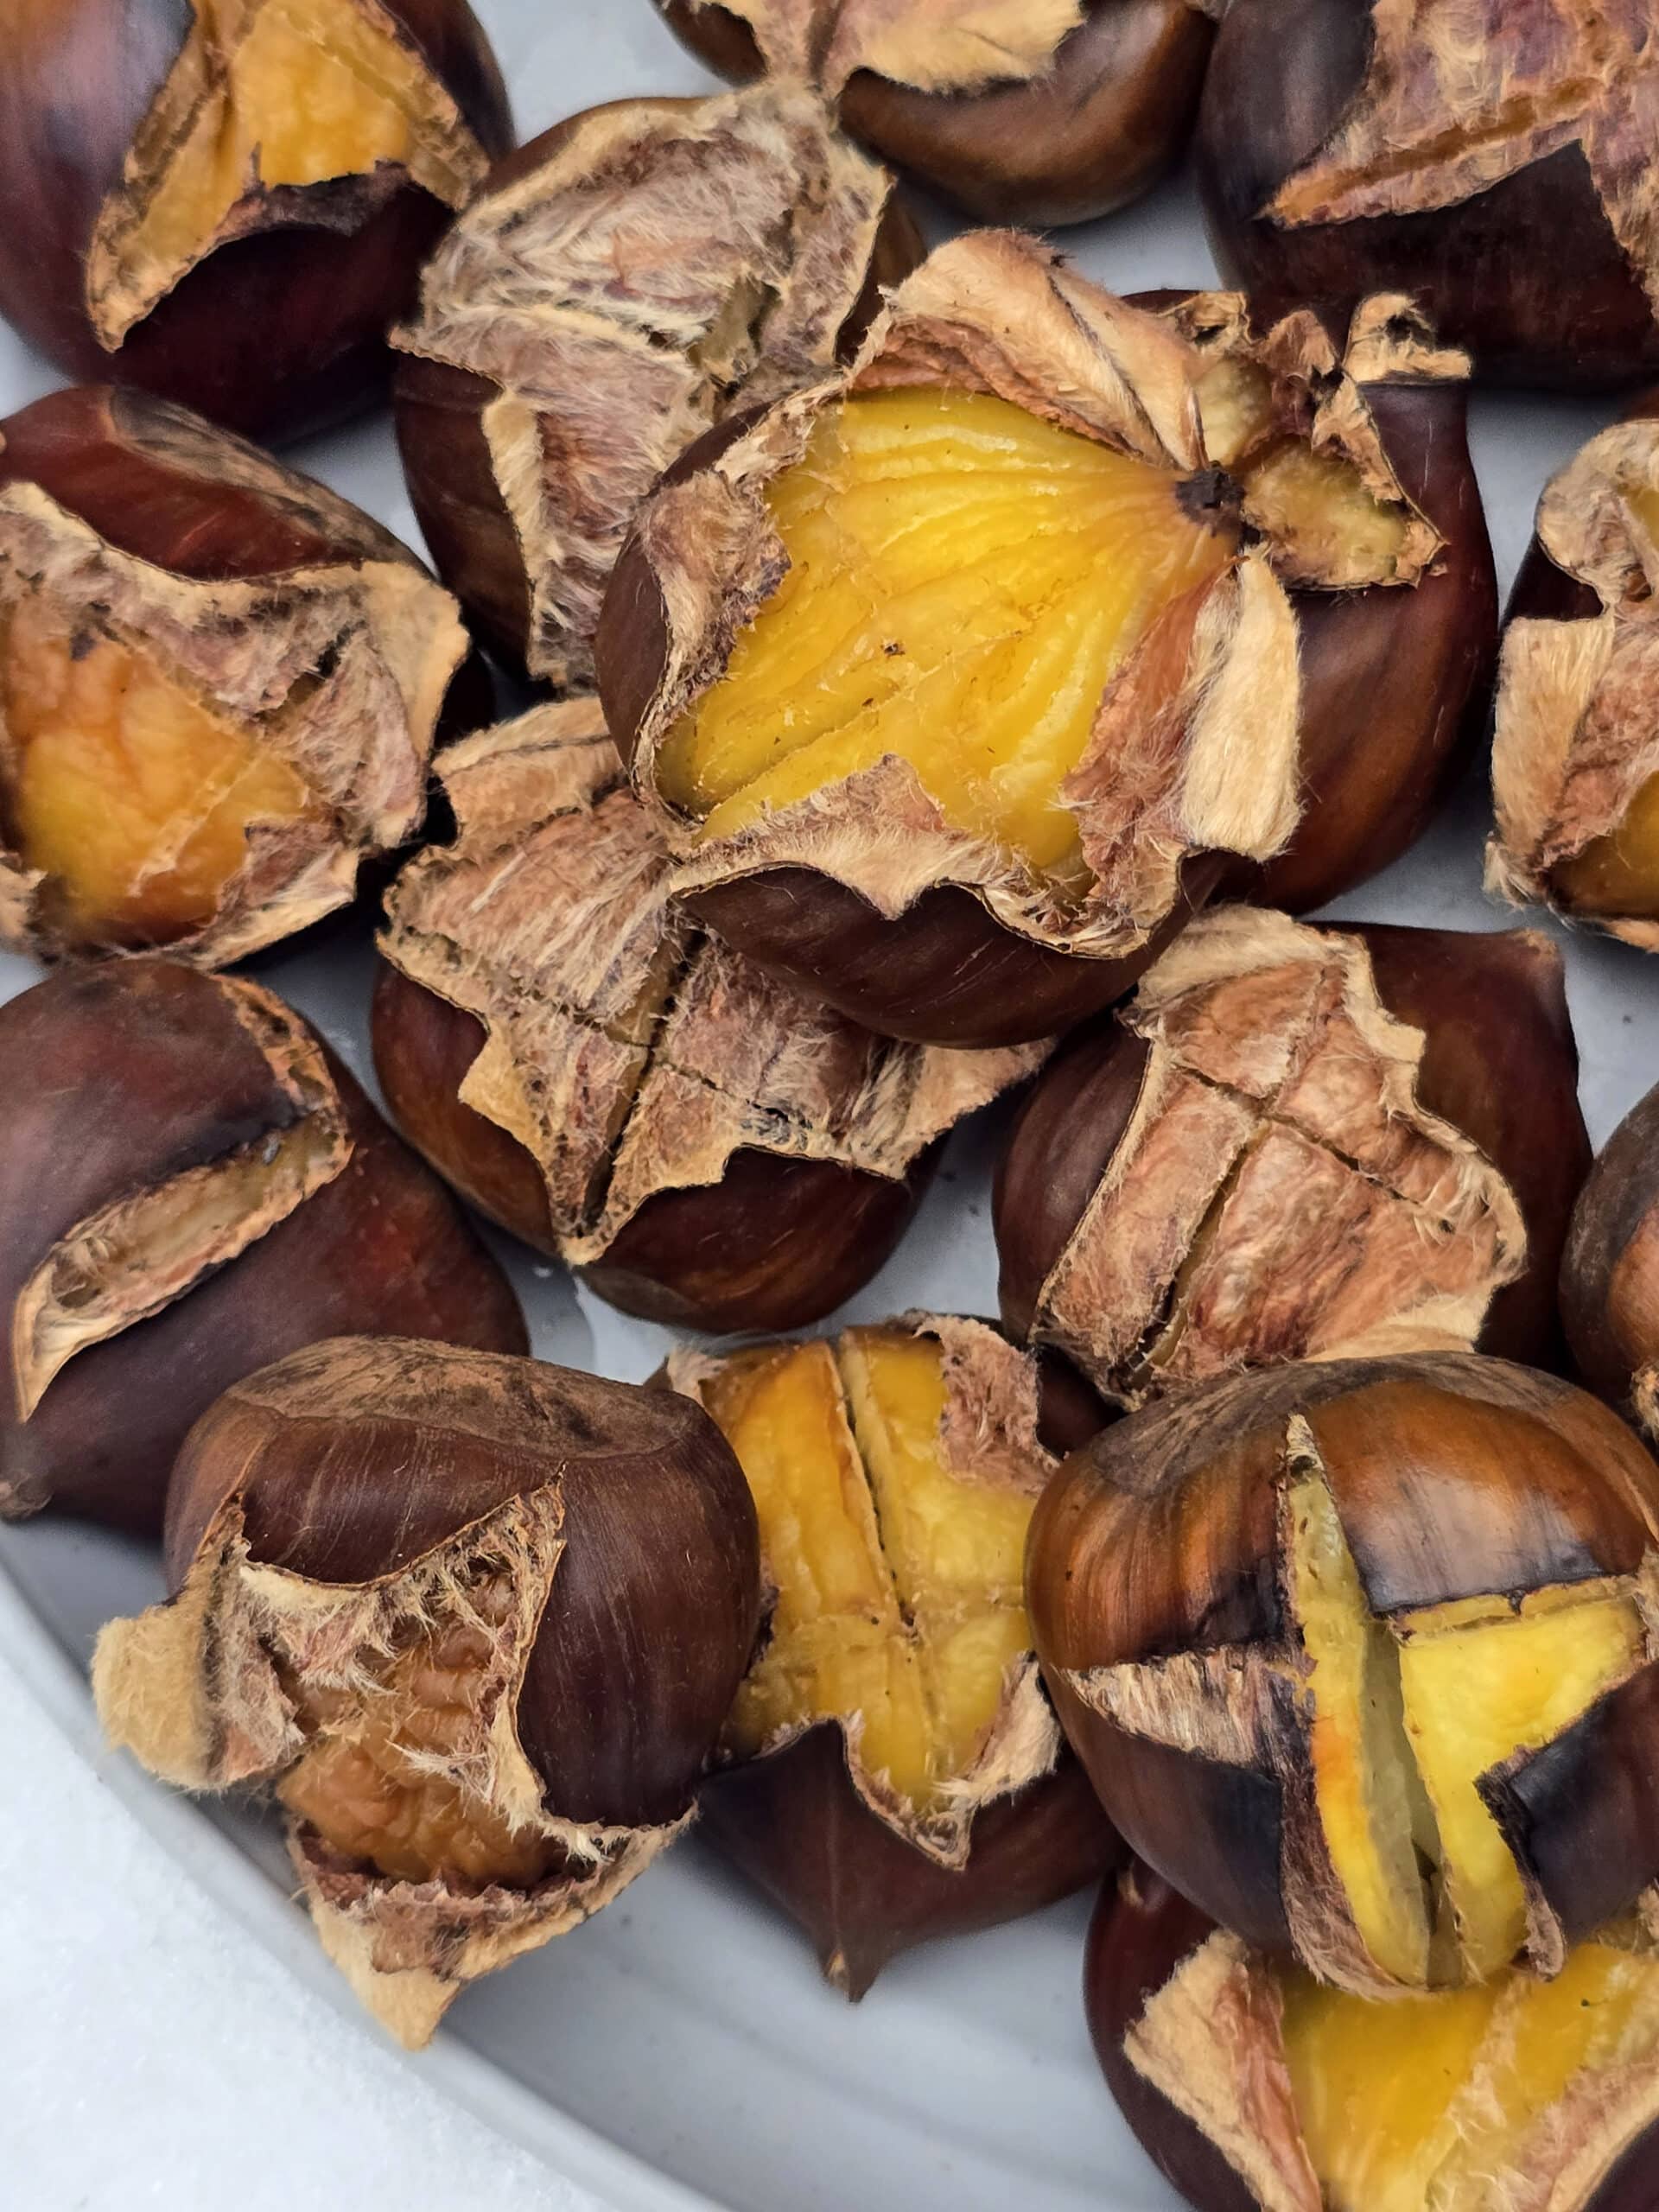
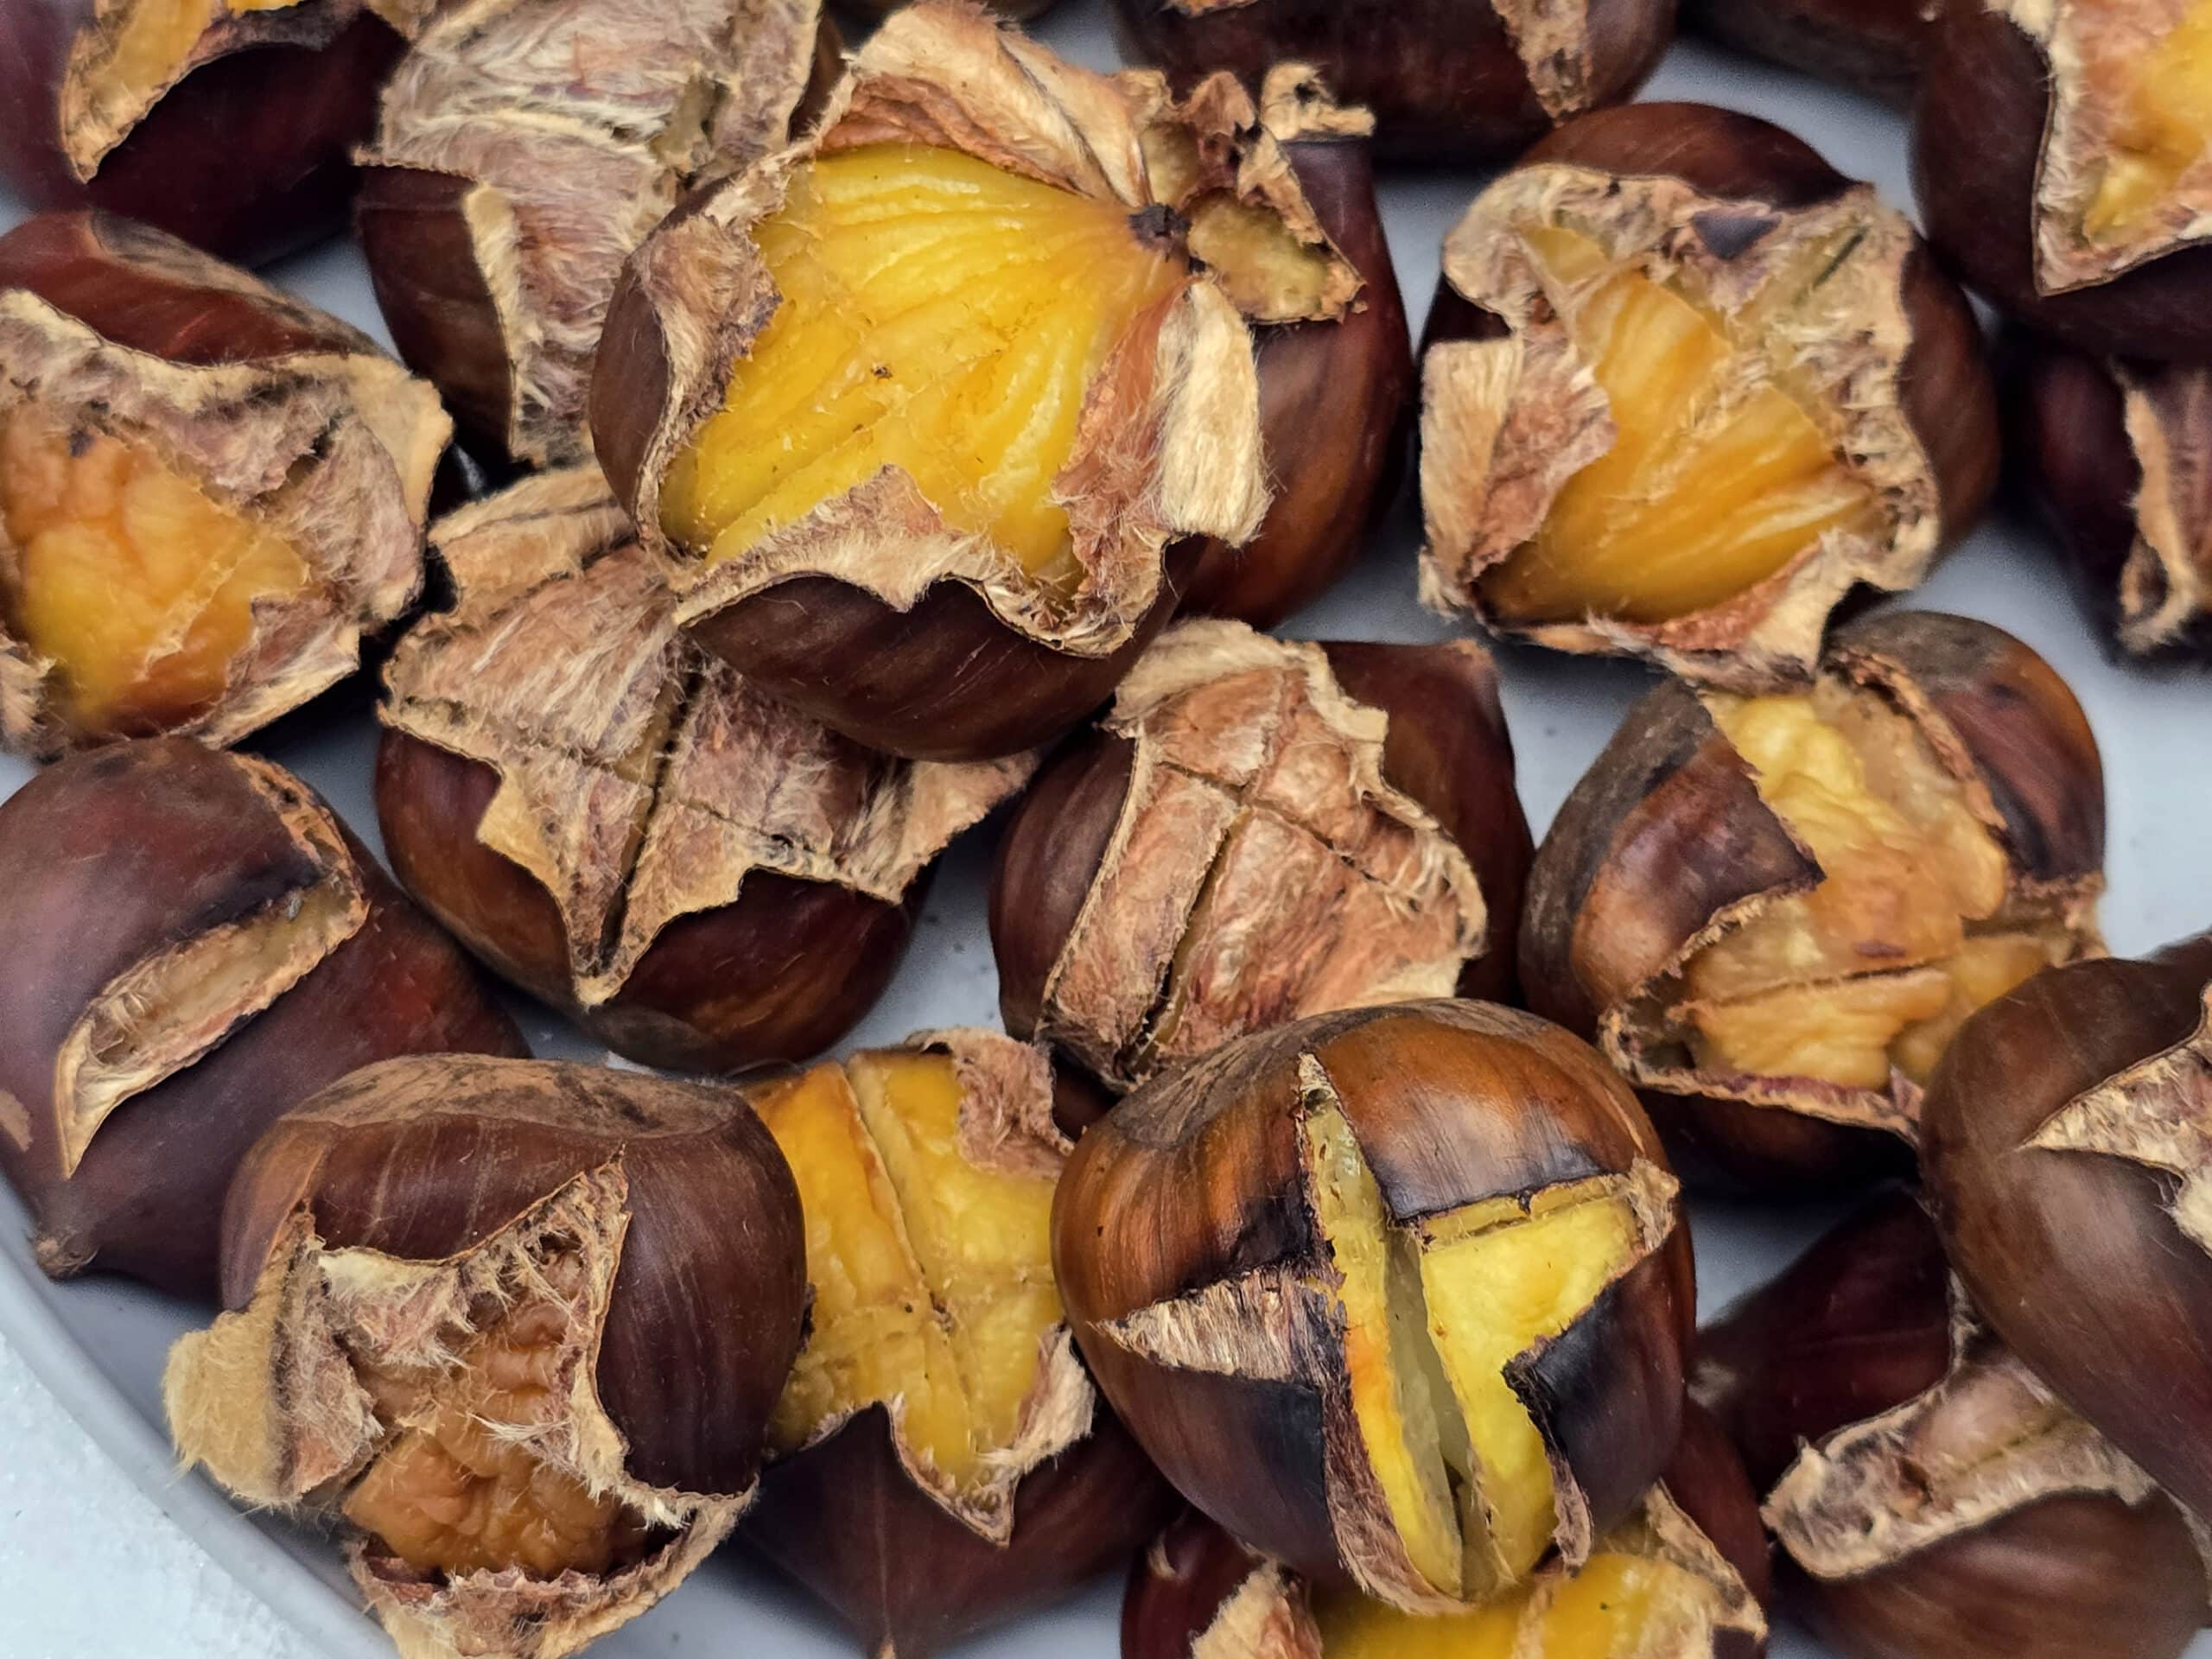
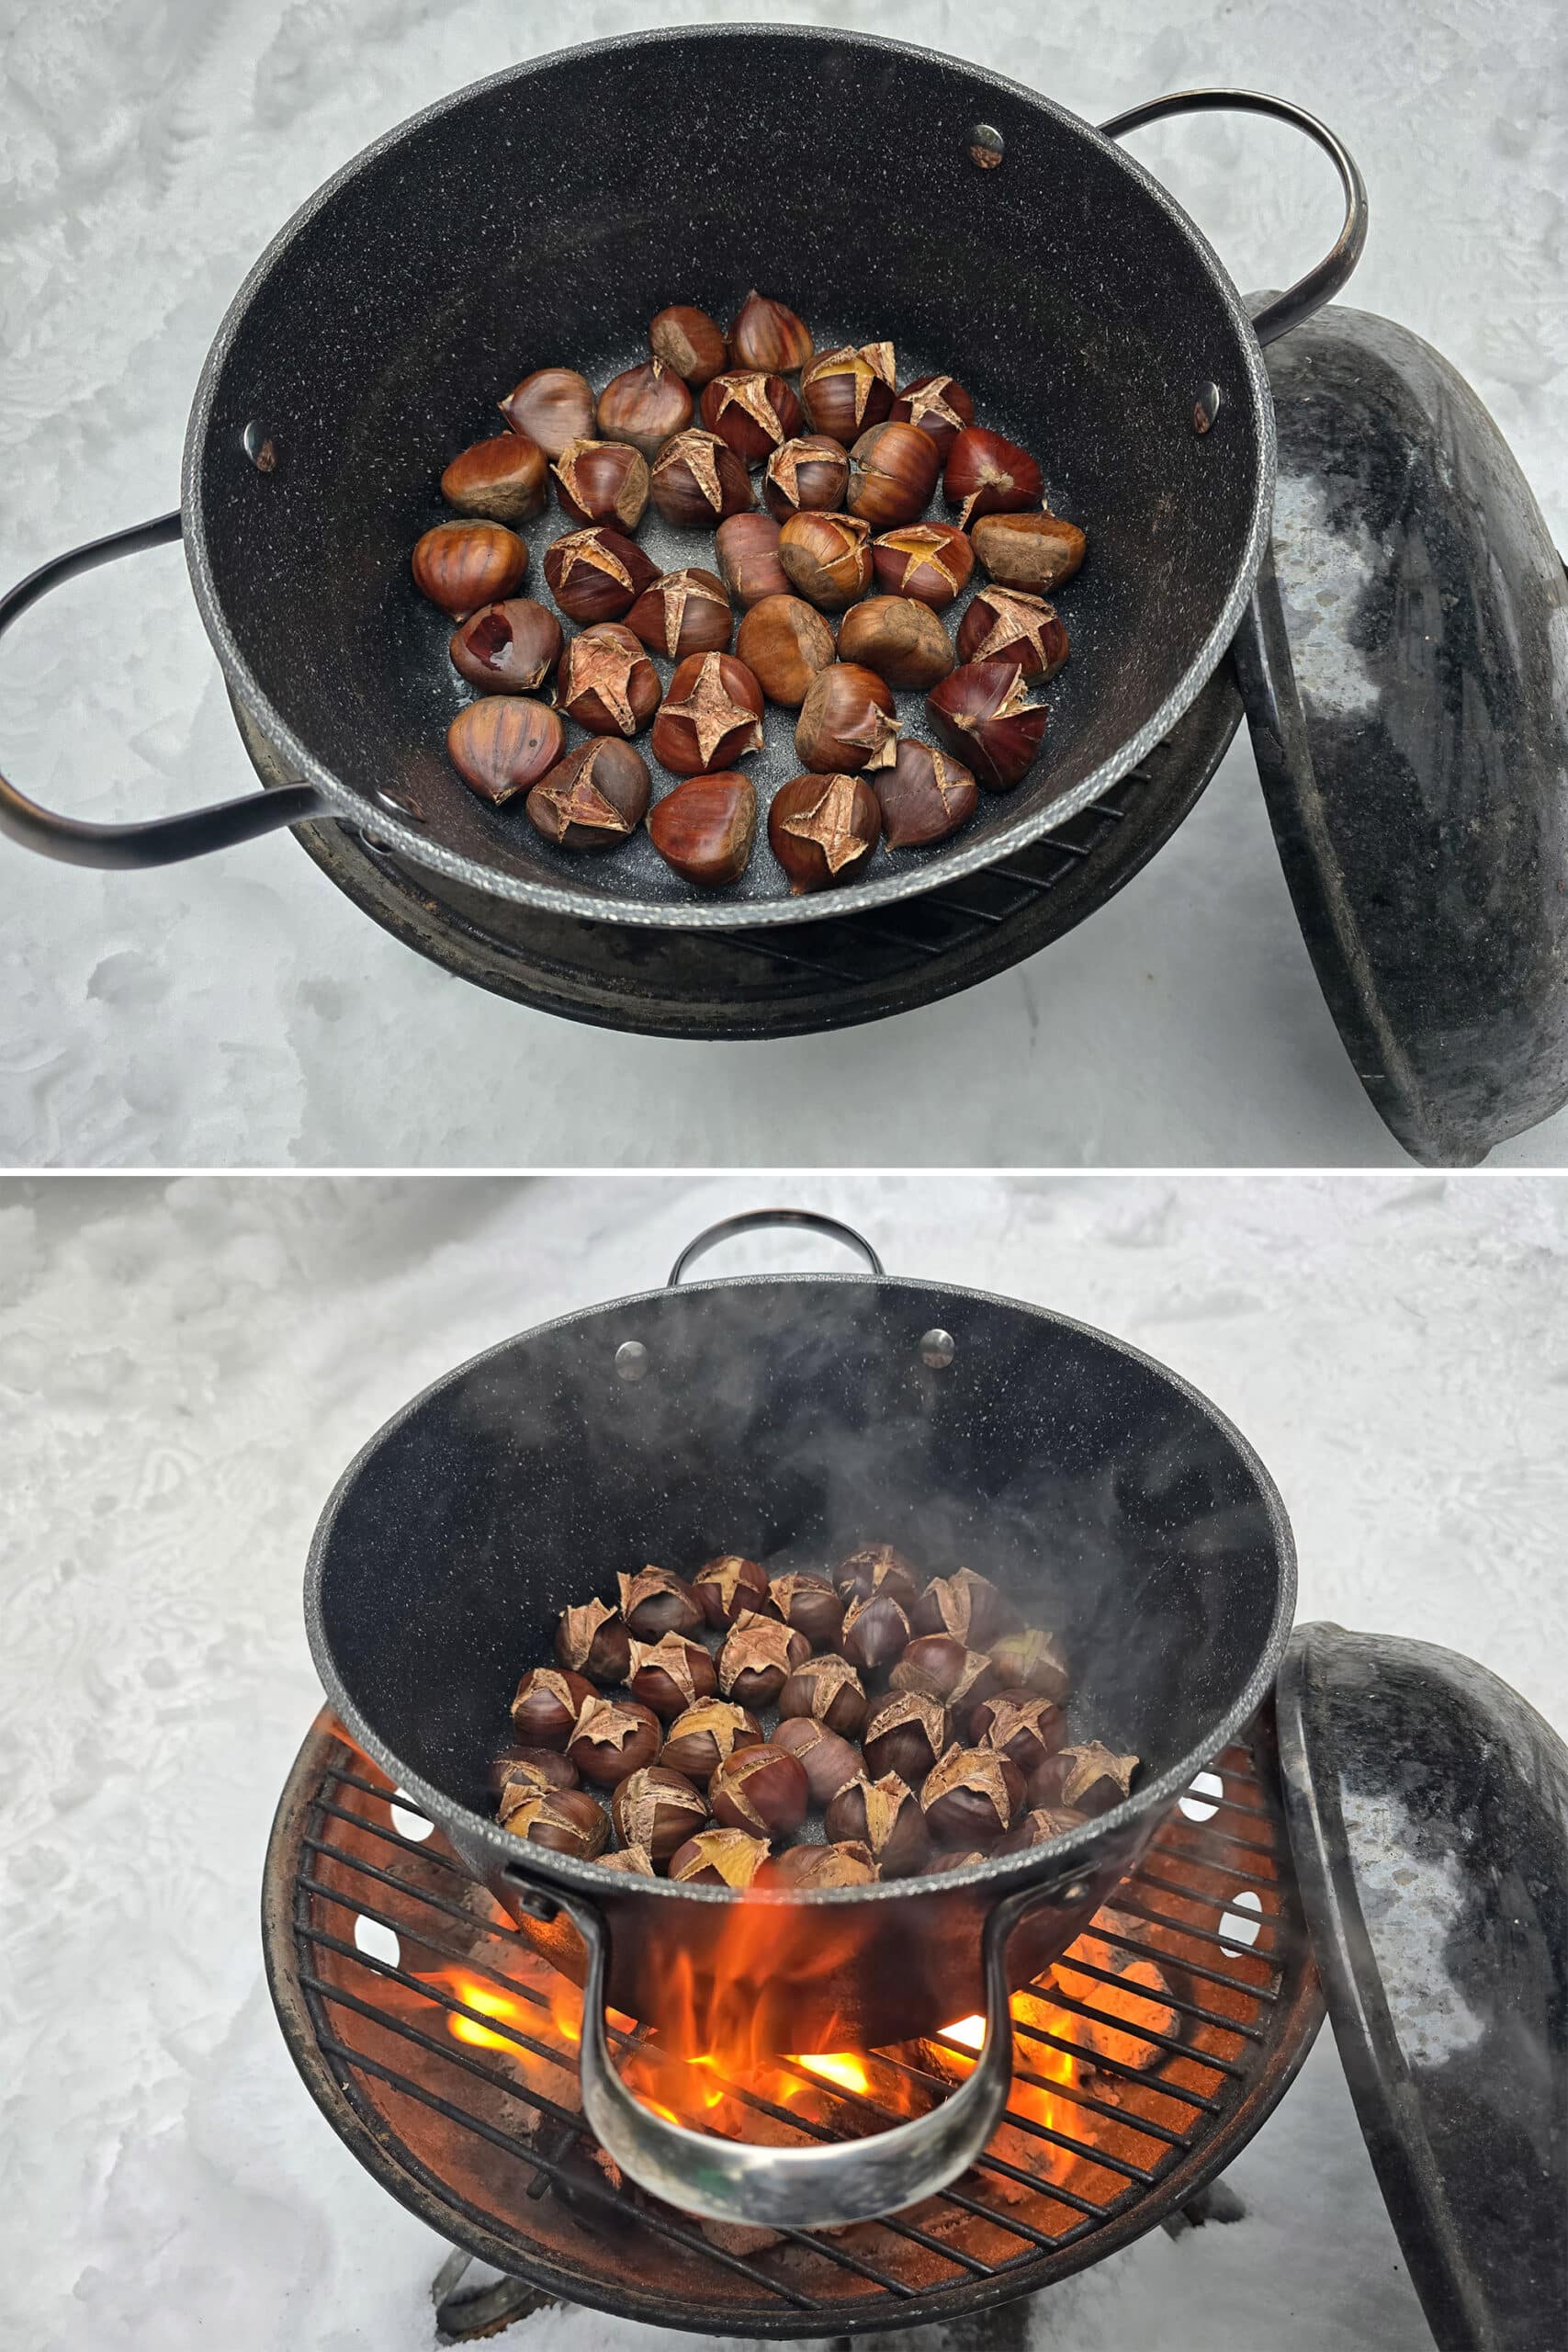
Place over the fire, let the chestnuts roast for 10-15 minutes, or until shells are browning, cut edges are curled back, and the nut meat is warm and tender.
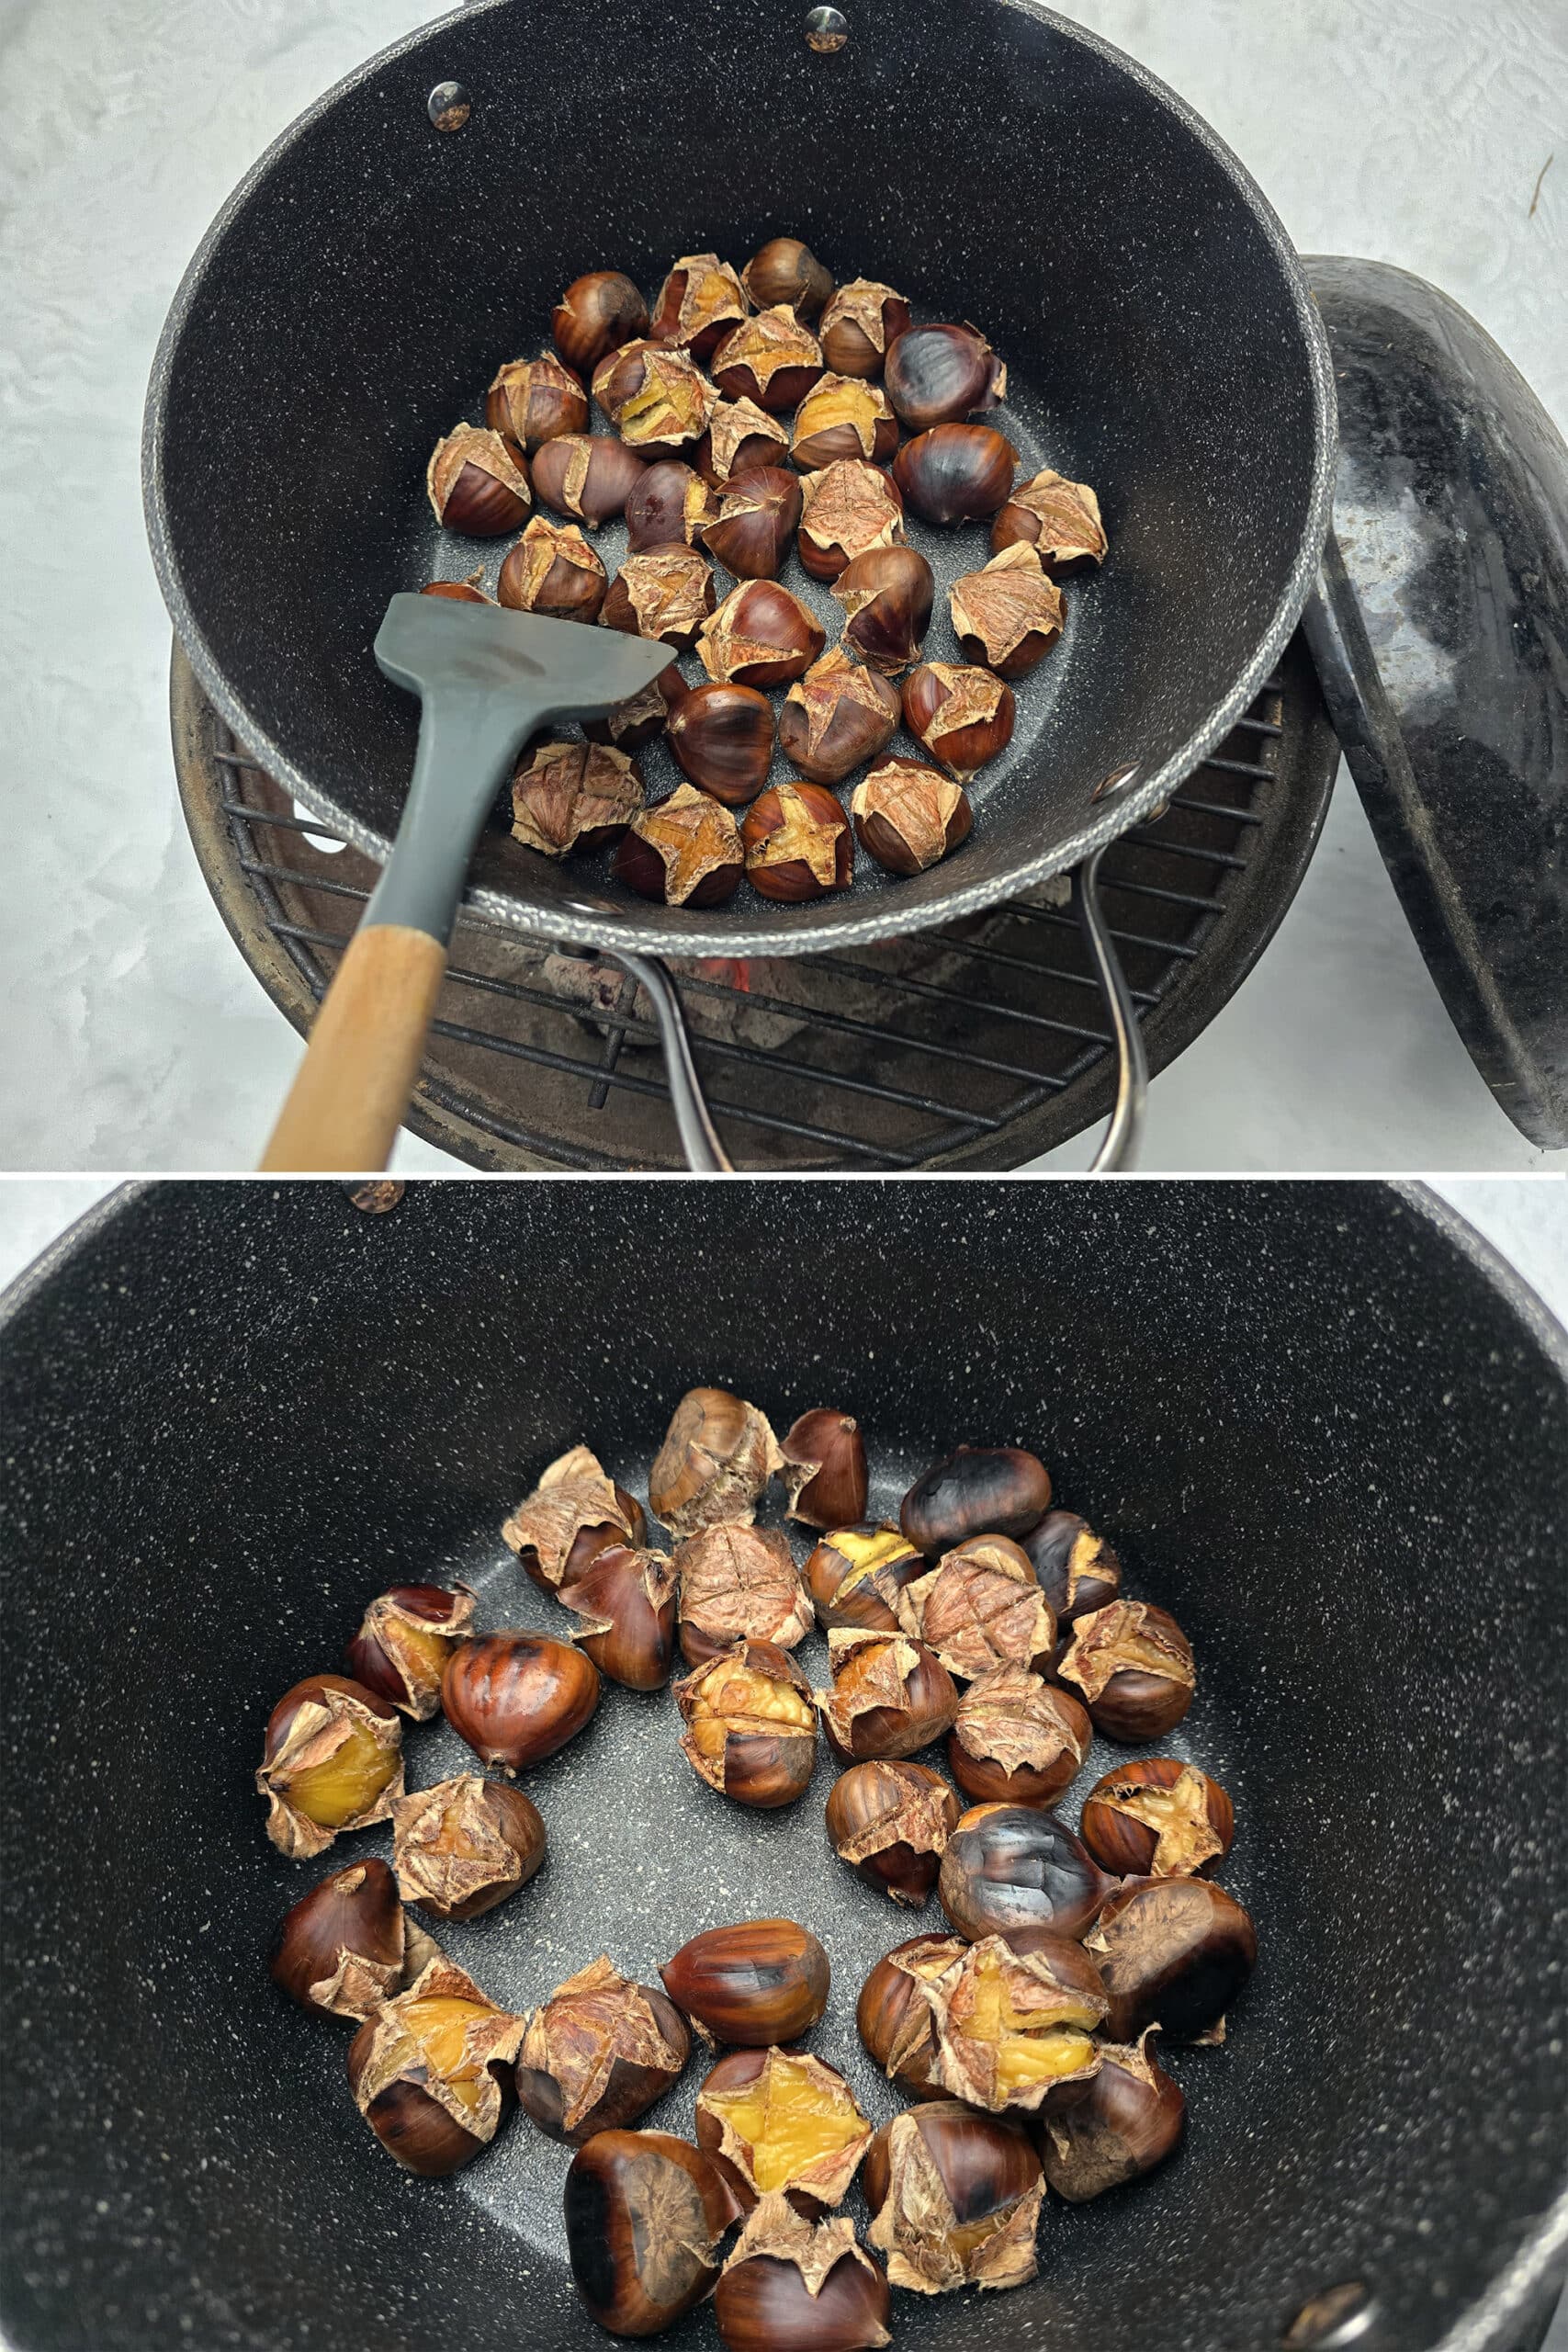
Whether or not you boiled them, the type of pan, the size of the chestnuts, etc can all impact the cook time.
Go by appearance and texture, just keep an eye on them and stir them every few minutes - you don’t want to let them burn. (Light burn marks are ok, just don’t scorch them!)
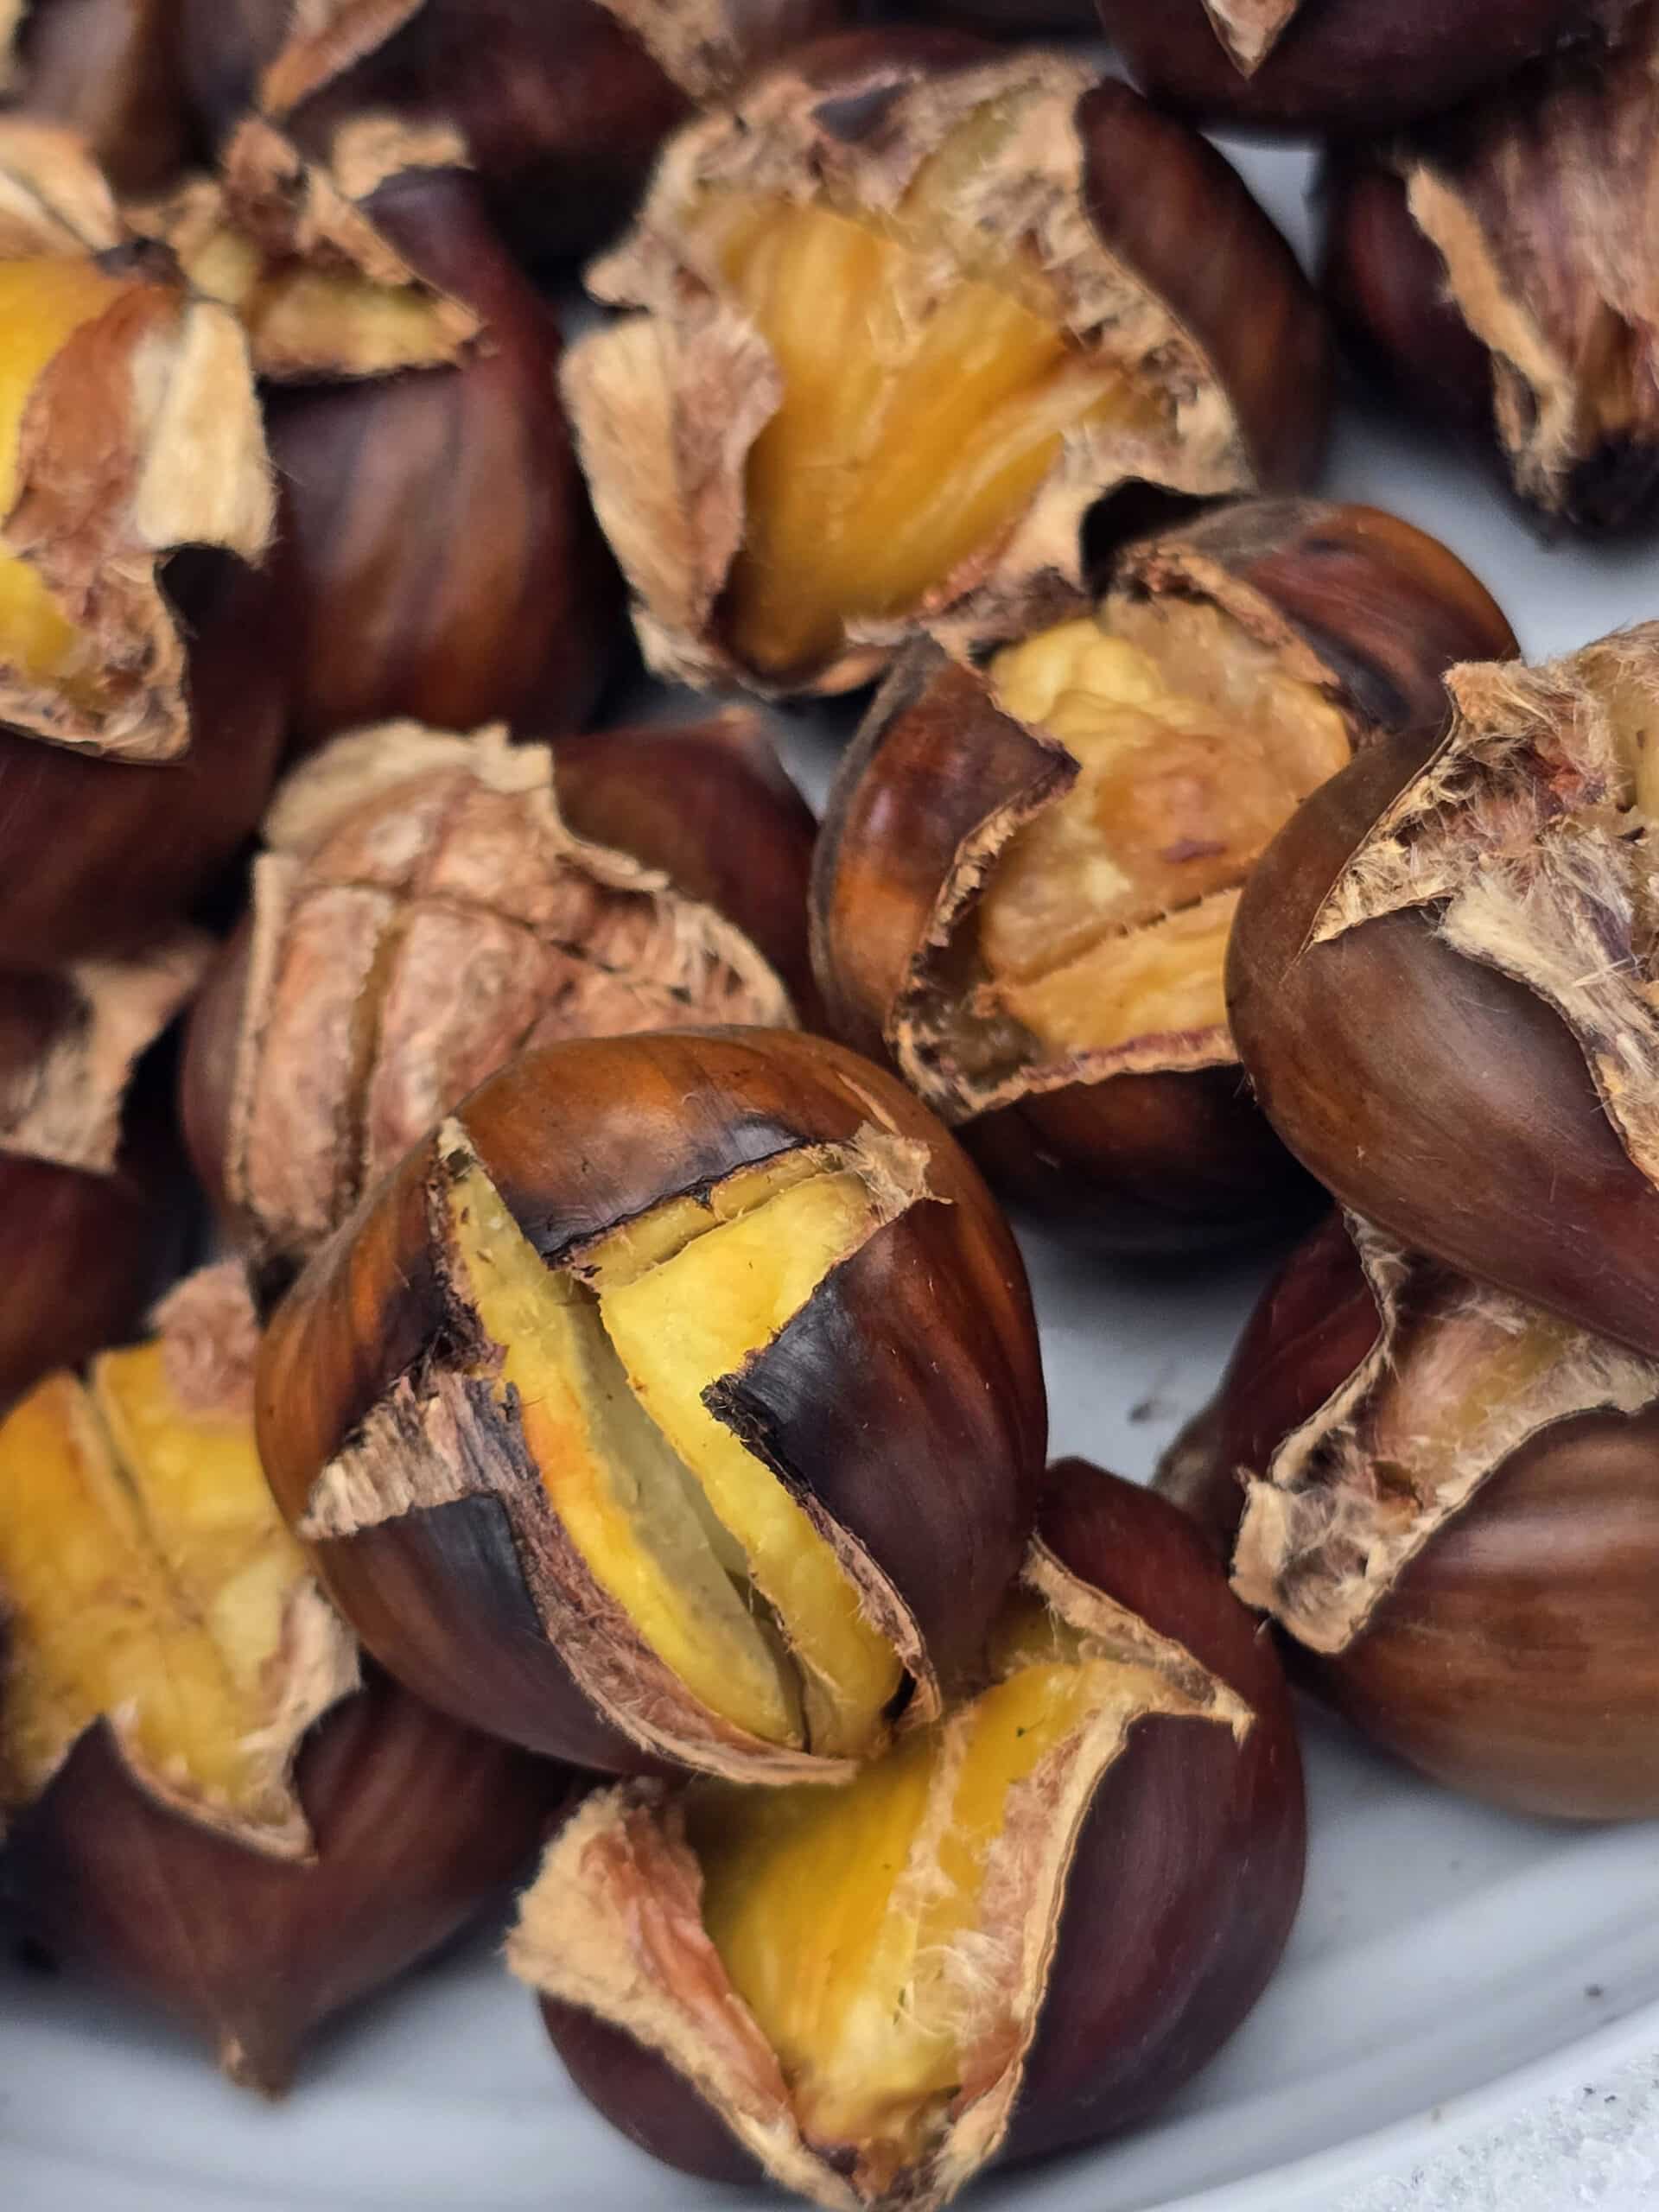
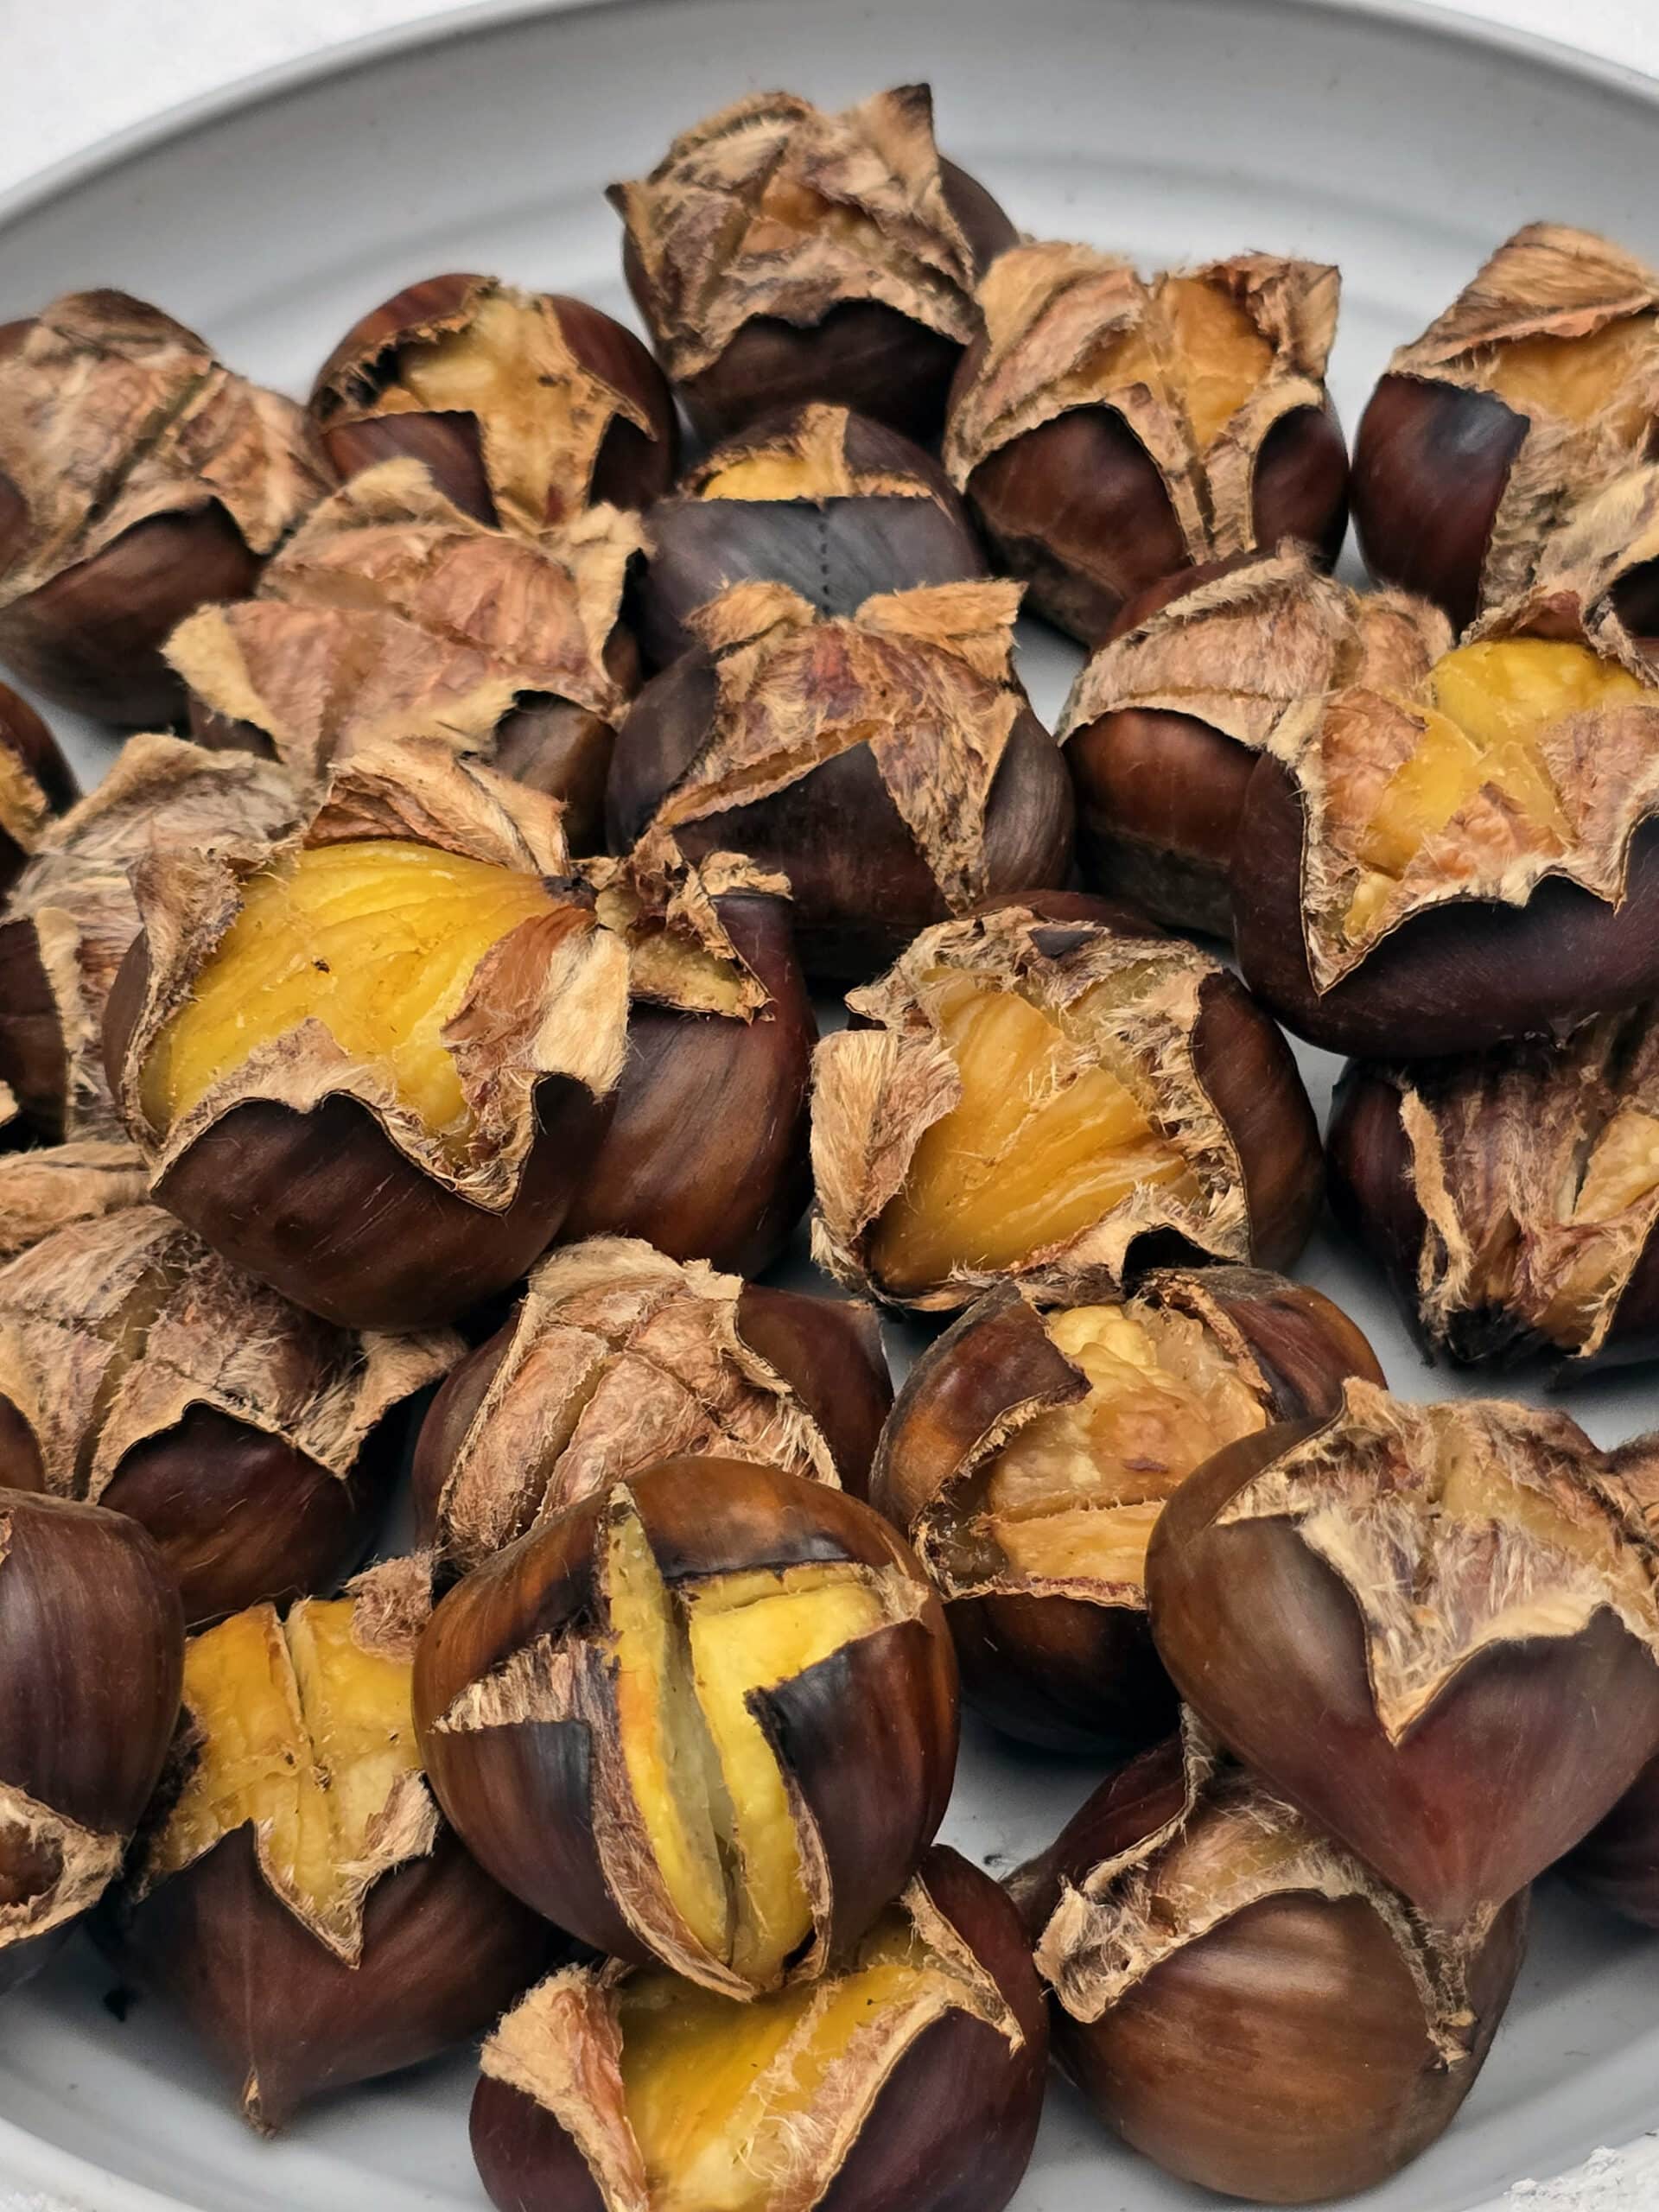
Once they’re ready, remove from the fire, allow to cool for a couple minutes, then serve!
AFTER peeling, leftover roasted chestnuts can be stored in an airtight container in the fridge for a few days. (Unless you’re cooking them into a recipe, I don’t really recommend this - they’re much better eaten fresh off the fire!)
How to Eat Roasted Chestnuts
FYI: Hot chestnuts are easier to peel, than after they cool. Good thing it’s usually an outside, winter treat - gloves help when handling hot, freshly roasted chestnuts!
The reason they’re easier to peel when hot is that the inner papery skin tends to fuse to the nut meat as they cool, and becomes big hassle to peel off.
Some people will salt their roasted chestnuts, others like a little butter on them... personally, I just eat them as-is.
More Winter Camping Posts
Want to try winter camping in Ontario? Here are our reviews on a few of the parks that offer winter camping, as well as some of the more winter-specific recipes we make, etc!:
Winter Camping in Ontario:
Algonquin Provincial Park Winter Camping [Mew Lake Campground]
Arrowhead Provincial Park Winter Camping
Killbear Provincial Park Winter Camping
MacGregor Point Provincial Park Winter Camping
Pinery Provincial Park Winter Camping
Silent Lake Provincial Park Winter Camping
Winter Camping Recipes and Activities:
Campfire Roasted Spiced Nuts
Gingerbread Pancake Mix
How to Make Maple Taffy over a Campfire
How to Roast Chestnuts on a Campfire
Equipment
- 1 Large Pan
- 1 Chestnut Knife Optional - you can use a paring knife
Ingredients
- 1 lb Chestnuts Buy more than you think you need - some are likely to be rotten.
Instructions
Prepare the Chestnuts
- Get rid of any potentially rotten chestnuts. I do this by placing the chestnuts in a pot of water - the ones that float, I throw away.
- Remove the remaining chestnuts from the water, blot dry if you’re using a regular knife to score them. (Wet = more slippery. Not something you really need to worry about with a chestnut knife, though!)
- Using a paring knife or chestnut knife, cut an X in the top of the rounded side of each chestnuts - see the post for photos and more details on each method.
- If - when cutting into them - you come across any that are molding or smell bad, throw it out. You might not catch every moldy one before roasting, but between the floating ones and anything visibly “off” when cutting, you’ll get the bulk of them.
Boil the Chestnuts (Optional)
- Place the scored chestnuts in a large pot, and cover with cold water. Bring the water to a boil over your campfire, then strain the chestnuts out as soon as the water starts actually boiling. Alternately, you can try soaking chestnuts in a bowl of hot water for 1 hour or so.
Roast the Chestnuts
- If you don’t already have a fire going for boiling the chestnuts, get a medium fire going now. You can cook on a grate over the fire, or with the pan directly on hot coals - AFTER the fire subsides.
- Spread your prepared chestnuts out in a single layer in your skillet or pan - flat sides down, scored sides up.
- Place over the fire, roast for 10-15 minutes, or until shells are browning, cut edges are curled back, and the nut meat is warm and tender.
- Your roasting time can vary wildly, based on whether you’re cooking them over a grate - as we tend to do - or with the pan directly on the hot coals. Whether or not you boiled them, the type of pan, the size of the chestnuts, etc can all impact the cook time.Go by appearance and texture, just keep an eye on them and stir them every few minutes - you don’t want to let them burn.
- Once they’re ready, remove from the fire, allow to cool for a couple minutes, then serve!
Notes
Nutrition
Thanks for Reading!If you loved this post - or have any questions about it - please leave a comment below! We'd also love it if you would consider sharing the link on social media! |

Marie & Michael Porter
Such a fun - and tasty - activity when winter camping. Hope you enjoy it as much as we do!