
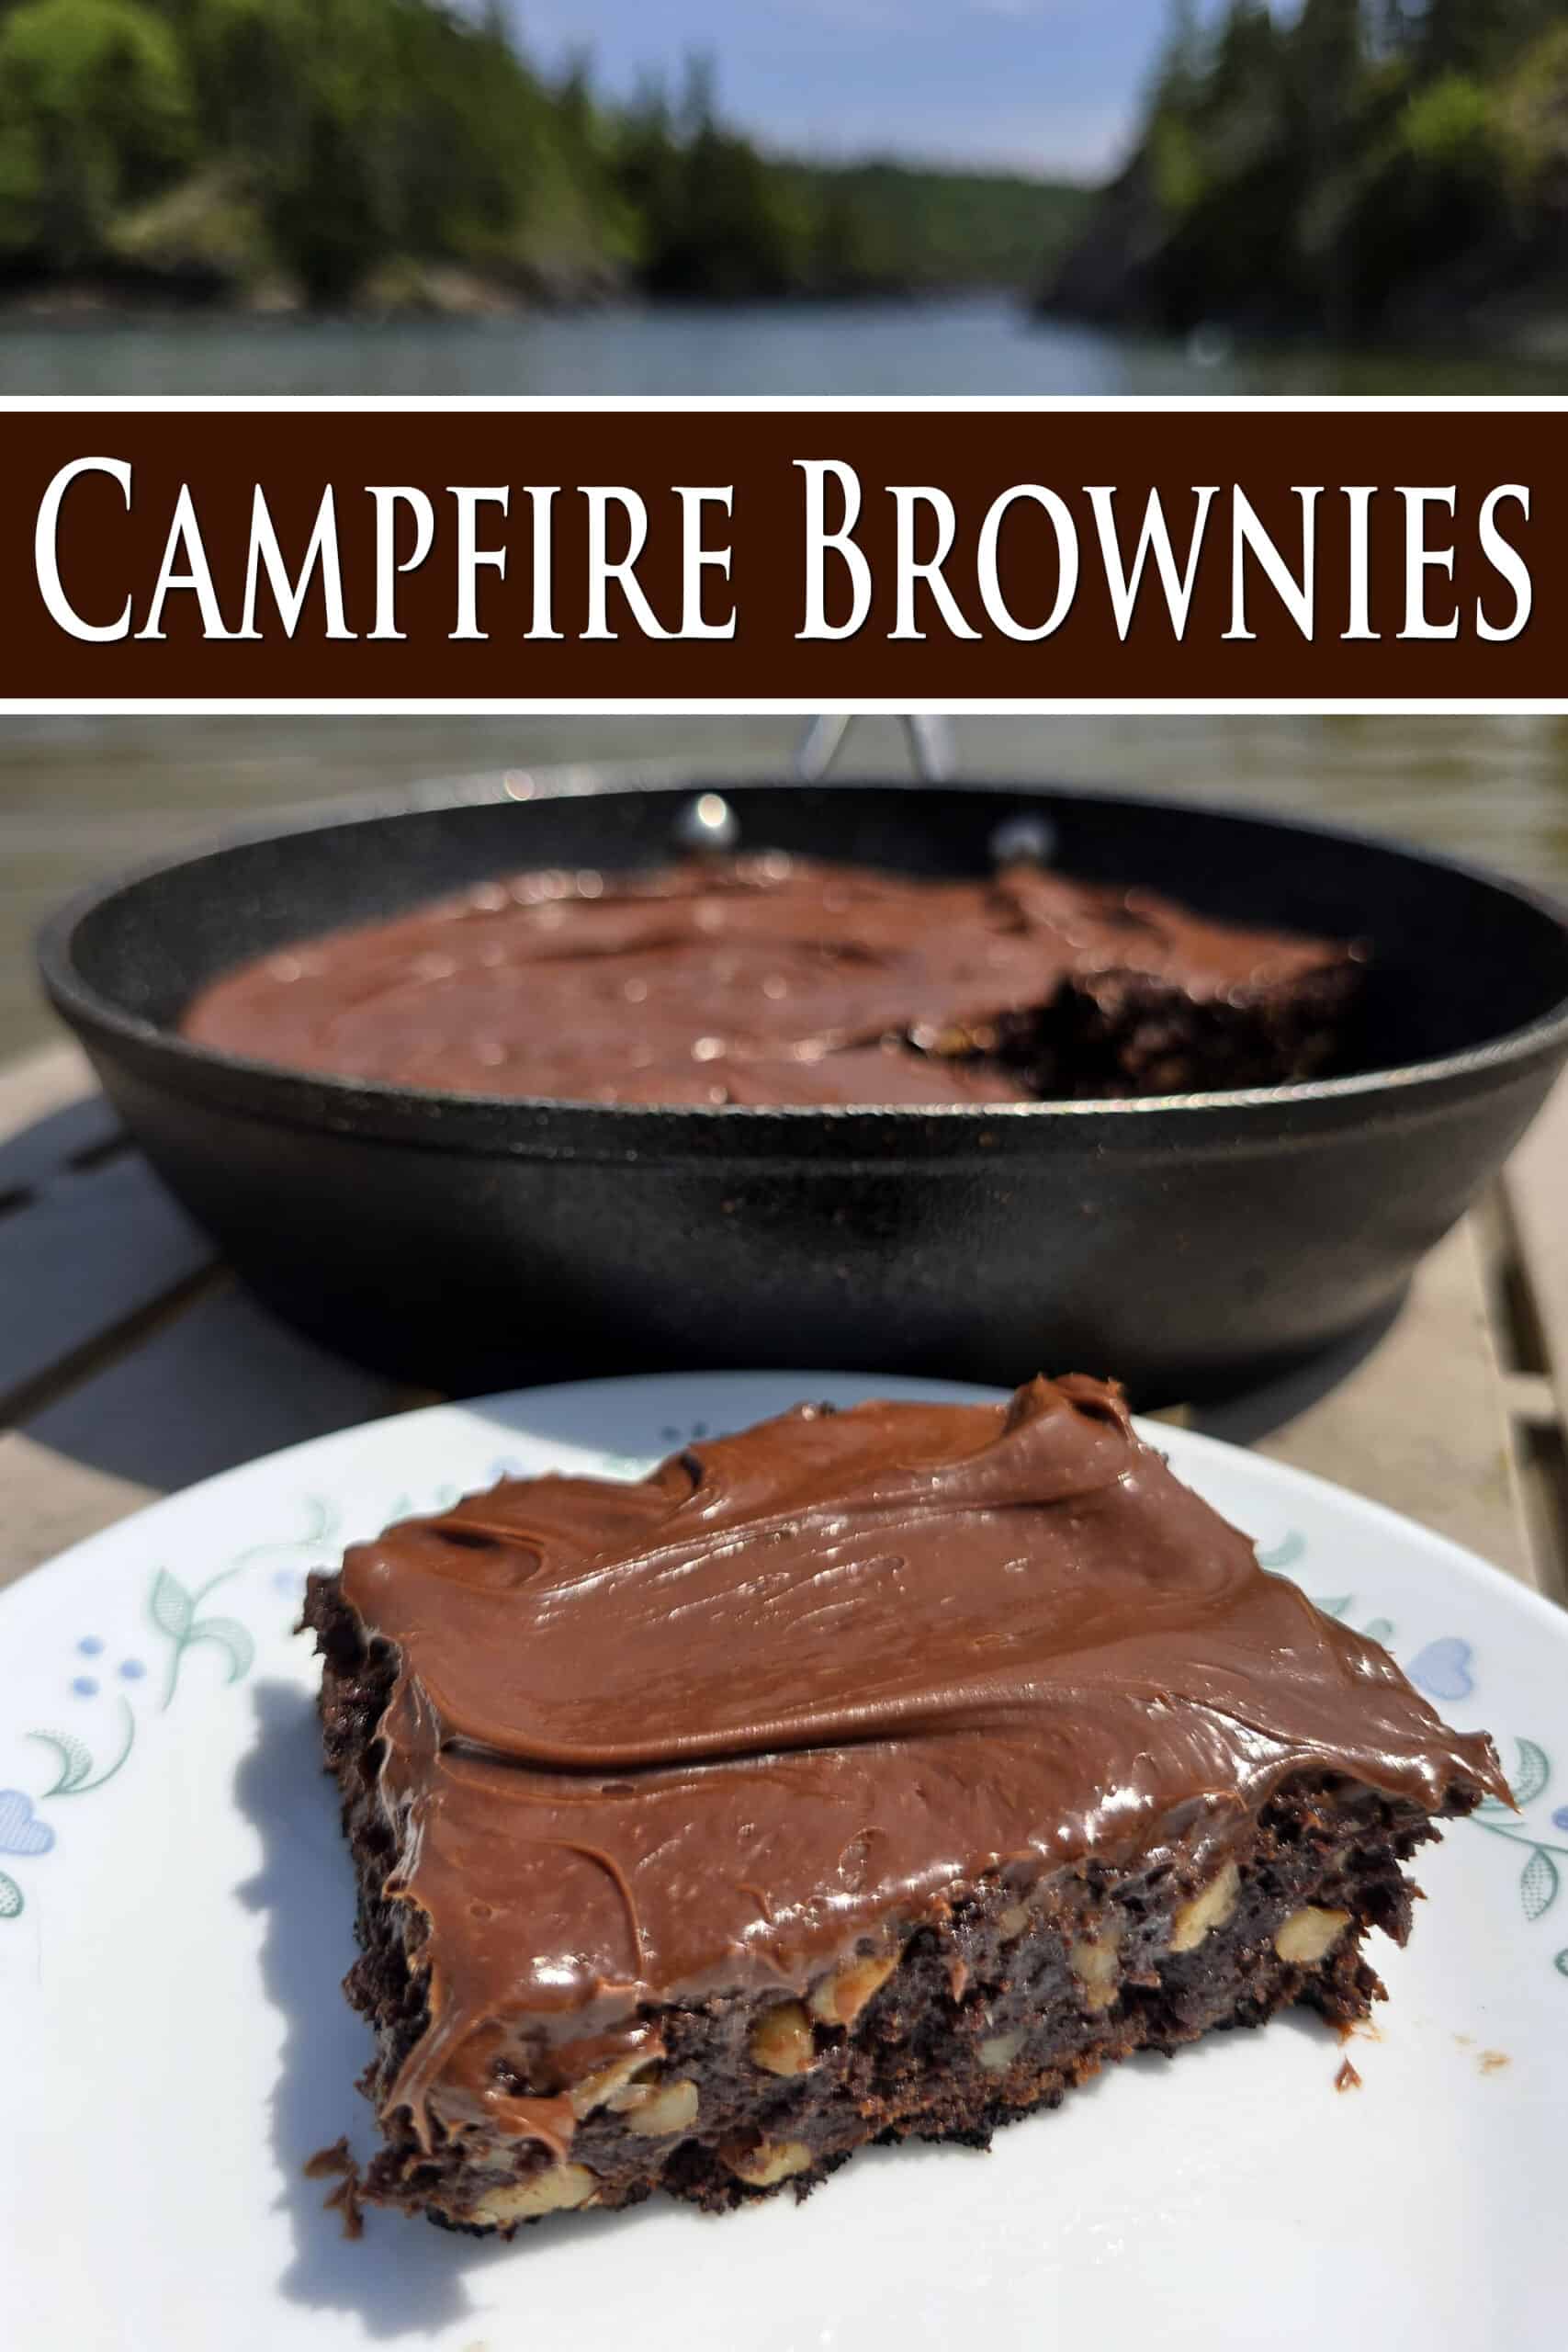
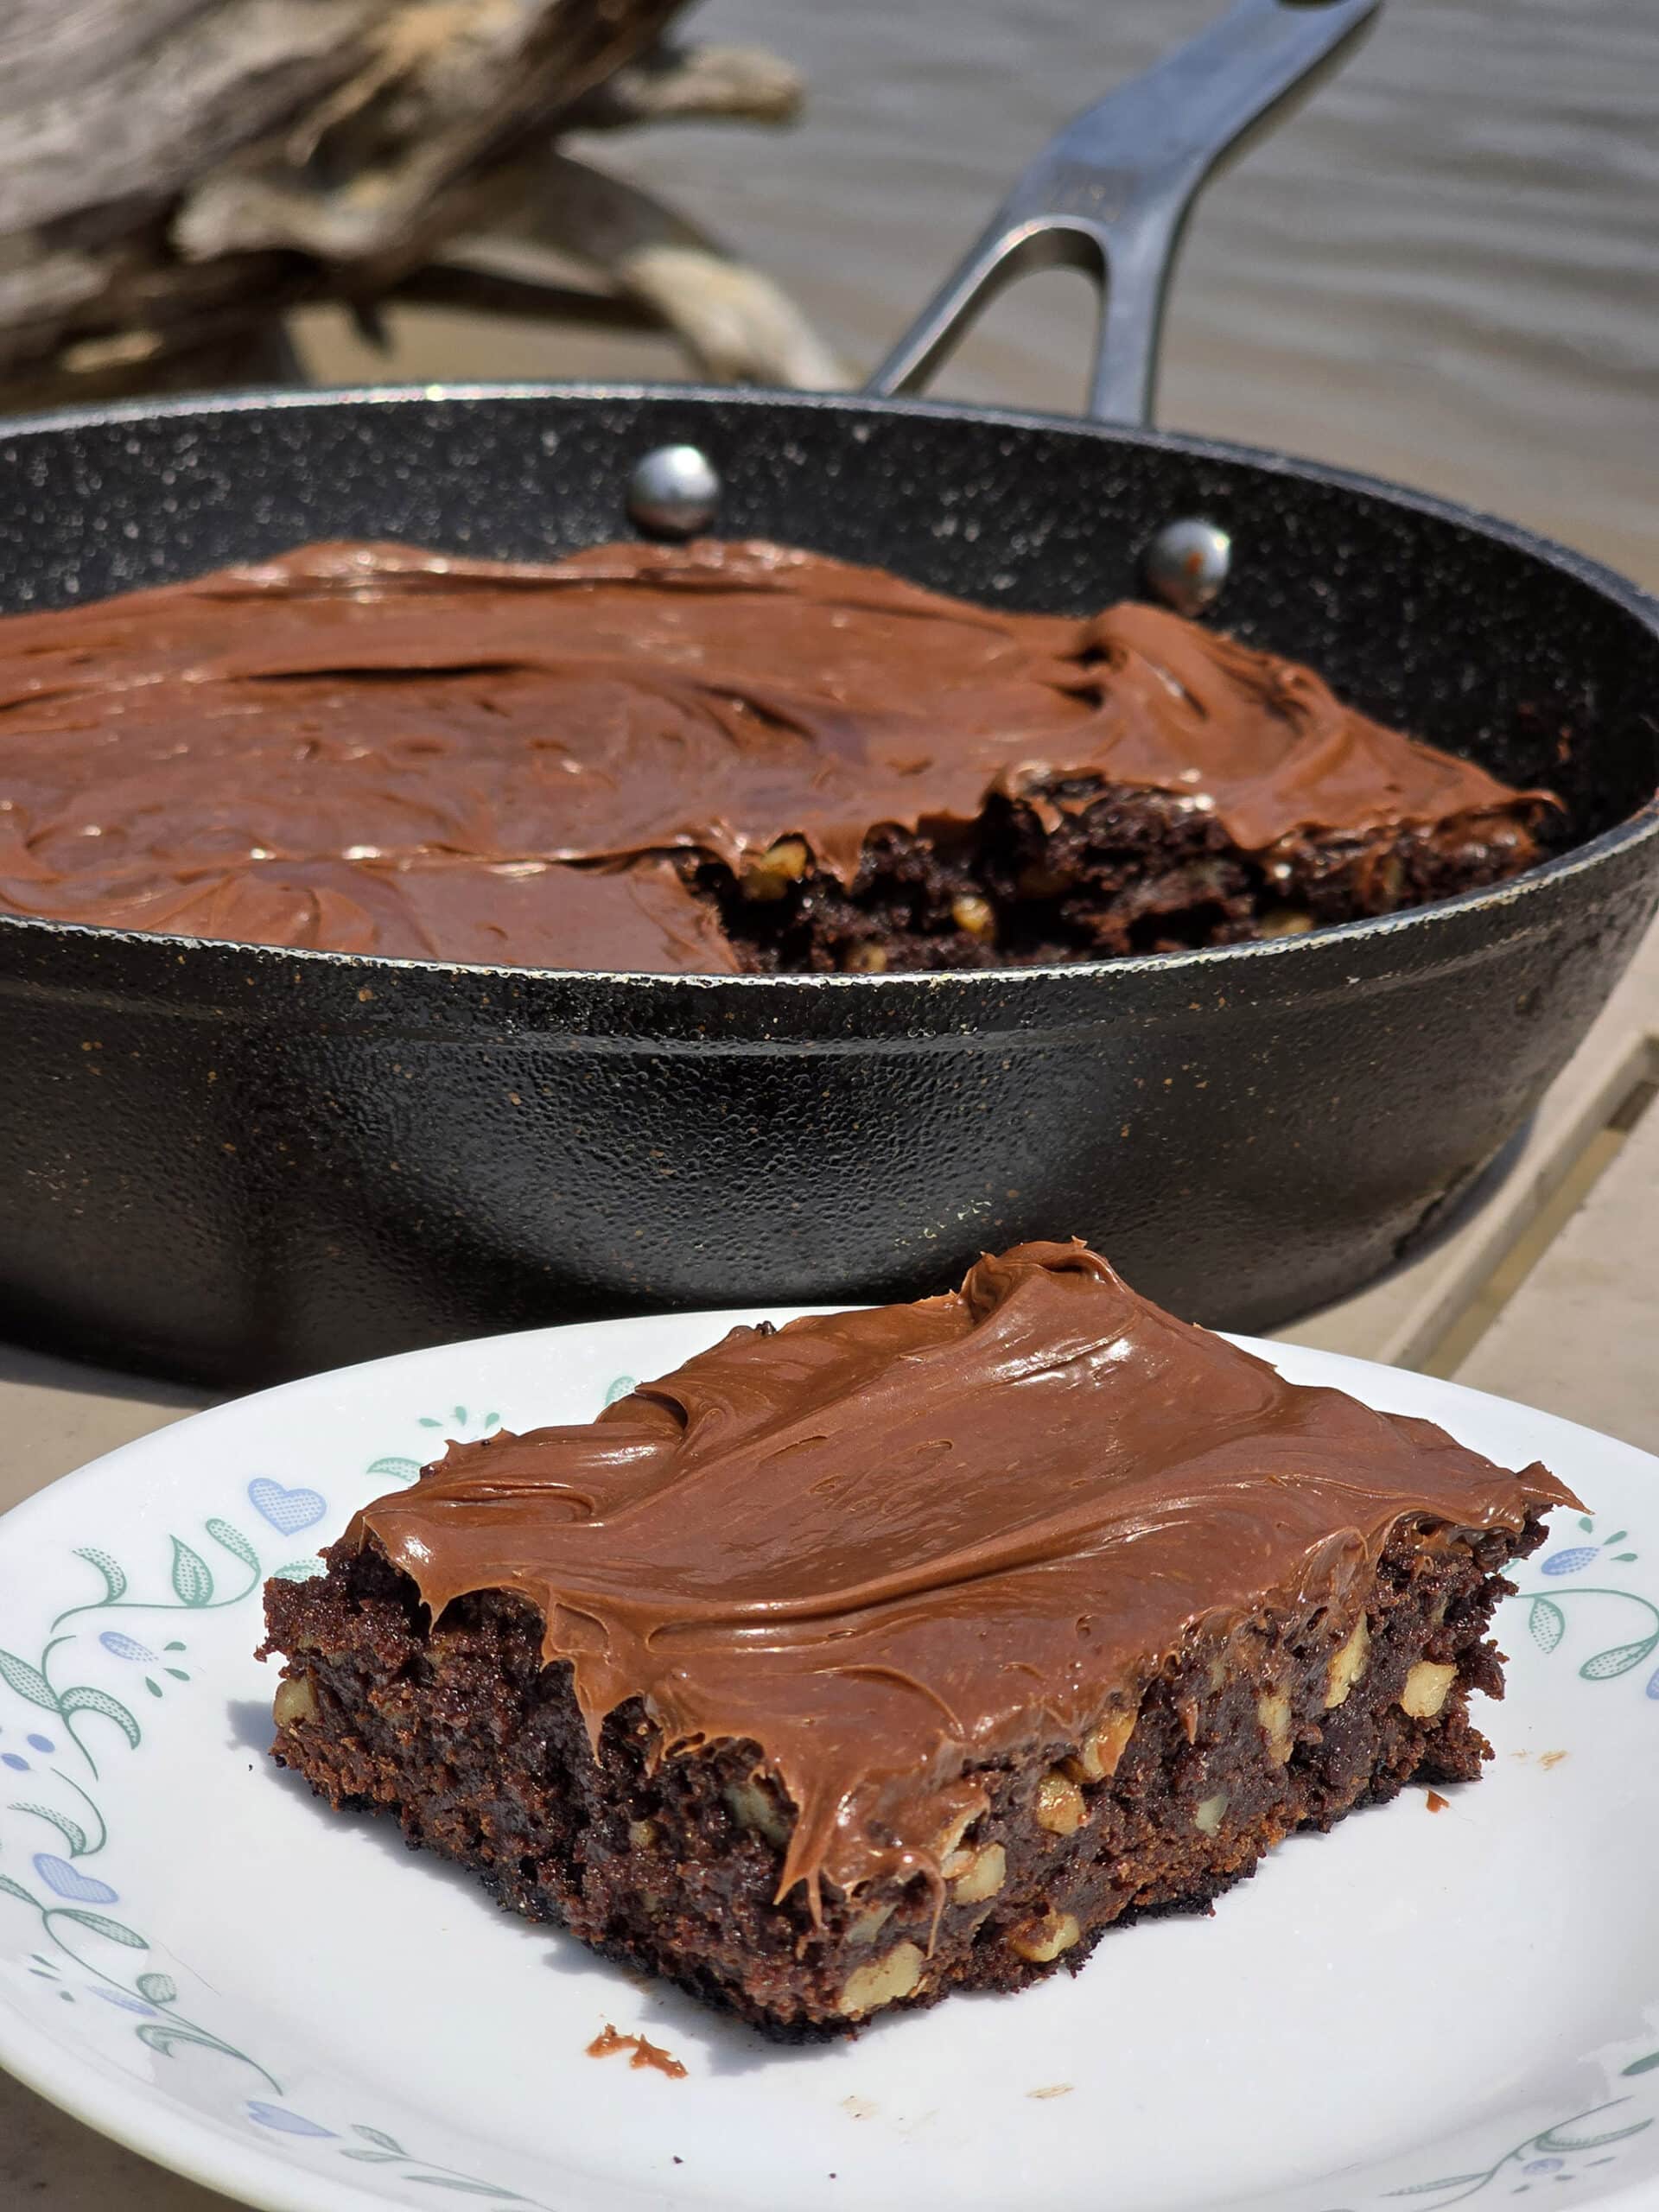
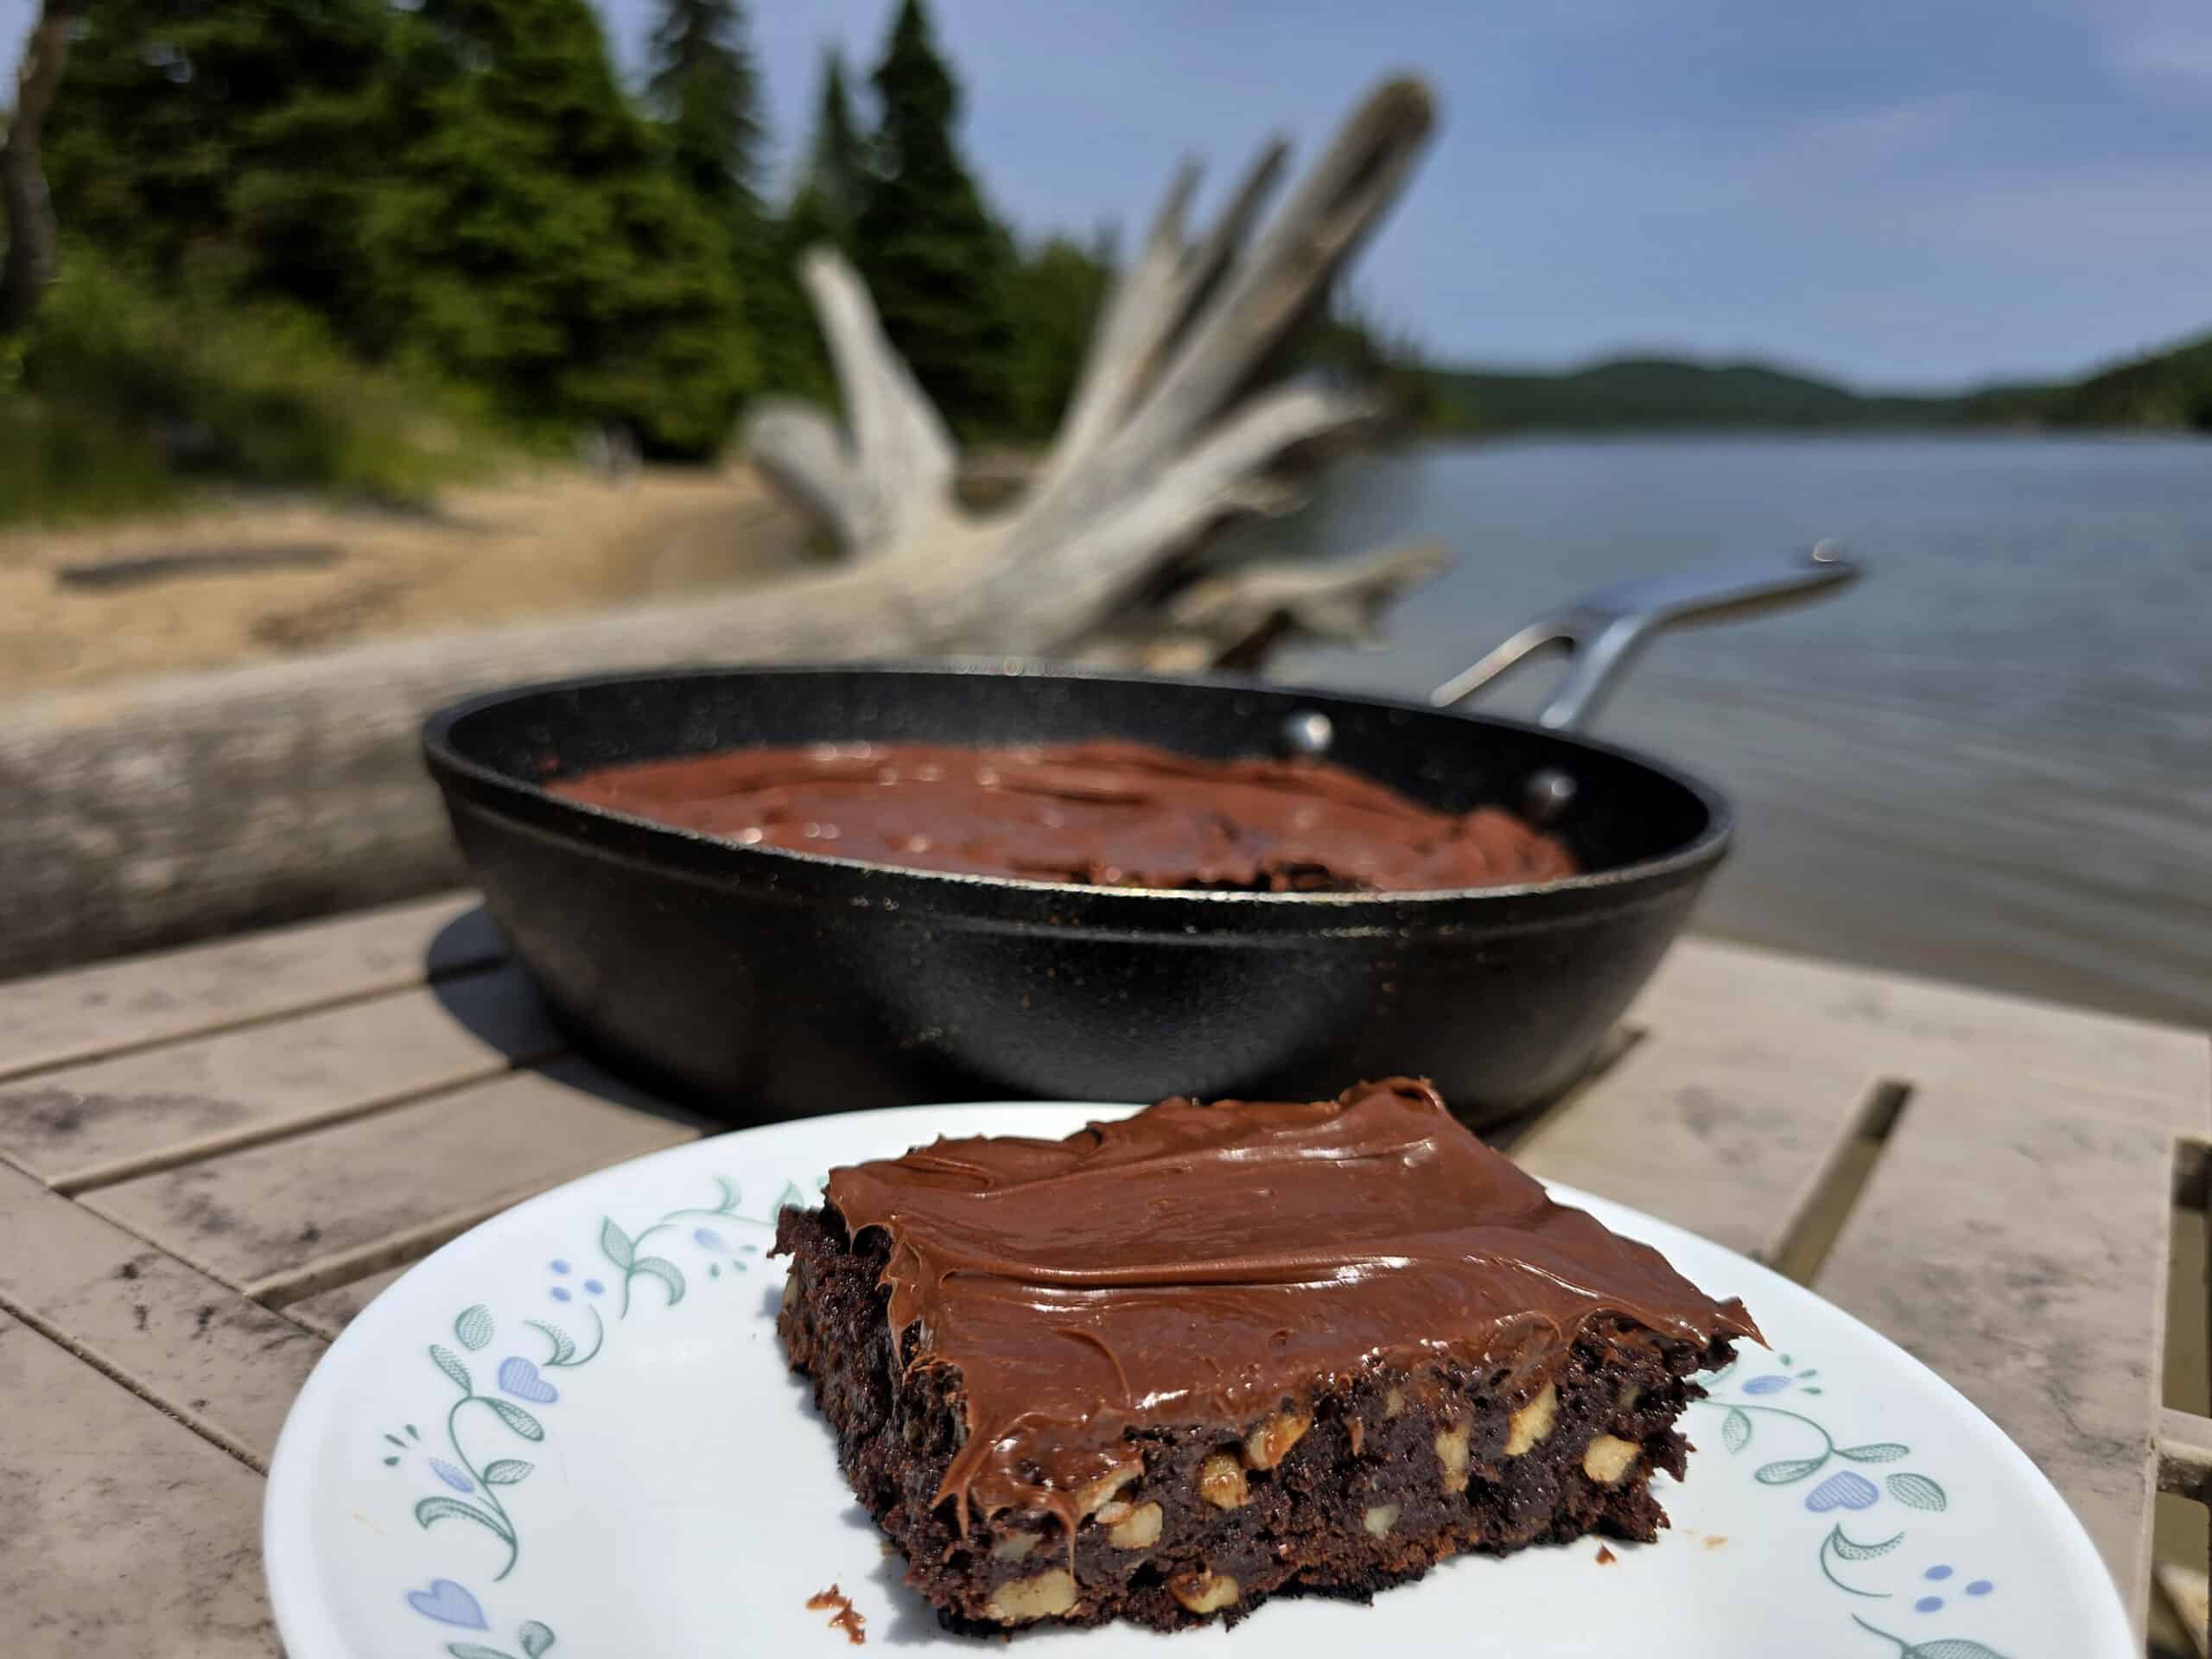
My campfire brownies recipe starts off with a simple homemade brownie mix, and is a fantastic dessert to cook over a campfire or grill. No oven needed!
While we do have a little table top air fryer / oven in the RV, this year we’ve REALLY gotten into “baking” outside, over the campfire.
So much nicer than unnecessarily heating up the camper, and hey... any excuse to sit around outside, enjoying the fresh air and scenery, right?
I had the opportunity to spend a fair amount of time honing my “no-bake baking” techniques in the past few months, so expect a fair number of those recipes in the next while!
These brownies are a fantastic camping dessert, or even an anytime snack. I do the dry ingredients up as a mix before our trips, and they’re ready to make up whenever we want - all you need at that point is butter and eggs!
Start to finish, you’re less than 25 minutes away from hot and fresh brownies!
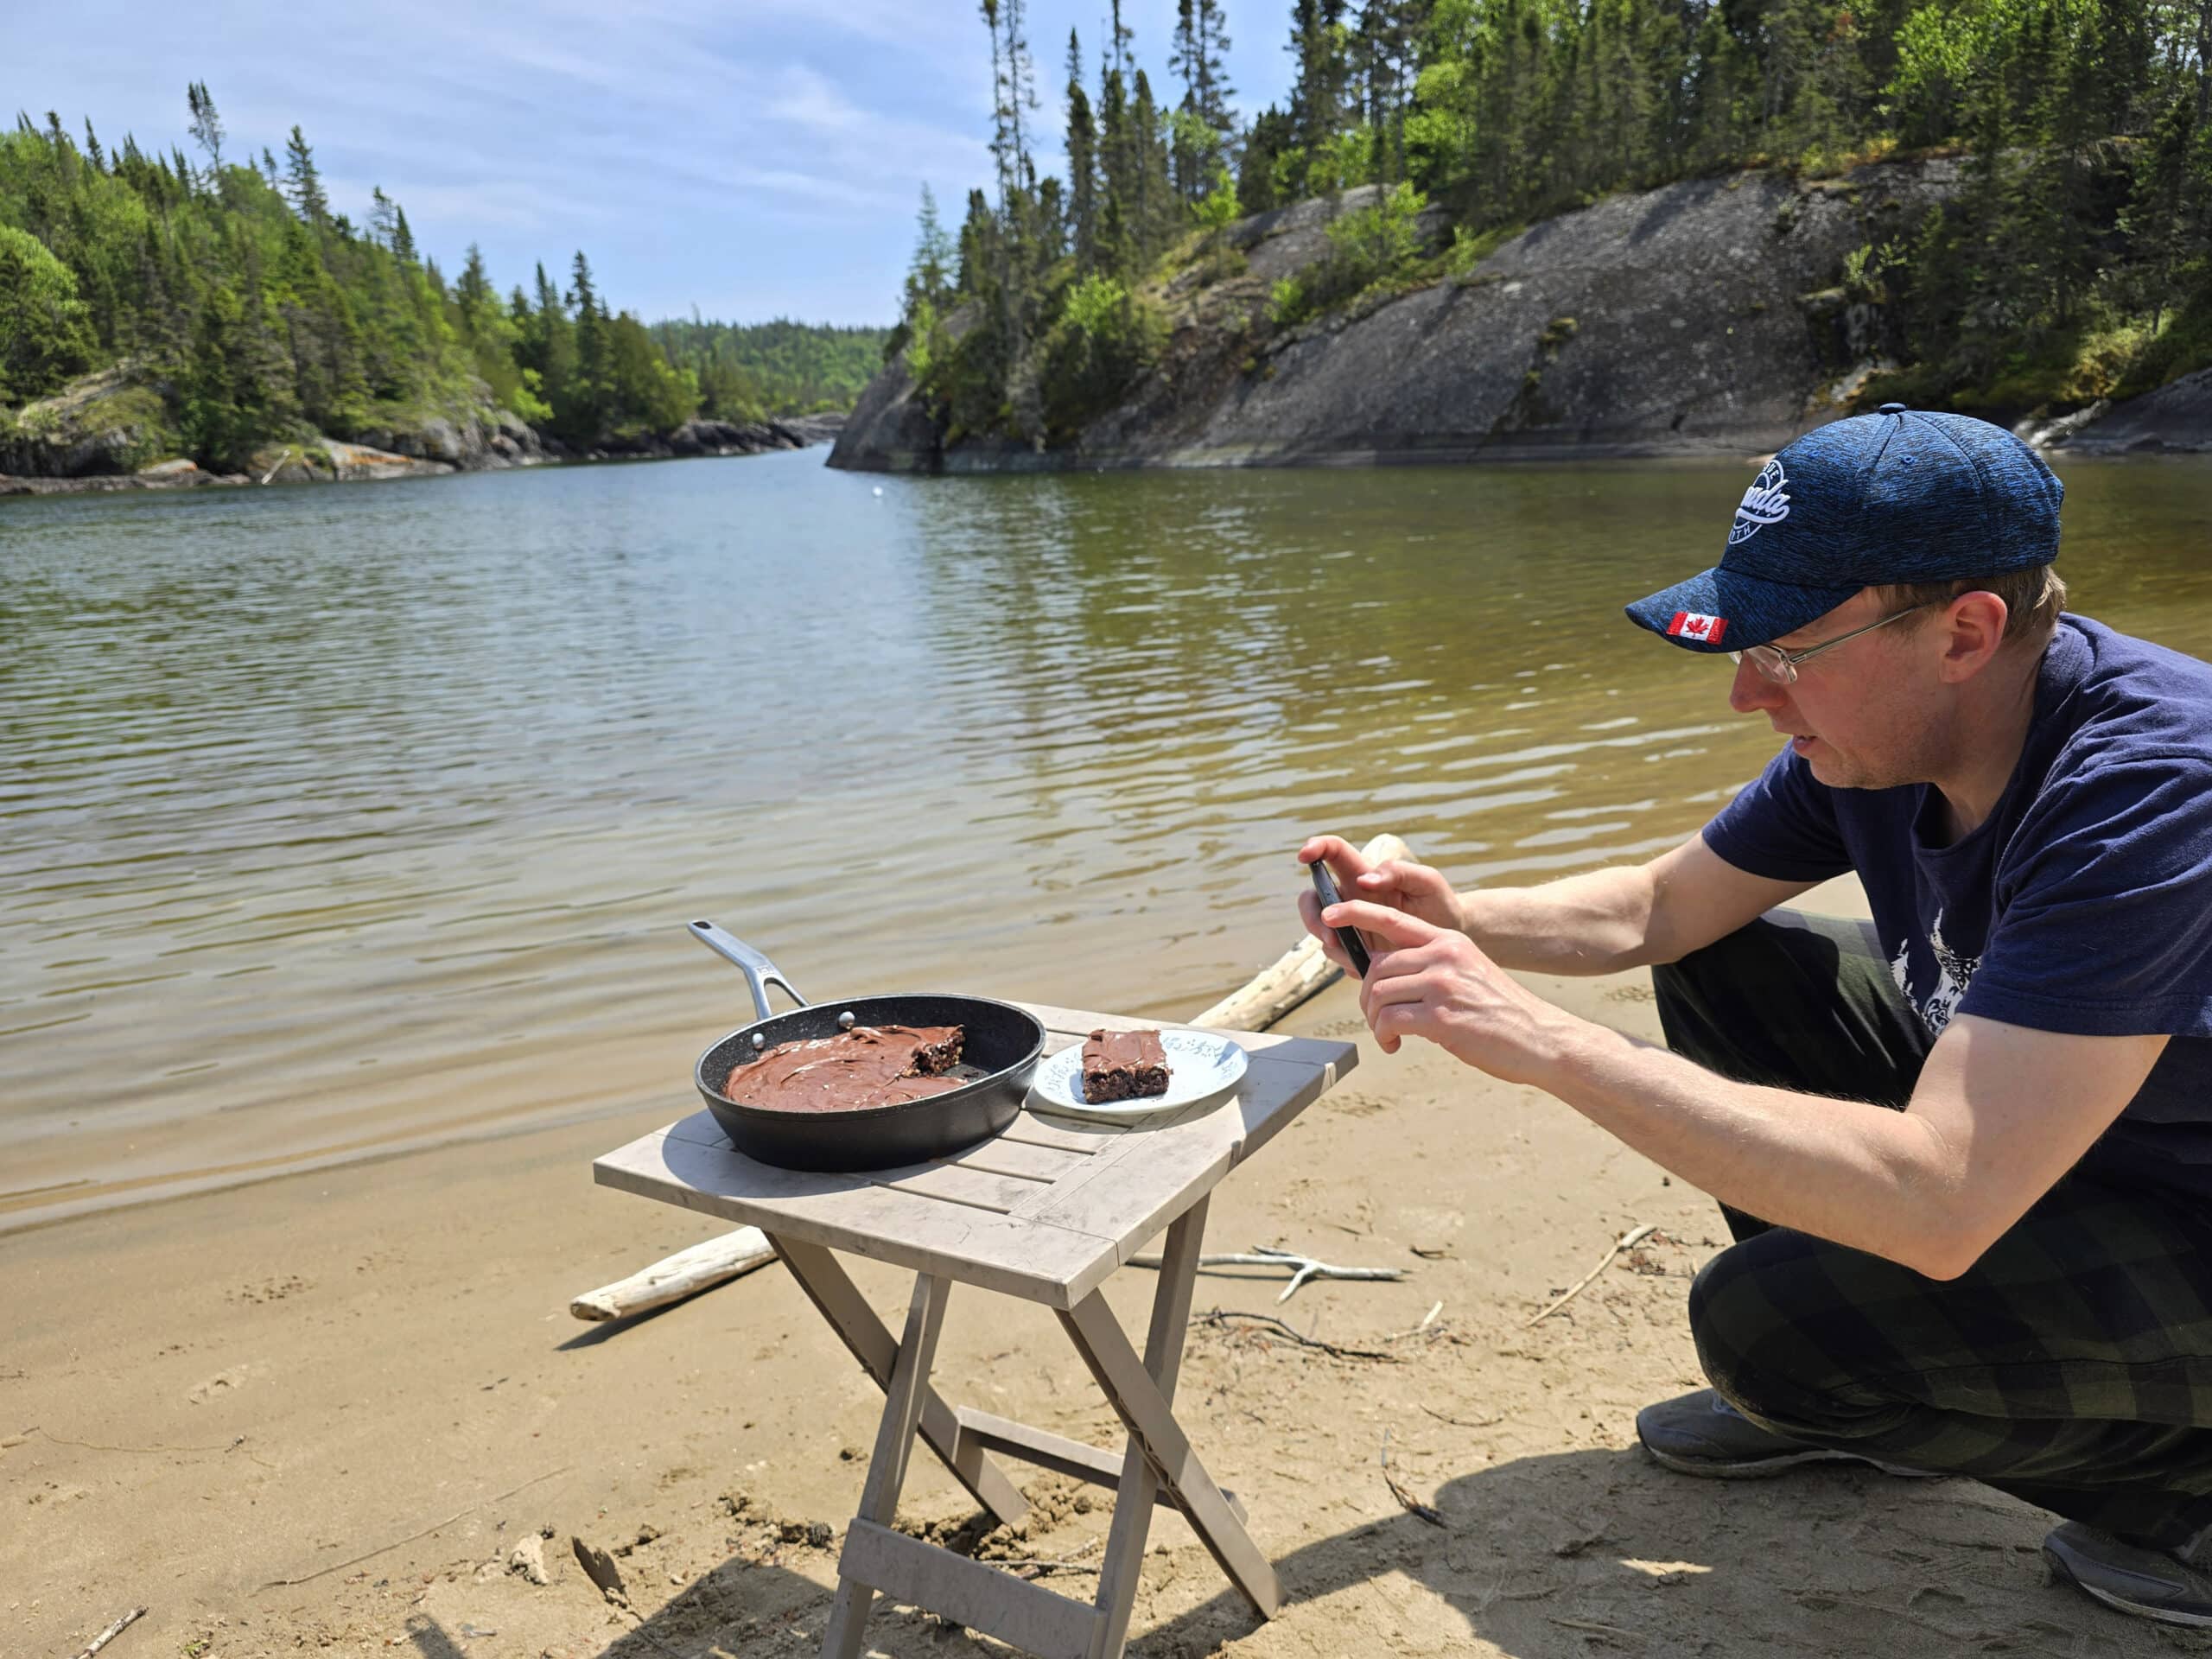
While we made this particular batch at Pukaskwa National Park, the nice thing is that these “no bake brownies” could even be made at home, over a stove.
Much better than turning the oven on in the summer!
Anyway, let’s look at what you’ll need for a batch of these campfire brownies...
Ingredients
This is an incredibly basic brownies recipe, for really easy “baking” at the campsite. There are very few ingredients, and they’re all simple ingredients. Anything you don’t already have on hand will be really easy to find in any grocery store.
As always, I have a few ingredient notes for you:
Brown Sugar
I like to use brown sugar in my brownie recipes - and for any of my chewy chocolate cookie recipes - because it enhances the chocolate taste, for a richer flavour in the final product.
That said... brown sugar doesn’t always play well in homemade mixes.
If you’re going to make your mixes ahead, be sure your brown sugar is packed for measuring, but FULLY broken up and well distributed in the mix, or else you could end up with really hard clumps.
It can help to measure your ingredients into a food processor, and blitz it until it’s uniform.
If you don’t want to mess with any of that, feel free to substitute the same amount of granulated sugar for the brown sugar.
“Add-Ins”
While I love a good basic brownie, add ins are a fun way to customize it.
There’s a LOT of room for customization here, too!
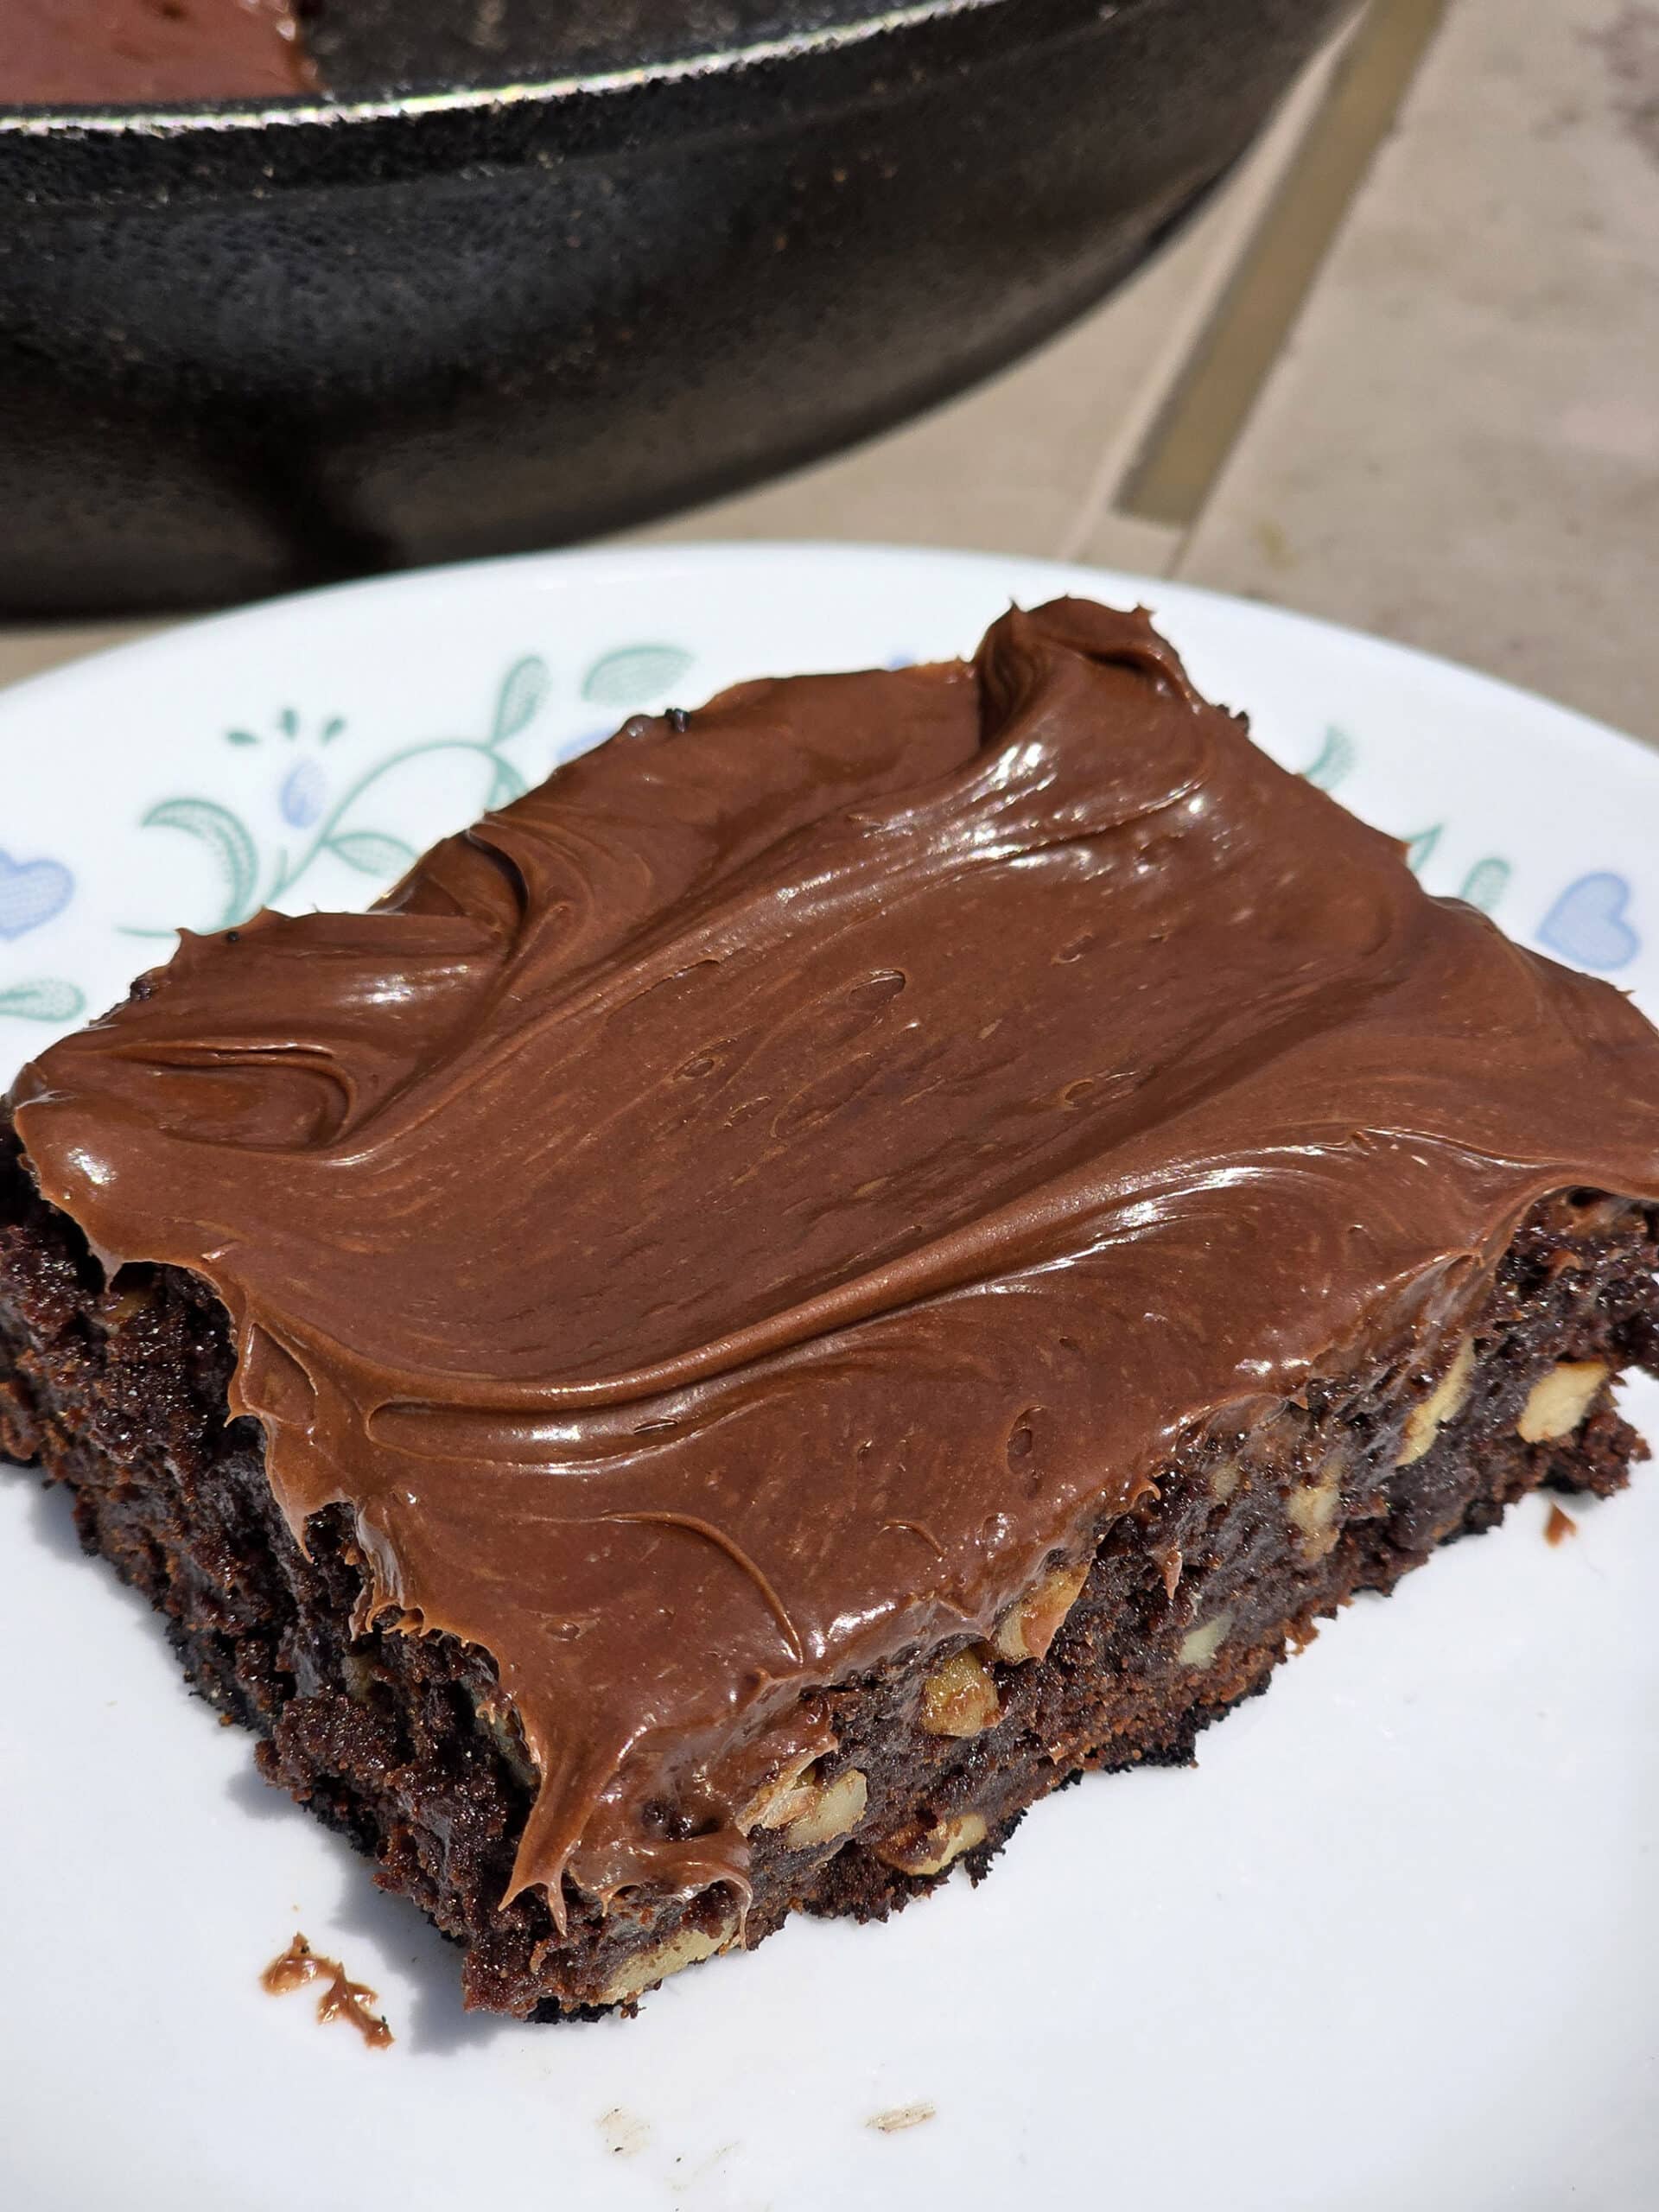
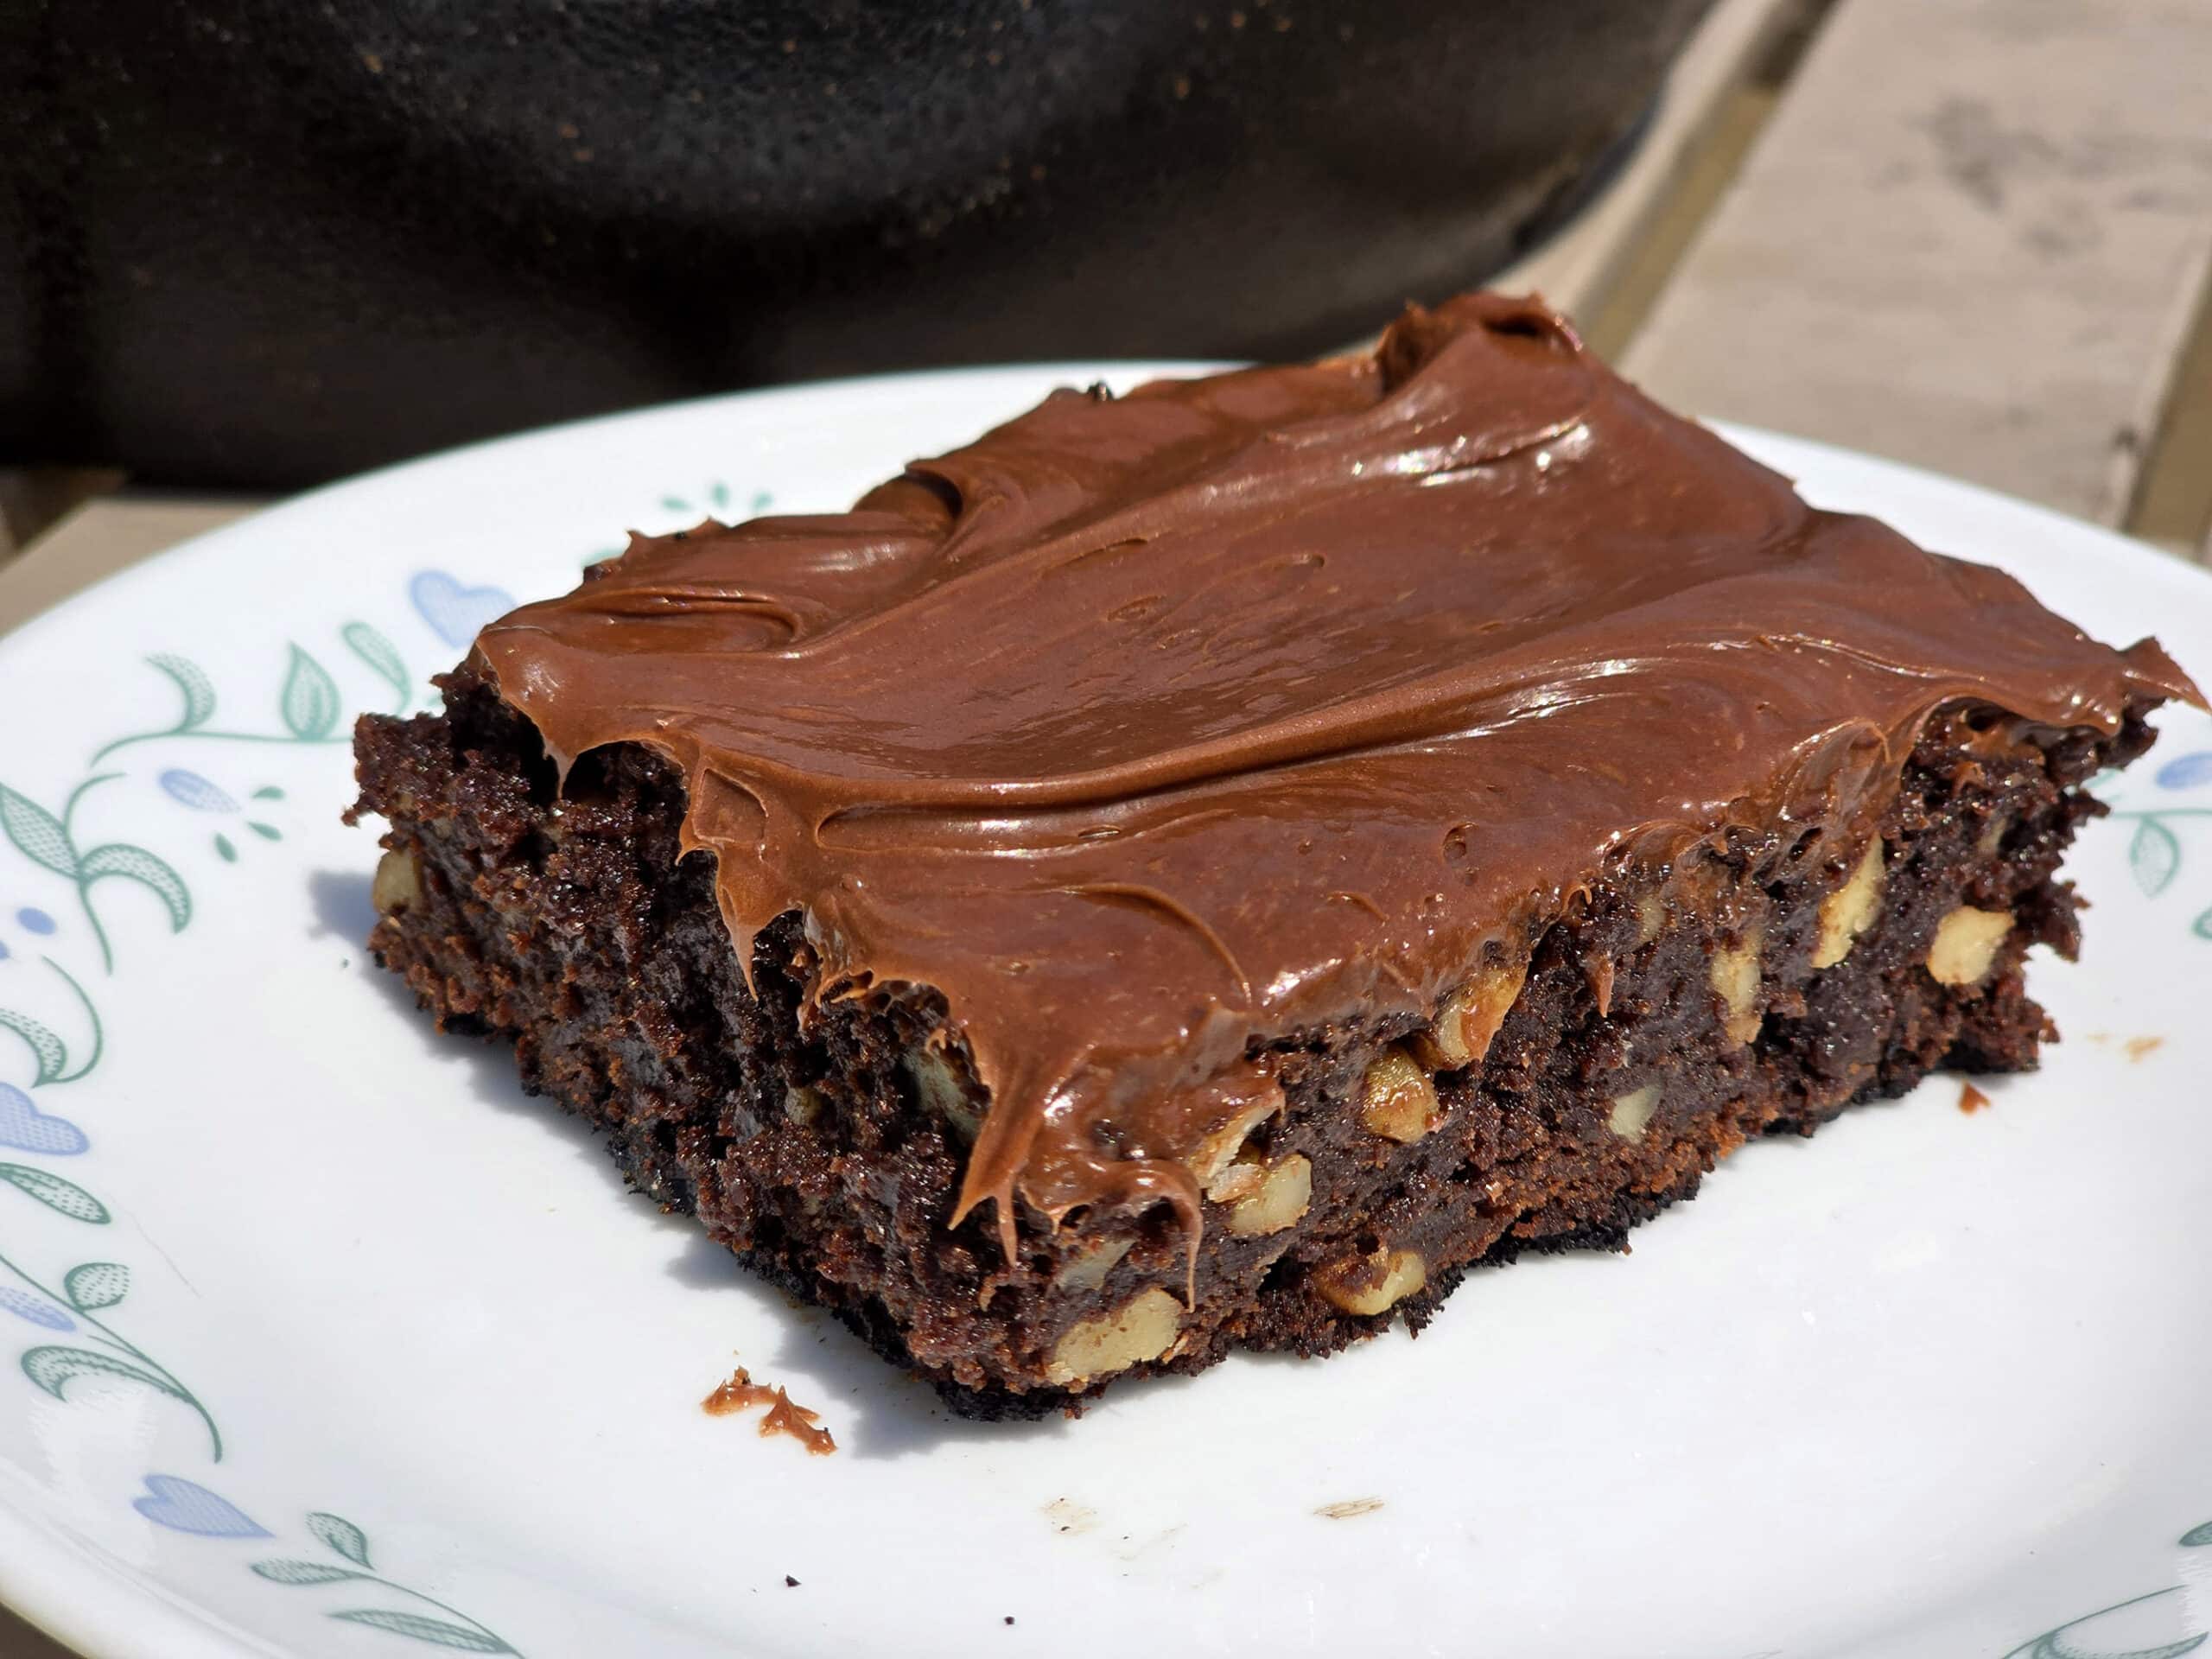
Chocolate chips - Dark chocolate chips, milk chocolate chips, white chocolate chips, etc - or chopped nuts are pretty common additions. I like chopped walnuts, but I’ve used pecans, peanuts, etc.
On the subject of pecans, chopped up bits of soft caramels - or caramel baking bits - plus pecans gives you “Turtle” brownies.
Then, there are the alternate chips - butterscotch chips, peanut butter chips, even peppermint white chocolate chips - which can be fun.
Candy is another great option - Smarties (in Canada!), Reese’s Pieces, M&Ms, mini peanut butter cups, etc - all are great in these skillet brownies.
In terms of amount, I’ll usually add anywhere between ½ cup - 1 cup worth of whatever I’m adding... and I generally eyeball it. This doesn’t need to be an exact science!
Everything Else
Rounding out this recipe, you will need:
Unsweetened Cocoa Powder
Unsalted Butter
Granulated Sugar
All-purpose flour
Large eggs
Salt
... I just don’t have anything to add, as far as these last few ingredients go. Like I said - super basic ingredients!
Share the Love!If you’ve made one of our recipes, be sure to take some pics of your handiwork! If you post it to Bluesky, be sure to tag us - @2NerdsInATruck, or you can tag us on TikTok, if you’re posting video. We're also on Pinterest, so you can save all your favourite recipes and park reviews to your own boards! Also, be sure to subscribe to our free email newsletter, so you never miss out on any of our nonsense. Well, the published nonsense, anyway! |
How to Make Campfire Brownies
The full recipe is in the printable recipe card at the end of this post, here is the visual walk through:
Homemade Brownie Mix
Label a medium sized freezer baggie with “Brownie Mix”, the ingredients under “To Use the Mix”, and any of the directions you’ll want to have on hand.
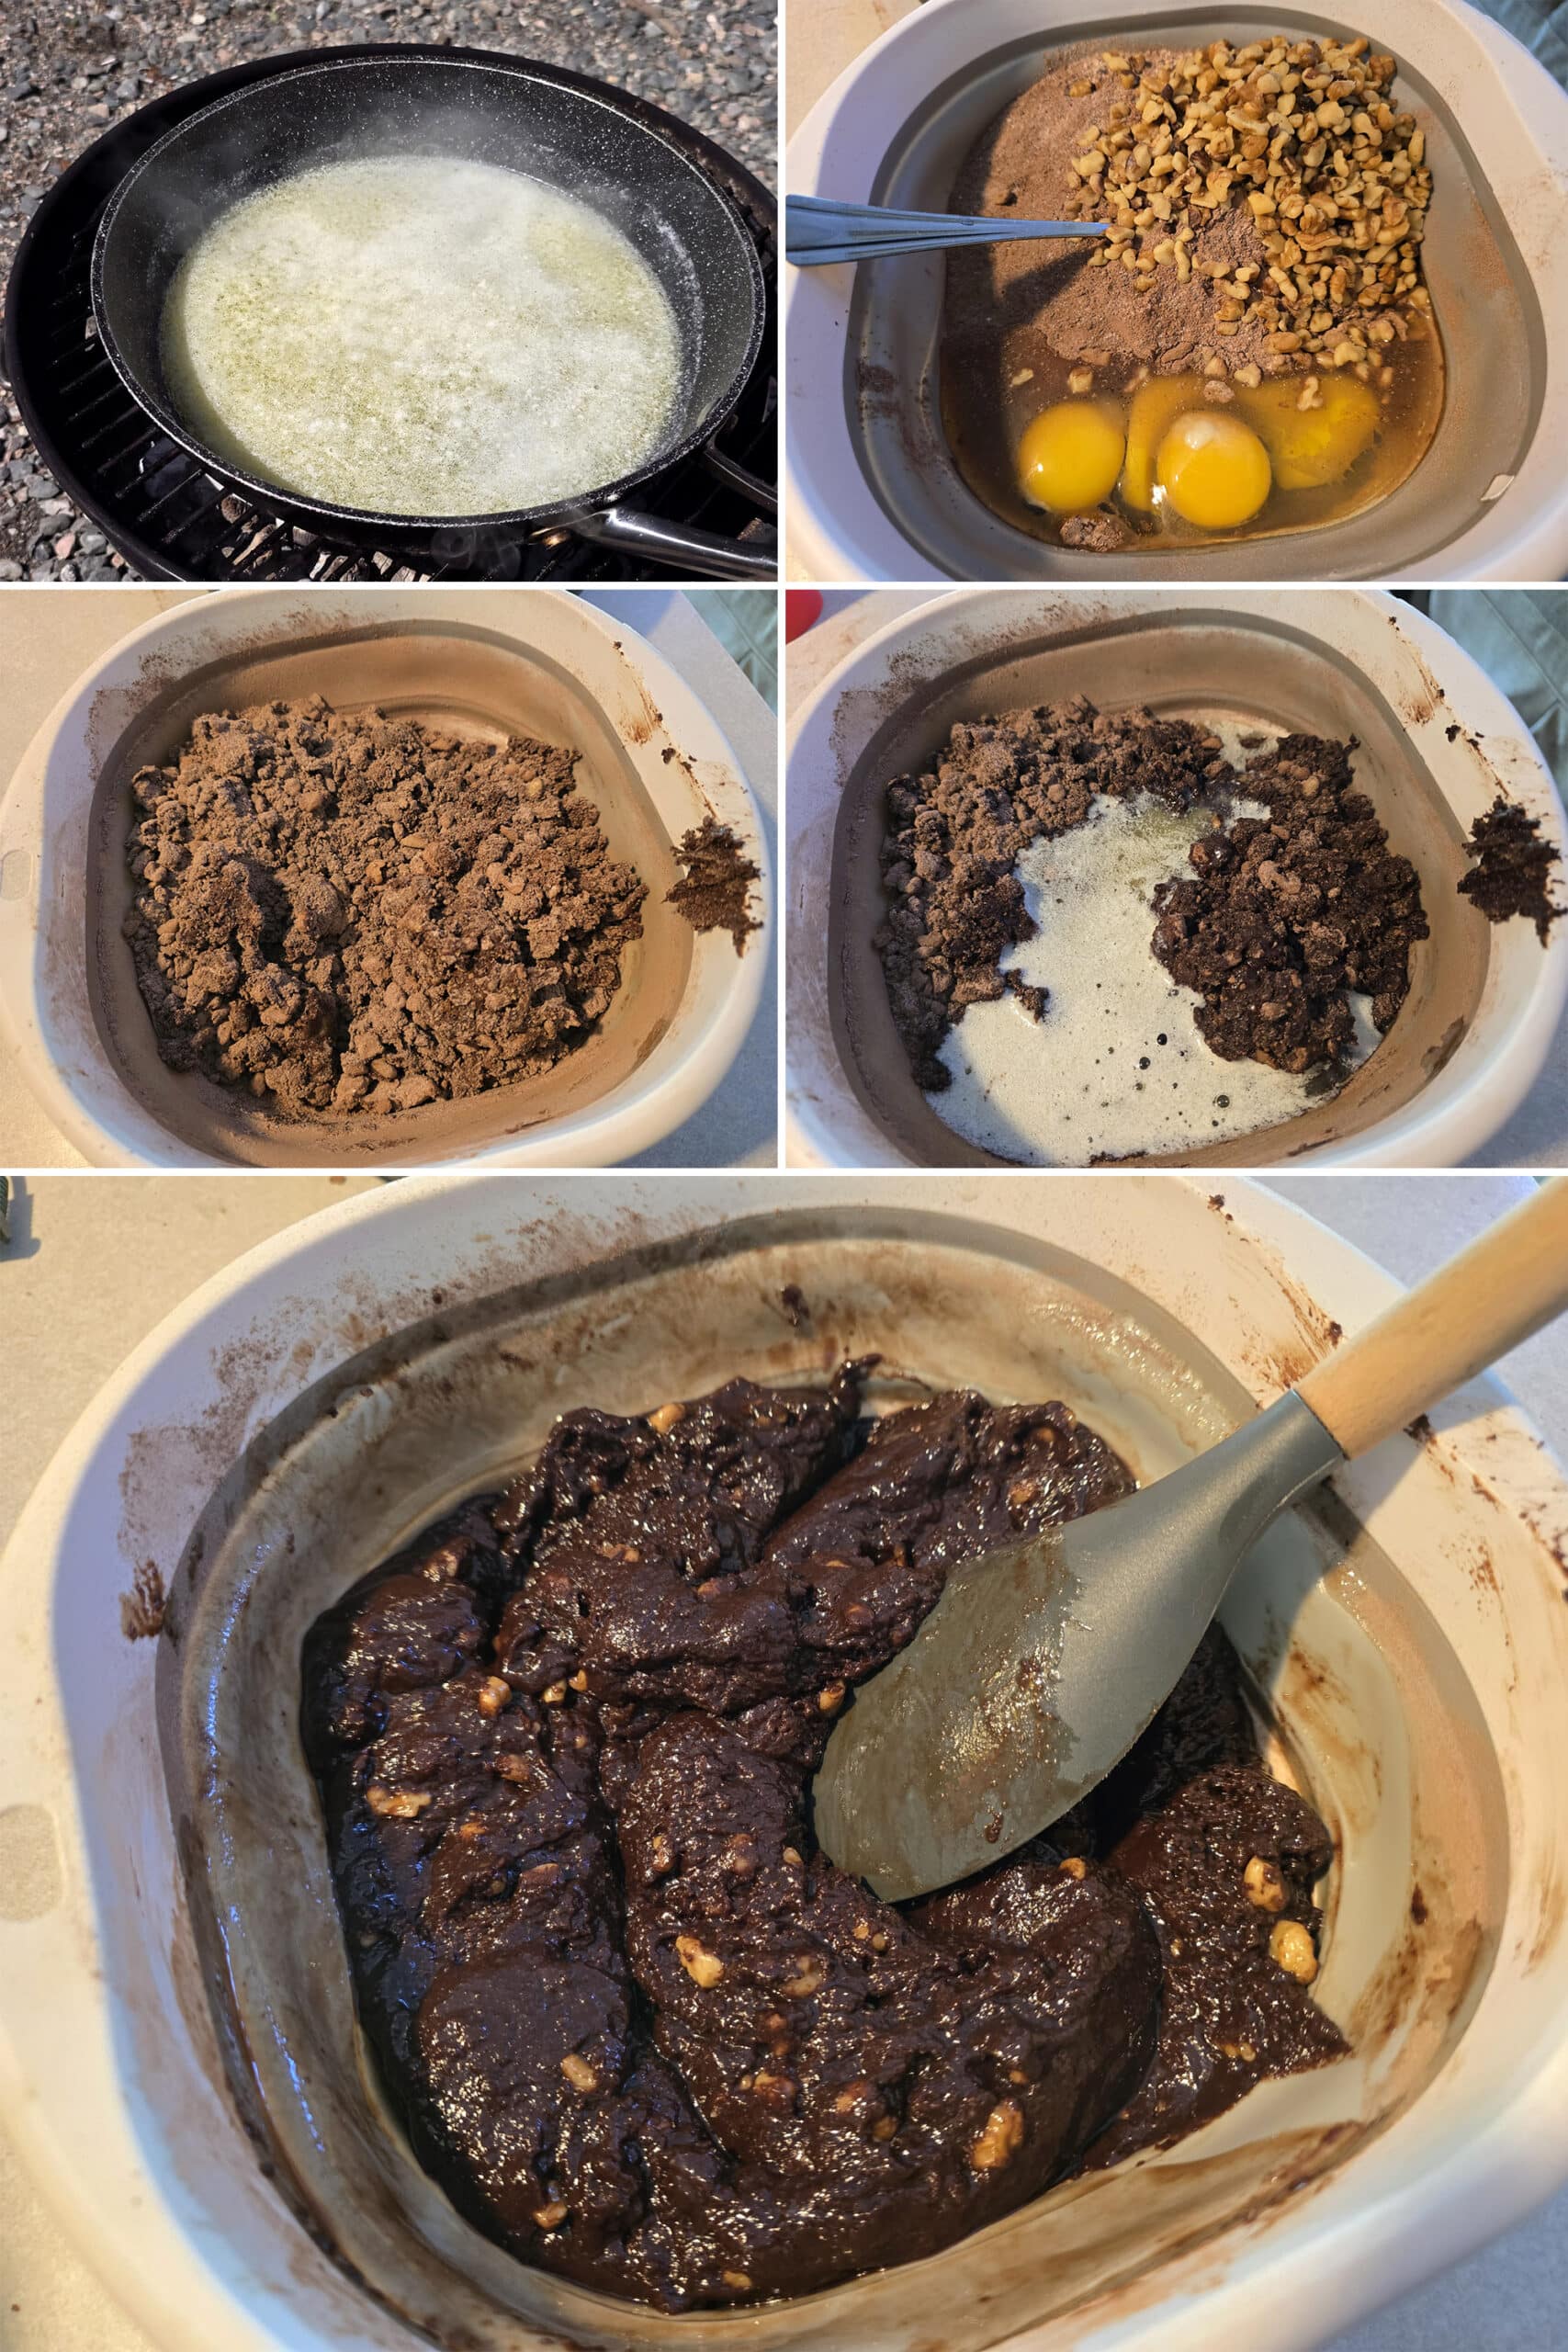
Measure the cocoa powder, sugars, flour, and salt into the baggie. Seal, shake to combine, and allow to settle for a few seconds.
Re-open the baggie, gently press out any excess air and re-seal. Store in a cool, dark, DRY place until ready to use.
(Note: Making the mix ahead of time is optional. If you’re measuring everything as you’re making the brownies, just measure all of these ingredients as “the dry ingredients”)

To Use the Brownie Mix
Get a low fire going. You can cook these brownies on a charcoal grill, a BBQ, or on a grill plate over a campfire, but aim LOW. It’s better to have a low fire and need to cook it longer, than to run too hot and burn it before it cooks!
Dump your brownie mix - or measure the dry ingredients - into a medium bowl.
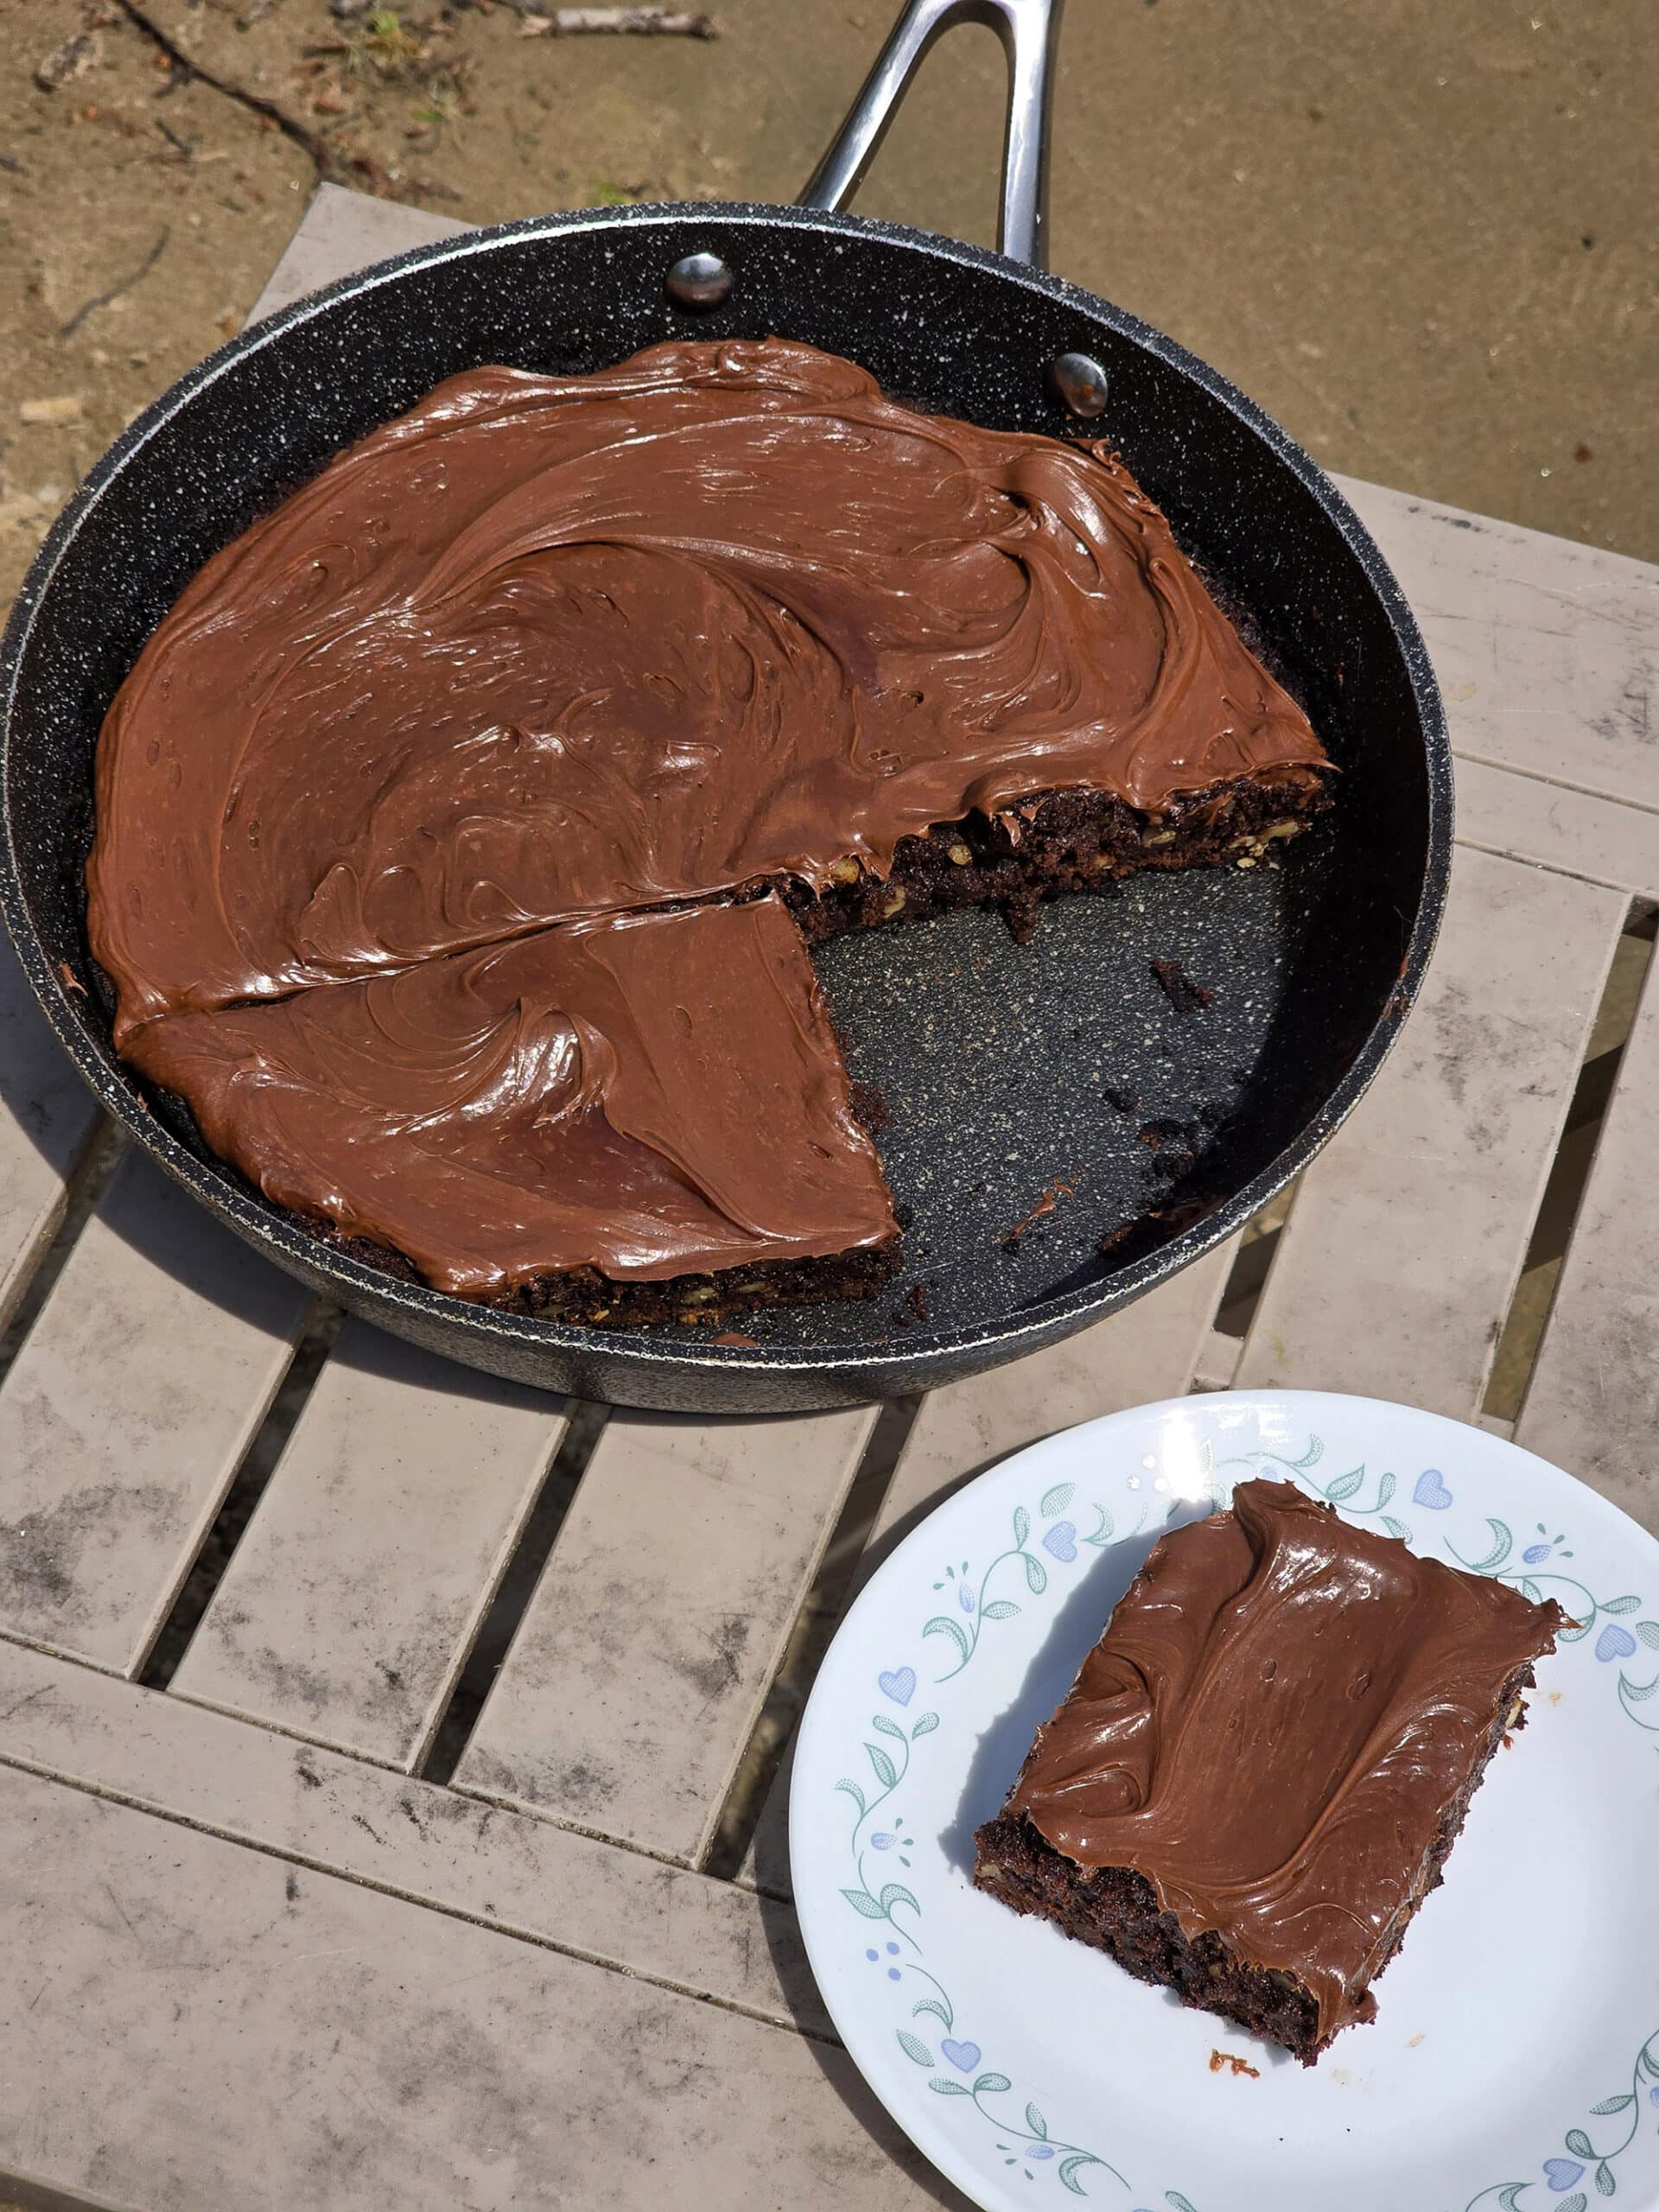
Melt the butter in a 9" cast iron skillet or Dutch oven, then remove pan from heat.
Add the melted butter to the bowl of dry ingredients, along with the eggs. Stir until just combined - it’s ok if the batter is a bit lumpy.
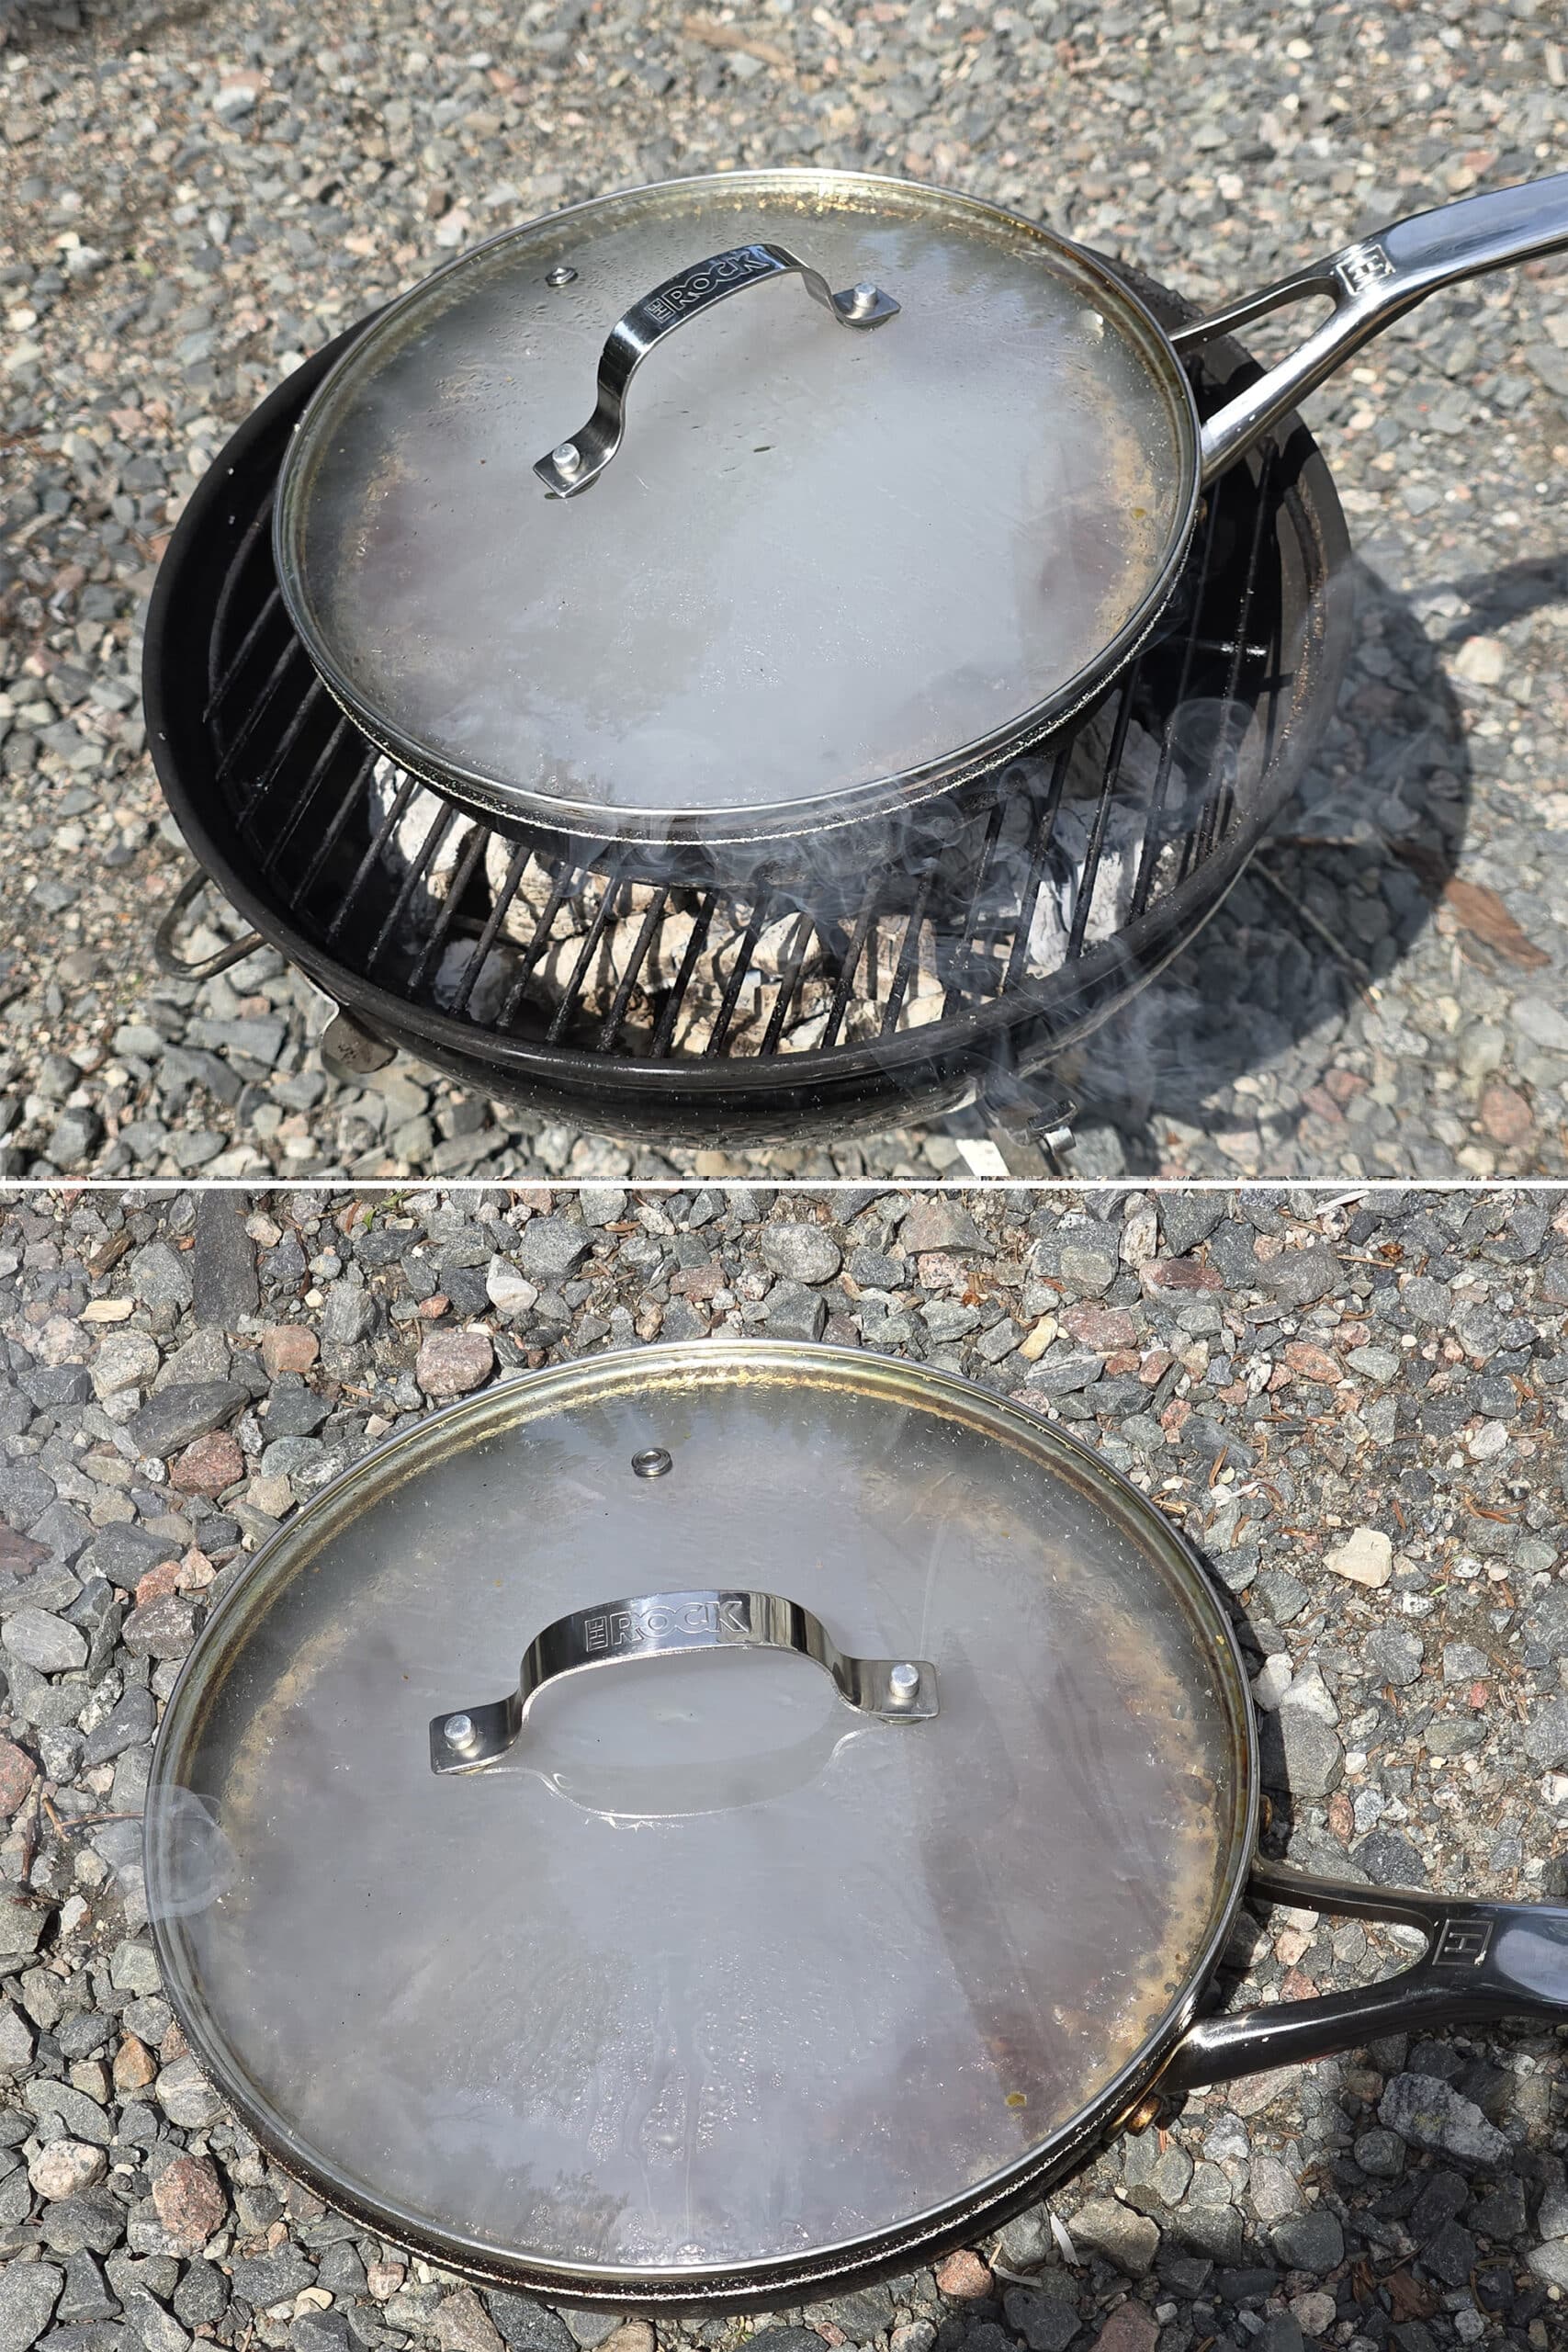
Cover the pan with a lid, return to the grill. I HIGHLY recommend using a glass lid, so you can keep an eye on what’s going on, without having to lift it. Best to keep the hot air contained!)
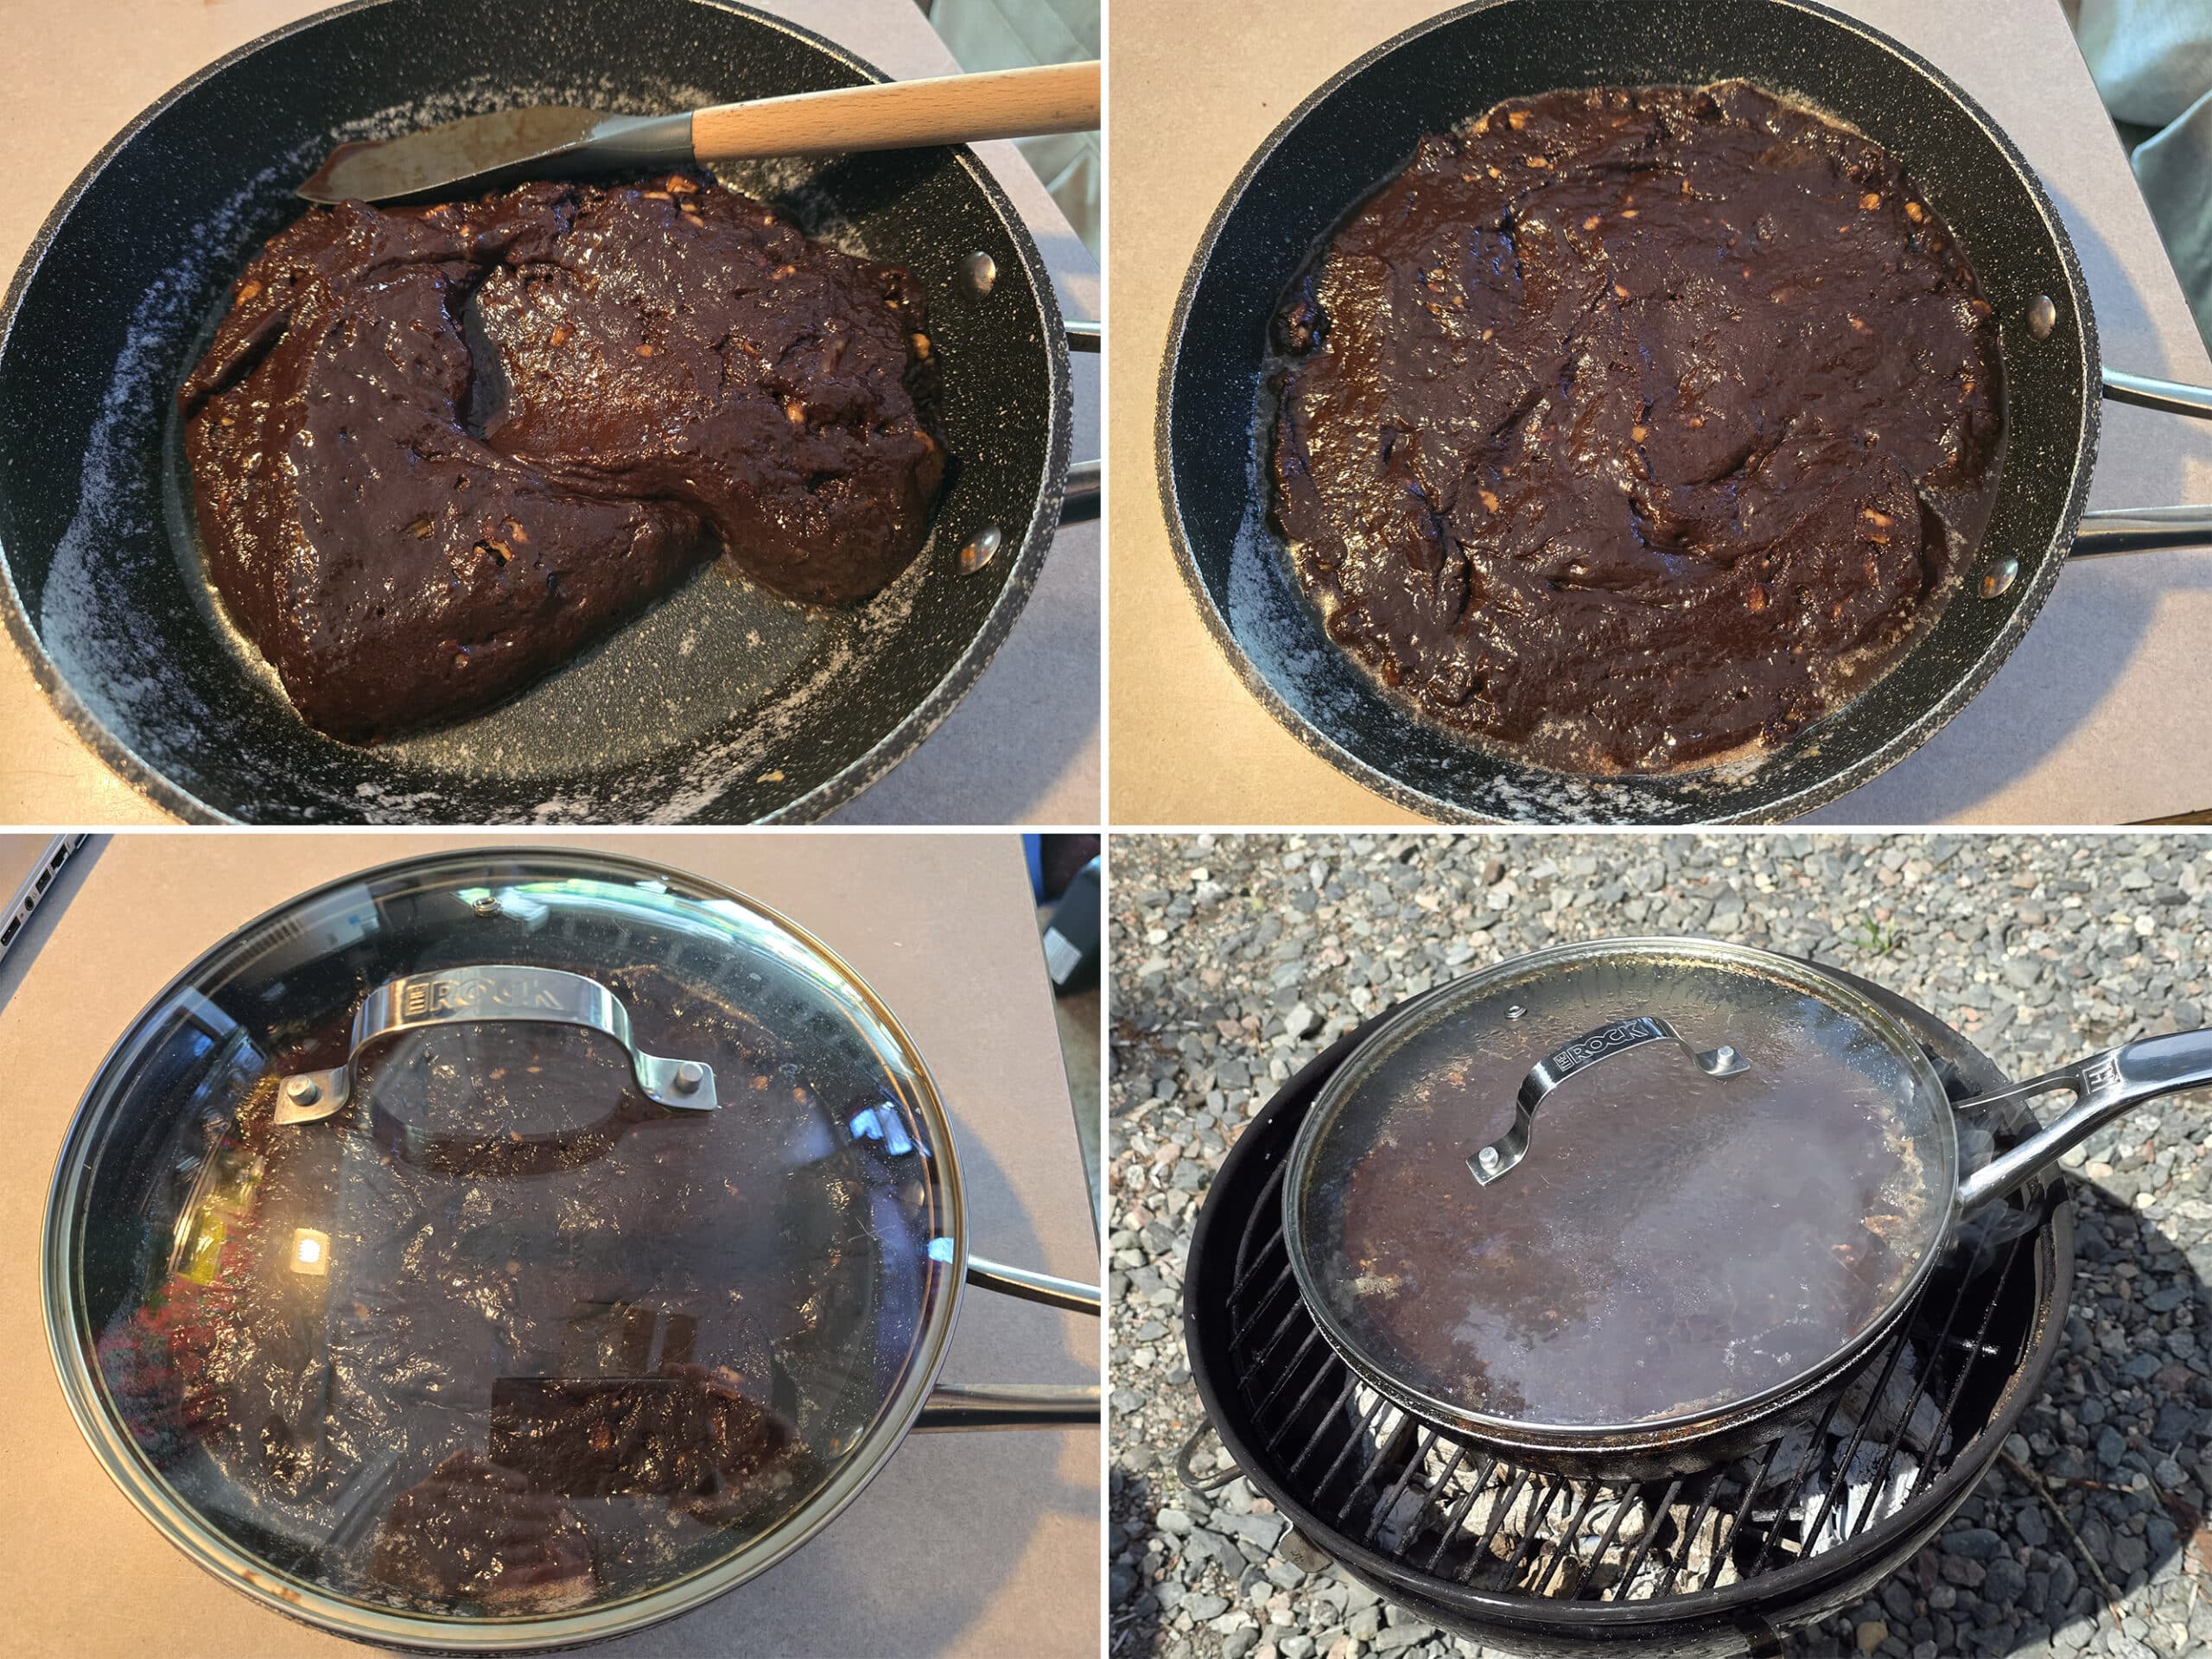
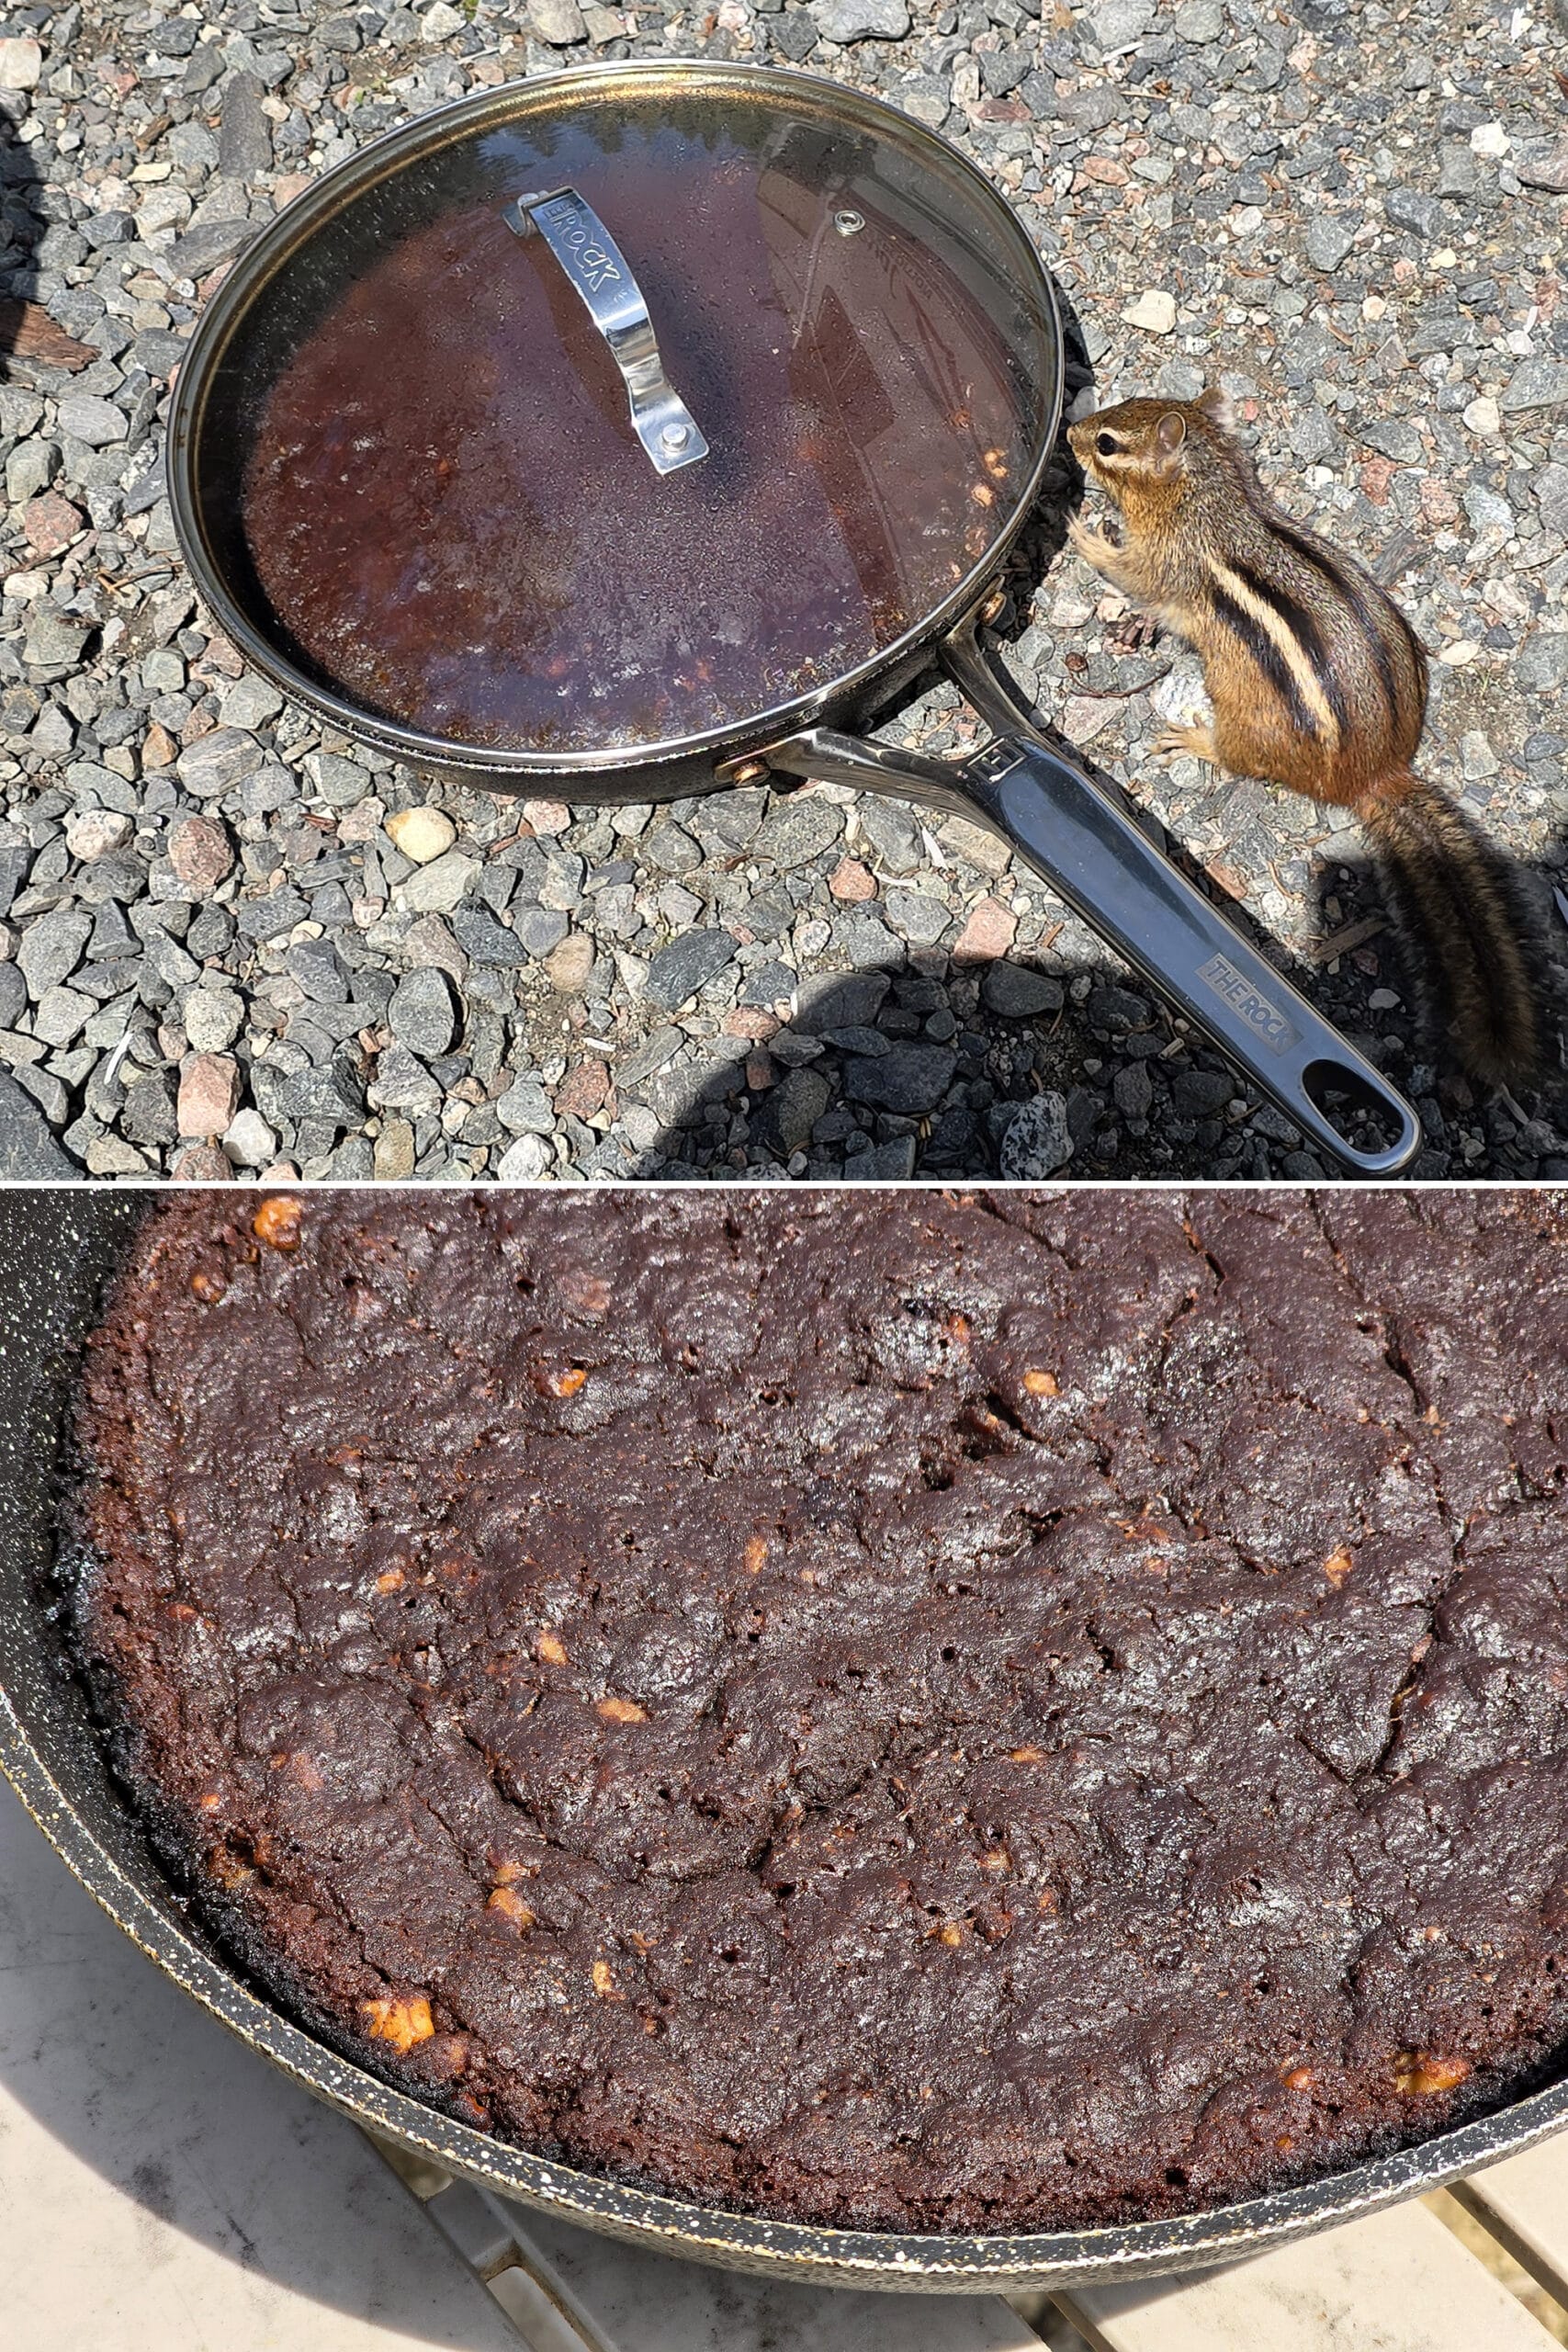
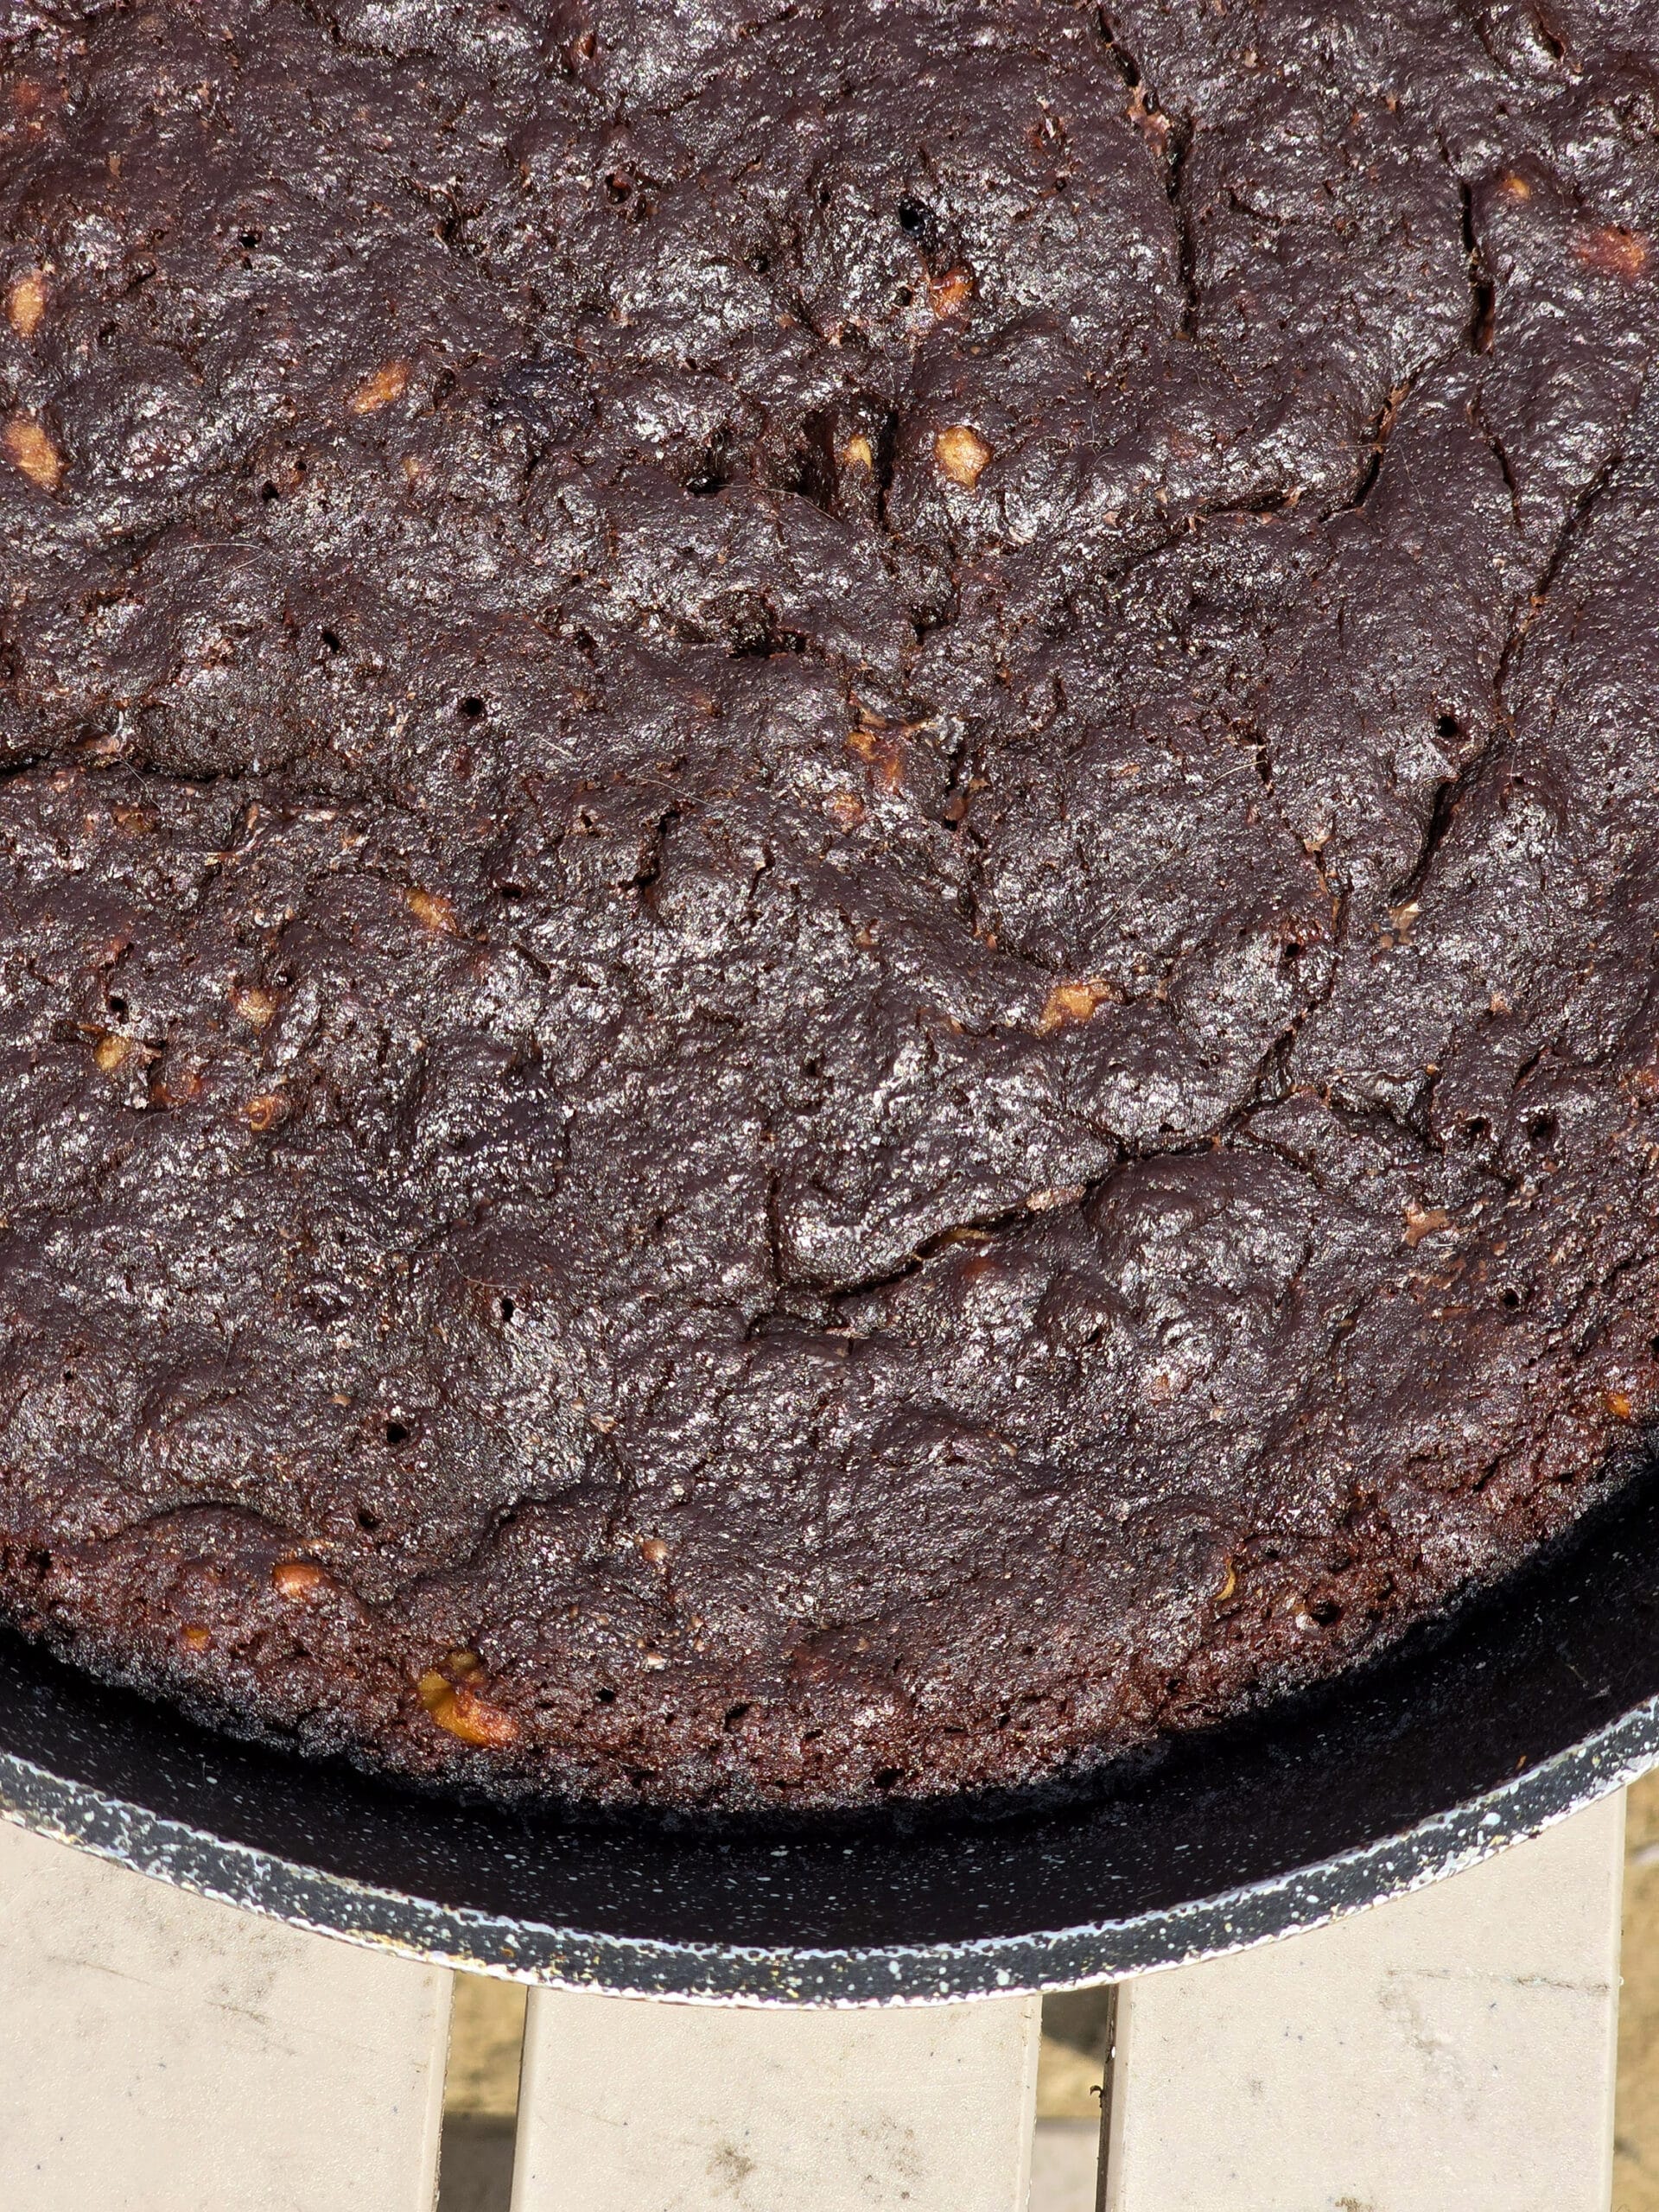
Note: The cooking time will vary wildly based on your heat source and pan. Keep an eye on the brownies - as it’s getting close to the point of needing to be taken off the fire, there will be a lot of condensation forming on the lid, and the outer edge of the crust will start to get golden brown.
You want to take it off the heat when the brownies look MOSTLY set and outer edge is golden - any further will char the crust. It WILL look wet on top!
Uncover the brownies, and check to see if it’s done. A toothpick or butter knife inserted into the center will be ALMOST clean when pulled out. Sticky bits, but not actually wet batter. This will firm up as it cools!
If it’s not quite done, return to the heat for another few minutes, the allow to sit for another 5 - without removing the lid. Don’t overcook it, or it will be dry!
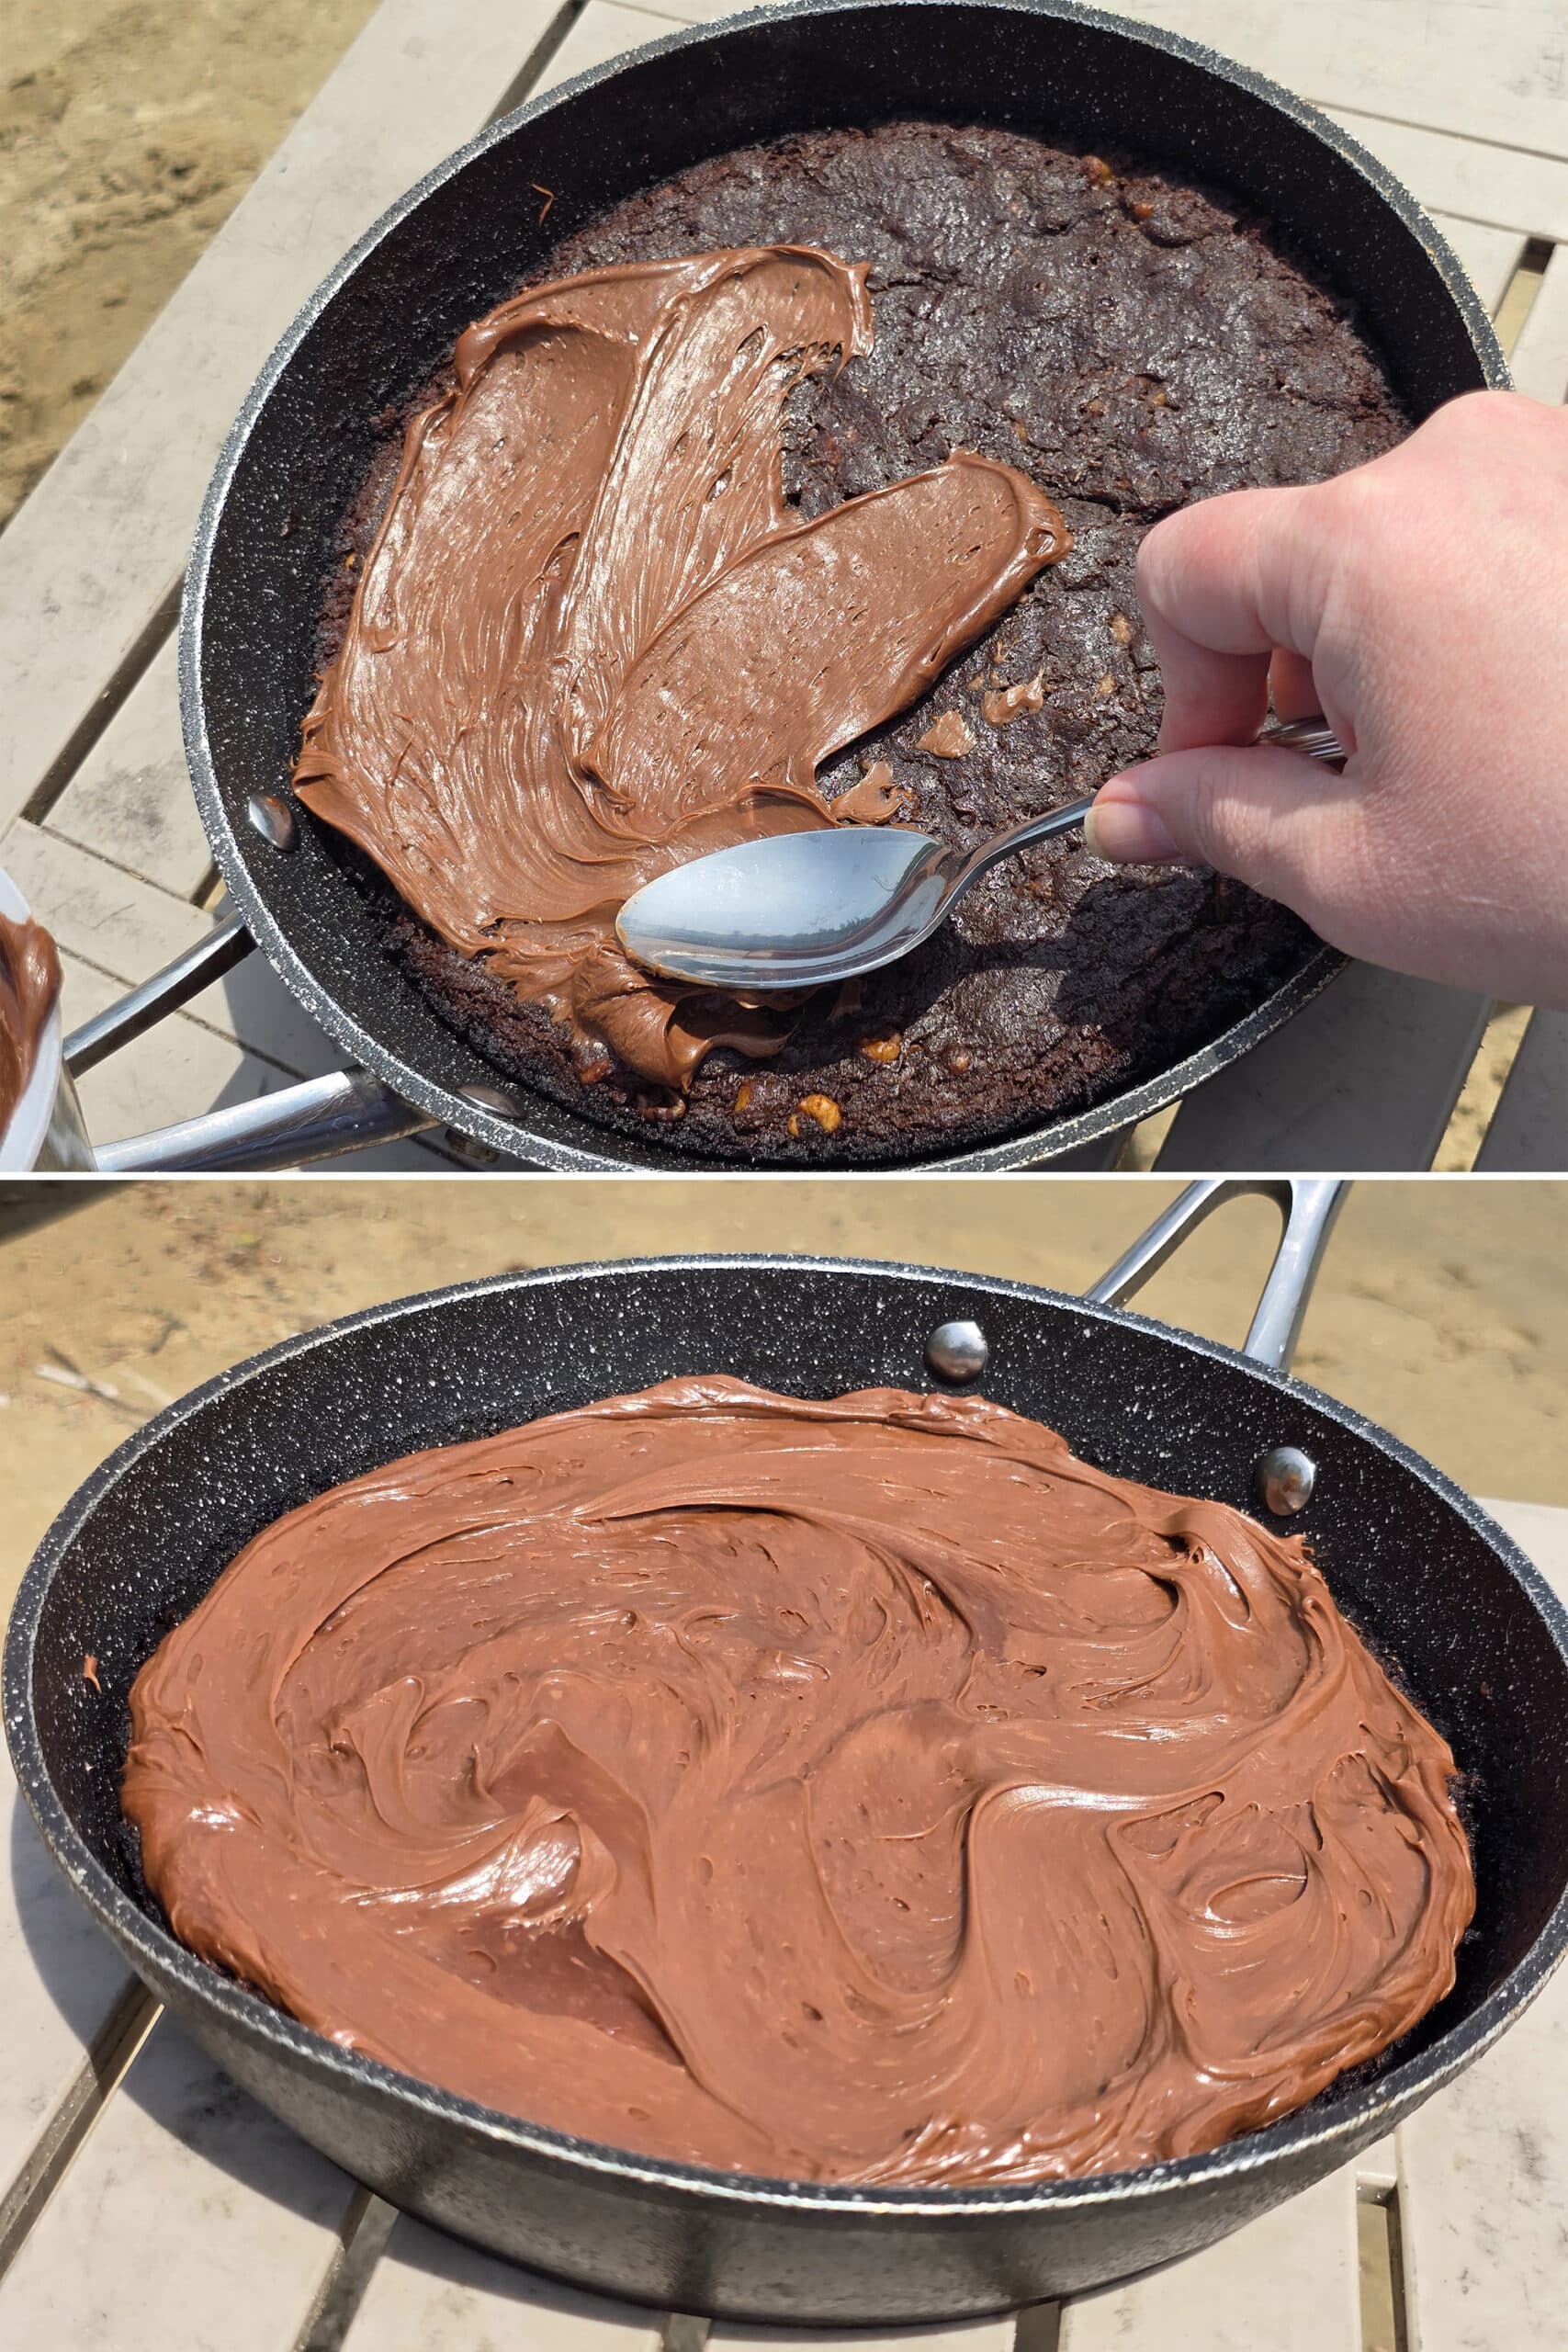
Allow the brownies to cool, before frosting, slicing and serving.
Leftovers
Once cooled, leftovers should be kept in an airtight container or wrapped in plastic, to prevent the brownies from drying out.
They’ll last for 4 days or so at room temperature, or a week or so in the fridge.
Best served at room temperature or warmer.
More Camping Dessert Recipes
Looking for some sweet treats to cook over a campfire or grill? Here's a few of my favourites!
Apple Fritter Bread Pudding
Apple Fritter French Toast
Baked Apples, Campfire Style!
Banana Boats
Campfire Cones
Campfire Haystack Cookies
Chocolate Peanut Butter No Bake Cookies
How to Make Maple Taffy
No Bake Cornflake Cookies
No-Bake S'Mores Bars
Peanut Butter No-Bake Cookies
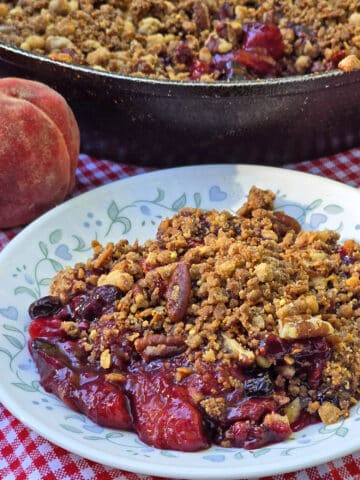
Skillet Apple Crisp
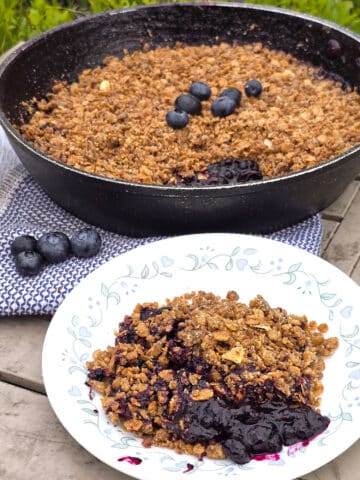
Skillet Berry Crumble
S'mores Board
... But wait, there's more! Be sure to check out our other Camping Recipes, including Camping Desserts, Camping Snacks, Make-Ahead Camping Mix Recipes, and a ton of delicious Camping Main Dish Recipes.
Also, we had SO much fun designing gourmet jerky recipes for our camping trips, we started a whole new blog for them! Check out Dried & Tasty for all kinds of fun recipes to make in your food dehydrator!
Campfire Brownies [No-Oven Skillet Brownies]
Equipment
- 10" cast iron skillet with lid
Ingredients
Brownie Mix
- ¾ cup Cocoa Powder
- ¾ cup Granulated Sugar
- ¾ cup Light Brown Sugar packed
- ¾ cup All-purpose flour
- ¼ teaspoon Salt
To Use the Mix:
- ½-1 cup Add-Ins if desired: Chocolate chips, nuts, etc
- ¾ cup Unsalted Butter
- 3 Large eggs
- Pan Spray
- Canned Frosting Optional
Instructions
Homemade Brownie Mix
- Label a medium sized freezer baggie with “Brownie Mix”, the ingredients under “To Use the Mix”, and any of the directions you’ll want to have on hand.
- Measure the cocoa powder, sugars, flour, and salt into the baggie. Seal, shake to combine, and allow to settle for a few seconds.
- Re-open the baggie, gently press out any excess air and re-seal. Store in a cool, dark, DRY place until ready to use.
- (Note: Making the mix ahead of time is optional. If you’re measuring everything as you’re making the brownies, just measure all of these ingredients as “the dry ingredients”)
To Use the Brownie Mix
- Get a low fire going. You can cook these brownies on a charcoal grill, a BBQ, or on a grill plate over a campfire, but aim LOW. It’s better to have a low fire and need to cook it longer, than to run too hot and burn it before it cooks!
- Dump your brownie mix - or measure the dry ingredients - into a medium bowl.
- Melt the butter in a 9" cast iron skillet or Dutch oven, then remove pan from heat.
- Add the melted butter to the bowl of dry ingredients, along with the eggs. Stir until just combined - it’s ok if the batter is a bit lumpy.
- Spray the pan with nonstick spray, then spread the brownie batter in the pan.
- Cover the pan with a lid, return to the grill. I HIGHLY recommend using a glass lid, so you can keep an eye on what’s going on, without having to lift it. Best to keep the hot air contained!)
- Cook for about 10 minutes (12 if your fire is REALLY low), then remove from heat WITHOUT removing the lid.
- Note: The cooking time will vary wildly based on your heat source and pan. Keep an eye on the brownies - as it’s getting close to the point of needing to be taken off the fire, there will be a lot of condensation forming on the lid, and the outer edge of the crust will start to get golden brown. You want to take it off the heat when the brownies look MOSTLY set and outer edge is golden - any further will char the crust. Note: It WILL look wet on top.
- WITHOUT removing the lid, allow the brownies to continue cooking in the pan for another 5 minutes. (This lets it cook through, without burning!).
- Uncover the brownies, and check to see if it’s done. A toothpick or butter knife inserted into the center will be ALMOST clean when pulled out. Sticky bits, but not actually wet batter. This will firm up as it cools!
- If it’s not quite done, return to the heat for another few minutes, the allow to sit for another 5 - without removing the lid. Don’t overcook it, or it will be dry!
- Allow the brownies to cool, before slicing and serving.
Notes
Nutrition
Thanks for Reading!If you loved this post - or have any questions about it - please leave a comment below! We'd also love it if you would consider sharing the link on social media! |
Marie & Michael Porter
One our our favourite quick and easy campfire desserts - hope you love it too!